Sunday, May 31, 2015
On Why I don't Like Pie.
Okay, there, I said it. I don't like pie. Well more specifically, I don't like cooked fruit pies. But that's really what we think of when we think of pie right? Apple pie, cherry pie, blueberry pie? No thank you. I will make an exception every now and again for a fresh strawberry pie, but that's even pushing my pie-tolerating limits. I know it's un-American, un-fathomable even. Really when it comes down to it, I am just not a big fan of cooked fruit in any form, which by default, rules out pie.
I also have an issue with the crust to filling ratio in pies, which is why I prefer tarts, but that category of neurosis is better left to another post.
That being said, I do, however, LOVE pie crust. You know what else I love? Caramel. Chewy, salty caramel is the food of the gods right? I am pretty sure we learned that in Greek Mythology 101 in college. I may be getting my bachelors degree and my pastry degree mixed up, but it has to be correct.
So, long story short, I had an extra disc of my favorite pie crust just hanging out in my freezer, as I am sure most of us do (kidding), and it was just begging to be made into something delicious. Taking inspiration from one of my favorite blogs, Sprinkle Bakes, these bad boys were born. I must confess that these pictures were from last fall, I just haven't gotten around to posting them until now. That will explain the secret and oh so delicious ingredient, apple cider.
To sum things up, pie crust + apple cider caramel + sea salt = amazingness. I rolled out my pie crust and fit it into the bottom of a square cake pan, and baked it until beautifully golden brown. Topped with a chewy caramel and flaked with crunchy sea salt, these squares are satisfying and decadent, any time of year.
Apple Cider Caramel Squares
Makes 64 1 1/2 x 1 1/2 inch squares
Pate Brisee Crust
400 grams (14 oz) unsalted butter, chilled, cut into 1/2 inch cubes
1 tablespoon white distilled vinegar
100 grams (3 1/2 oz) granulated sugar
2/3 cup water, chilled
665 grams (1 lb 7 1/2 oz) all purpose flour1 teaspoon salt
Remove butter from fridge 20 minutes before mixing.
In a small bowl, combine sugar, water, and vinegar, stir to aid the dissolving of the sugar. Set aside in refrigerator for 10 minutes. Then, stir again to completely dissolve sugar.
In a food processor, pulse the flour and salt together a few times to combine. Add the butter, and pulse in one second bursts about 3-4 times until butter is cut in and evenly dispersed. You should have visible chunks of butter in your flour mixture, this is where the flakiness comes from.
Pour mixture into a large bowl and make a little well in the middle of the flour. Pour the vinegar water mixture into the well, along with the almond extract, and gently mix liquids into the flour with a fork. When liquid is evenly dispersed, dump dough out onto a clean surface and knead gently a few times, just until dough comes together in one cohesive ball. It may be a bit shaggy or falling apart, but that's okay, while it is resting the moisture will bind everything together.
Cut ball of dough in half and shape each half into a disc about 1/2 - 3/4 inch thick. (use one for this recipe, and you can freeze the other half for later use) Wrap in plastic wrap and chill for at least two hours, or overnight. Take dough out of fridge about 10 minutes before you roll it out. Place one of your discs of dough between two sheets of parchment paper and roll out to a 1/8 inch flat disc. Always start in the center of the disc and roll outward, turning the disc 30 degrees after each roll to get an even thickness throughout.
If you are using a square or rectangular pan, you will want to roll out your dough to fit your pan instead of a round circle. Line your cake pan neatly with parchment paper, so that the paper extends up the sides of the pan, this will aid in removing the bars once the caramel is poured in. Pan spray under the parchment will help keep it in place. Carefully move the dough to your pan and cut off excess. For this recipe I just cover the bottom of the cake pan, and just about 1/4 inch up the sides to catch the caramel.
Dock with a fork (meaning poke a bunch of tiny holes in the bottom of the tart crust with a fork) and freeze for twenty minutes. Preheat your oven to 400 F. Place a piece of tin foil over your tart shell, pressing it down to fit the form of your tart, and fill with beans or rice or pie weights. Blind bake your tart for 20 minutes, flipping the pan front to back halfway through. Remove the pie weights and tin foil and bake for another 5-7 minutes, until the crust is golden brown and cooked completely. Let cool while you make the caramel.
Chewy Apple Cider Caramel
1 - 1/2 gallon apple juice
2 1/4 cups granulated sugar
1/4 cup water
2 cups heavy cream
8 oz. butter
2 tsp. salt
Over medium-low heat, reduce apple cider to 1/2 cup. Be sure to keep a close eye on it when it gets close to being done, it will basically turn to caramel and can scorch quickly. Let cool.
In a small saucepan heat the cream and butter until butter is melted, then set aside and keep warm over very low heat.
In a large saucepan, combine the sugar and water, making sure all the sugar is evenly wet and that the sides of your pan are clean and free from sugar. Cook over high heat until caramelized to a dark amber color. Do not stir. When sugar reaches the color you want (I prefer a dark caramel, but a lighter color is fine also), carefully whisk in the heavy cream/butter mixture one ladle-ful at a time. Insert a candy thermometer and cook caramel, whisking constantly until it reaches soft ball stage (238 degrees F). Quickly whisk in the cider reduction and pour over prepared crust. Let caramel cool at room temp for at least an hour, then transfer to refrigerator to chill completely.
Once chilled, gently remove from pan by pulling up on your parchment and transfer to a cutting board. Cut into 1 1/2 inch by 1 1/2 inch squares and top with sea salt.
Labels:
apple,
apple cider,
bar,
Candy,
caramel,
chewy caramel,
dessert,
dessert table,
sea salt,
Special Occasion
Wednesday, March 18, 2015
Cake-a-palooza Day 6
Three weeks and five posts later, I am finally back with the last cake. I have had the chance to design and create so many cakes in the past few months, it is hard to pick a favorite but this one is definitely up there. This is one of those cakes that makes me so excited for wedding season to get into full swing, and even though we may not be making cakes like this every weekend, there are some great designs lined up for the summer.
For now though, we have been getting in lots of practice with our window displays. We decided to go for a theme for the main window in the shop this time around, a modern spin on a midsummer nights dream. Succulents, muted purples and greens with a touch of metallics, plus a suggestion of lit vines dripping down from above, all come together in this 4-tiered stunner.
March is here, April is on the way, and then wedding season will be here before I know it. Stay tuned.
***Cake made by Bria Helgerson for Sugar Fixe Patisserie***
Friday, February 27, 2015
Cake-a-palooza Day 5
Day 5!
Friday is here, which means my work week is almost over. Almost. At the bakery, we've been preparing all week for a big gala downtown, and tomorrow is the big day. My boyfriend is taking a state licensing exam tomorrow that he has been preparing for for months. Needless to say we are all going to be happy when Sunday comes.
For now though, let's just talk about this cake. I've done ruffles, in fondant and buttercream, I've done them vertically and horizontally, and I've done them in ombre tones, and pretty pastels. I wanted to try them in a way that I'd never done before. Something a little more refined and clean. Soft and romantic, but clean and modern all at the same time, these ruffles are just a bit different than the typical ruffled wedding cake. Paired with soft pinks and grays, and stylized Juliet roses, this cake can make a statement without being over the top.
Tomorrow we do the opposite. Stay tuned.
**This cake designed and made by Bria Helgerson for Sugar Fixe Patisserie**
Friday is here, which means my work week is almost over. Almost. At the bakery, we've been preparing all week for a big gala downtown, and tomorrow is the big day. My boyfriend is taking a state licensing exam tomorrow that he has been preparing for for months. Needless to say we are all going to be happy when Sunday comes.
For now though, let's just talk about this cake. I've done ruffles, in fondant and buttercream, I've done them vertically and horizontally, and I've done them in ombre tones, and pretty pastels. I wanted to try them in a way that I'd never done before. Something a little more refined and clean. Soft and romantic, but clean and modern all at the same time, these ruffles are just a bit different than the typical ruffled wedding cake. Paired with soft pinks and grays, and stylized Juliet roses, this cake can make a statement without being over the top.
Tomorrow we do the opposite. Stay tuned.
**This cake designed and made by Bria Helgerson for Sugar Fixe Patisserie**
Thursday, February 26, 2015
Cake-a-palooza Day 4
Well, I made it three days before I gave up on daily cake posts. I give props to all those bloggers out there who have time to post daily, or even once a week! I can barely throw a post up once every few months, but like I said, I am trying to make up for lost time!
Up next, another petite wedding cake, this time in mint green with frilly white ruffles. I kind of thought the cupcake trend was on the down-spiral, but it seems that I was wrong. As I am getting more involved at the bakery with wedding consultations, I am finding that cupcake-mania is still alive and kicking. The reason is this: cost effectiveness. Brides are seeing that a three dollar cupcake per guest is cheaper than a wedding cake at five dollars (minimum) per guest, and opting to save some money. However, they are still wanting that photo-op of cutting their cake, the beautifully displayed creation, perfectly matching their decor and theme. Enter: the petite wedding cake.
A miniature version of the show-stopper, perfectly sized to cut and share with the wedding party, or save for the first anniversary. This particular one is a little more on the modern-but-romantic side, with a mint green background, and a delicate white gardenia.
Two more cakes to come, so stay tuned!
**This cake designed and made by Bria Helgerson for Sugar Fixe Patisserie**
Tuesday, February 24, 2015
Cake-a-palooza Day 3
I'm gonna make this short since it has been a VERY long day and there is a glass of wine calling my name. So let's talk about this cake, which I have so lovingly named 'big blue'. This isn't a cake for the traditionalist, or the romantic. This cake is for someone who likes a little quirk, a little mod, maybe even a little hint of southwest flair. All of those things go together right?
Right. This cake allowed me to practice one of my new favorite mediums. I have long been a user of petal dusts and luster dusts, but up until recently have only been using them by themselves, or mixed with alcohol. I may have been a little late to the game, but mixing dusts with a small amount of cooking oil, produces a much different, silky smooth finish. It also allows for a much more fluid brush stroke, which is how I created the pattern on the bottom two tiers.
The feathers were also a first for me, and they almost became the death of me. Gum paste flowers have nothing on feathers when it comes to fragility, but the statement they make on this cake makes all the breakage and heartbreak worth it.
**This cake was designed and made by Bria Helgerson for Sugar Fixe Patisserie.
Labels:
4 Tiered Cake,
feathers,
Fondant,
gumpaste feathers,
metallic,
silver,
southwest,
Wedding Cake
Monday, February 23, 2015
Cake-a-palooza Day 2
Day 2! Today we have a three-tiered beauty with gold leaf and watercolor panels.
I am an avid follower of fellow cake designers whether it be through blogs, Pinterest, twitter, or Facebook, or creeping in the windows of cake studios here in Chicago. Most of my time online is spent looking at wedding cakes, checking out whats new and trending in the industry, and gathering inspiration for designs of my own.
I have always been a huge advocate of creative integrity, and of giving credit where credit is due. I try never to copy another cake artist's design, because that isn't fair to me, to said cake artist, or to the client who is expecting a custom, one of a kind cake. That does not mean that I don't get ideas from other cakes, but I always try to put a twist on them and make them my own. This cake includes some techniques and styles that were made popular by JessieCakes and AK Cake Design, but with my own spin.
The dahlia is a flower I have been working on recently and there are so many types of dahlias that the variations and possibilities are endless. So you can probably expect to see many more from me in the future.
*This cake was designed and created by Bria Helgerson, for Sugar Fixe Patisserie.
Labels:
3 Tiered Cake,
dahlias,
Gold Leaf,
metallic,
panels,
Peach,
Pink,
watercolor cake,
Wedding Cake
Sunday, February 22, 2015
Cake-a-palooza Day 1
I am about to make up for some lost time here. Get ready for a cake-a-palooza. 6 days, 6 cakes. Things are about to get real crazy at the bakery, so I figured I better post these pictures now, or they will sit on my hard drive for all eternity. Seven months after starting a new job at a bakery, I find myself once again in a management position. I realized I really missed bossing people around, but more importantly I missed being able to share and implement new ideas to help improve and grow the business. So here we go, let the madness begin once again.
It is almost March and we are quickly approaching wedding season. A few recurring trends you will see throughout the next few days are: metallics applied in new ways, intricate gum paste flower sprays, unexpected pops of color, and the merging of romantic and modern aesthetics.
First up a small but striking cake. The bottom tier is brushed with a metallic copper petal dust and is adorned with gum paste poppies, leaves, and berries in peach and copper hues. The top tier is left blank to showcase the detailed arrangement.
Stay tuned, more to come tomorrow.
*This cake was designed and created by Bria Helgerson, for Sugar Fixe Patisserie.
Labels:
2 Tiered Cake,
berries,
copper,
Fondant,
Gum Paste,
Gumpaste,
Leaves,
metallic,
Poppies,
Wedding Cake
Tuesday, December 2, 2014
Paint it Black - Pink and Black Peony Cake
Black Friday? Screw that. Last week while trying to enjoy some holiday cooking/baking and simultaneously watching an entire days worth of Friends re-runs on TV, I found my self yelling at the obnoxious commercials. "It doesn't count as a black Friday sale if it isn't on black Friday!!!" There may have been a few more expletives in there, but I will censor it for family viewing. Why, oh why are stores now opening on Thanksgiving? They can't just wait another few hours to open at 4 am on black Friday? Really stores? I realize this is a completely irrational feeling for a few reasons, one being neither I, nor any of my family members work in the retail industry and are therefore not affected by having to work on Thanksgiving, and two, I am not being forced to go shopping on said holiday. But dammit, is nothing sacred anymore? I would much rather pour myself another glass of wine and let the crazies get their 2-for-1 60-inch plasma TVs thank you very much. I am going to be the best old curmudgeon some day. Okay rant over.
Maybe I was just a little extra crabby this year. I always get a little sad around Thanksgiving since I haven't been able to get home for it the past few years. Even though I am welcomed with open arms to my partner's family's table, and I love them as my second home, I still miss carving the turkey with my dad, running the turkey day 5k with my sister, and popping wine before noon with my mom.
Luckily, this year I was able to go home in October for a big celebration. My mom turned 60. Yes folks, she is officially old. I guess that makes me really old too. More importantly, we threw here a big shindig to celebrate, with tons of house smoked pork, all the trimmings, home-brews, bubbly, and of course, cake. I wouldn't be a good pastry chef daughter if I didn't bring a cake now would I? A few years back my very talented mother started painting, specifically painting greeting cards. She would send me them periodically, or gifted them to family and friends. I have saved every one of these cards, because they are beautiful, which she thinks is silly. I think she's crazy. And old.
For her birthday, I decided to turn my favorite of her cards into her cake. It had an even more special meaning when I re-read the card. It had been sent to me from my grandpa, right after I had been laid off from my design job. He told me I would find something new and not to worry because everything will work out in the end. Now, here I am, 5 years later, turning this card into a cake, and loving what I do.
On a serious note, my mom is one amazing, strong, intelligent, driven, passionate, nurturing lady. She has always supported her daughters in everything we do, pushing us where we needed to be pushed, and letting us carve our own path when a little nudge wasn't needed. Even though I am in my thirties, I can still say I want to be like my mom when I grow up. I love you Mom. Here have some more cake!
Chocolate Devils Food Cake with Dark Chocolate Ganache and Salted Caramel Buttercream
*this will make a 2 layer 9 inch cake (the cake pictured is a 4-layer 9-inch bottom tier, and a 2-layer 7-inch top tier)
Cake:
3 cups granulated sugar
2 3/4 cups all purpose flour
1 1/8 cups dark cocoa powder
1 1/4 teaspoons baking powder
2 1/4 teaspoons baking soda
1 1/2 teaspoons salt
3 large eggs
1 1/2 cups buttermilk
3/4 cup vegetable oil
2 teaspoons vanilla
1 1/2 cup hot coffee
Butter and flour the sides of two 9" cake pans, and line bottom with a circle of parchment paper. Preheat oven to 350 degrees F.
In a large bowl, whisk together the sugar and vegetable oil until combined. Add the eggs one at a time, whisking until thoroughly incorporated after each addition. Add the buttermilk and vanilla and whisk to combine.
Sift the flour, baking soda, baking powder, cocoa powder, and salt into a large bowl. Add the wet ingredients into the dry ingredients and whisk just until combined. Add the hot coffee and amaretto and whisk until incorporated.
Fill each cake pan 2/3 the way full and bake until a toothpick inserted into the center comes out clean, and center springs back when pressed gently with your finger, about 35-40 minutes.
Let cakes cool completely before assembling.
Ganache:
1 1/2 lb. heavy cream
1 1/2 lb. dark or bitter sweet chocolate, chopped
Place chocolate in a heatproof bowl. Heat heavy cream over medium heat until it comes to a simmer, then pour over chocolate. Let sit for a minute or two, then gently whisk until smooth. Let ganache cool until it is a spreadable consistency. You can make this ahead of time and chill until ready to use. Just put the chilled ganache in a stand mixer and mix with the paddle attachment until it becomes soft and spreadable.
Salted Caramel Sauce
this makes about 3-4 cups of caramel sauce, which is much more than you will need for a small cake, but I find that if i am going through the trouble to make caramel I might as well make a big batch and freeze the leftovers.
3 cups sugar
1/2 cup water
3 oz butter
2 cups heavy cream
1 tsp vanilla
1/2 tsp salt
Combine the butter, cream, vanilla, and salt in another saucepan. Heat until butter is melted and cream is hot, keep warm until caramel is ready. Combine the sugar and water in a medium saucepan over high heat. Cook until sugar turns a deep amber color. Remove from heat and carefully whisk in the cream mixture one ladle-ful at a time. Mixture will bubble up and sputter, using a bigger pan for the sugar will help protect your hands from splatter. Let cool to room temperature before adding to buttercream.
Salted Caramel Buttercream
4 oz egg whites
8 oz granulated sugar
2 oz water
12 oz unsalted butter, room temperature, cubed
1 tsp vanilla
1/2 cup room temperature caramel sauce
Place your egg whites in the bowl of your stand mixer fitted with the whisk attachment.
Heat the sugar and water in a small sauce pan over high heat. Using a candy thermometer, bring the sugar to a boil and continue cooking until it reaches 230 degrees F. When it hits that temperature, turn your stand mixer to medium to begin mixing the egg whites until they are foamy. When the temperature hits 240 F, remove from heat and slowly pour into the egg whites on a medium low speed. As soon as all of the sugar is in, turn the mixer to medium high and mix until the meringue is cool to touch. Add the butter a few tablespoons at a time and whip until thick, which may take a few minutes. Add the caramel sauce and whip until combined.
Assembly
Pipe a barrier of buttercream around the edge of the bottom layer of leveled cake. Drizzle the cake inside the barrier with extra caramel sauce. Then spread a thin layer of ganache, again staying inside the border. On top of that, spread a layer of buttercream, sealing in the ganache and caramel with the border. Place the second layer of cake on top. Smooth any buttercream that has bugled out the sides and chill completely before frosting as you like. I finished this cake with a regular layer of buttercream, chilled then covered in fondant.
Assembly
Pipe a barrier of buttercream around the edge of the bottom layer of leveled cake. Drizzle the cake inside the barrier with extra caramel sauce. Then spread a thin layer of ganache, again staying inside the border. On top of that, spread a layer of buttercream, sealing in the ganache and caramel with the border. Place the second layer of cake on top. Smooth any buttercream that has bugled out the sides and chill completely before frosting as you like. I finished this cake with a regular layer of buttercream, chilled then covered in fondant.
Labels:
2 Tiered Cake,
black,
cake,
Fondant,
gum paste peonies,
painted cake,
peony,
Pink
Thursday, October 30, 2014
Plum Almond Tartlets
My 35 degree bike ride to work this morning has finally convinced me that it is in fact fall. Pumpkins and apples are everywhere, my freezer is being stocked with chili and german goulash, and I finally had to turn the heat on. I supposed that it was time to share these late summer tarts with you before the weather turned to
full on winter. That would just be cruel to tout these stone fruit beauties when snow is falling, no? These are such a staple in my dessert arsenal, some puff pastry, either homemade (recipe below) or store bought, almond frangipane, some ripe fruit and a sprinkle of sugar are all you need to make a decadent, yet light and crispy tartlet.
For a fall spin, change out the fruit to apples or pears, or even persimmon if you can find it.
Plum Frangipane Tartlets
Blitz Puff Pastry
adapted from Saus - Advanced Bread and Pastry
16 oz ap flour
16 oz unsalted butter, cold, cut into small pieces
8 oz cold water
1/4 oz salt
Dissolve the salt into the water. In a food processor, pulse the butter and the flour together until combined, leaving the butter chunks fairly large. Add the water-salt mixture and pulse just until moistened. Flatten dough into a rectangular disc, wrap in plastic and let rest in refrigerator for 30 minutes. On a floured surface, roll out dough to a large rectangle the long side should be horizontal to you. Take the left edge and fold it so it reaches the center. Take the right edge and fold it into the center. Now take the left side and fold the entire thing in half, meeting the right edge, like a book. Wrap in plastic and refrigerate for 30 minutes. You will repeat this two more times, letting it rest for 30 minutes between each fold. After the last fold, let the dough rest in the refrigerator overnight or freeze for future use.
Frangipane
adapted from Martha Stewart
7 TBL unsalted butter
1/3 cup almond paste
1/2 cup sugar
2 eggs
1/3 cup AP flour
In a food processor, cream together the butter, sugar, and almond paste until very smooth. Add the eggs, one a a time, blend until smooth. Add the flour and pulse just until combined. Chill until ready to use.
Assembly
1 Book puff pastry
Frangipane
2-3 Ripe but firm plums, sliced thinly
turbinado sugar
almond slices (optional)
1 egg yolk + 1 TBL water
Preheat oven to 400 F. Take one book of puff pastry and roll it out on a floured surface to 1/8-1/4 thickness. Cut as many 4 inch rounds as you can fit. With half of the rounds, cut out the center with the next smallest round cutter, this will be the border for your tart. Swipe a bit of water around the edge of one of the whole circles and place the cut circle on top, lining up the edges. With a fork, dock the bottom surface of the tart shell, but do not dock the cut circle edge. This will allow just the edge to puff up around the filling, keeping the bottom of the tart flat to hold the filling in. Arrange tart shells on a sil-pat or parchment lined baking sheet. Chill completely. When ready to bake, place 1-2 tablespoons of frangipane in the inner circle, do not overfill. Arrange a few slices of plum on top of the frangipane. Whisk together the yolk and water and brush the edges of the puff pastry. Sprinkle a bit of turbinado sugar around the edges and on top of the plums. Bake for 20-30 minutes, until the puff pastry is golden brown and the frangipane has set. Let cool completely. Dust with a bit of powdered sugar prior to serving.
Labels:
almond,
dessert,
frangipane,
plum,
Puff Pastry,
stone fruit,
Tart,
tartlet
Tuesday, October 7, 2014
The Ups and Downs of Cake Design
Managing expectations. That is what it all comes down to. Making sure you (the cake designer) and the client are on the same page. Making sure they know that they brought you pictures of an $800.00 cake but only want to spend $200.00, and that they will not be getting what is in the picture. Making sure that when the customer doesn't give you any pictures at all, and say they trust you to make their vision a reality, that you know exactly what their vision is. Making sure that you ask every single question you can possibly think of to make sure the customer will be happy with their cake.
A few weeks ago, I had my first unhappy customer. It has taken me a little while to stop stewing over it, but now I realize that the customer wasn't unhappy because I made an ugly cake. The customer was unhappy because I (and by 'I', I mean the bakery I work at) couldn't read her mind. She had trouble putting into words what she actually wanted, and we failed in response by not laying out an exact plan prior to making her cake. We were not on the same page, and as a result, we lost money and, more importantly, we lost a customer. As a team, we learned a lot from this cake. We learned we need to manage our customers expectations better. We need to ask more questions, provide clear sketches, gather pictures, and there needs to be more communication between the sales team and the design team.
This is all a new adjustment for me. Up until now, I have been making cakes directly for clients as a freelancer. Mostly for people I know, or through people I know. Even at the restaurant, I was dealing directly with the clients for consults and was not only able to hear what they wanted and discuss options, but to read their facial cues and hear the emotion in their voices. Now, I am detached a bit from the process since the cake consults go through our sales team. I realize that it would be impossible for myself or my fellow cake designer to meet with every client that we have at the bakery, that is a full time job, but it adds a whole new aspect to the execution of a cake.
So, when I get a chance to design a cake for someone I know and someone who trusts me, I jump at it. For this cake, I got a color scheme and no expectations. I was free to do whatever I wanted, and that is something I find I will miss working for someone else. I had been wanting to try making dahlias out of gum paste for a while now, so that is what I did. Maybe I need to learn how to manage my own expectations as well. Until I have my own shop, my own business, this is how the game goes. I don't want this to sound like I am complaining, because I am not. I get to make cakes all day, every day. Some of them I get to help design, some of them I don't, but either way it is definitely where I want to be.
Labels:
anniversary cake,
berries,
color block,
dahlias,
Gumpaste,
Special Occasion,
Sugar Flowers
Tuesday, September 9, 2014
Short Rib Bucatini
Anything after labor day is fall, right? I don't care that it was 82 degrees in Chicago today. I don't even care that the leaves are still bright green on the trees, and the beaches are still full of people. I've got the fall itch, and while you won't see me standing in line at Starbucks for a pumpkin spice latte, you will catch me in the kitchen braising something.
Up until now, I have only made my short ribs one way. A very good way, mind you, but I was in a rut and it was time to branch out. I am sure I will find myself braising some short ribs in red wine and beef stock at some point this winter, but for now, this version suits this summer-ish fall season just fine. Plus, it let me use the last of my fresh basil from my teeny tiny herb 'garden' that I have somehow managed not to kill this summer. (By 'garden' I mean two window boxes hanging from my deck rail.)
Short Rib Bucatini
recipe adapted from Food & Wine
4 tbl olive oil
3 pounds bone-in beef short ribs
kosher salt
fresh ground pepper
1 large vidalia onion, chopped finely
4 cloves garlic, minced
3 tbl tomato paste
2 - 28 oz. cans whole peeled San Marzano tomatoes
1 medium carrot, peeled and roughly chopped
2 bay leaves
1 pound dried bucatini
fresh basil and grated parmesan cheese for garnish
Heat olive oil in a large enameled cast iron pot over medium high heat. Season all sides of the short ribs generously with salt and pepper. When oil is hot, brown all sides of each piece of short rib, about 2-3 minutes on each side. Remove short ribs to a plate and set aside. Pour all but two tablespoons of fat our of the pot, and return to medium-low heat.
Add the onions, and cook, stirring occasionally until soft and gently browned, about 12-15 minutes. Add the tomato paste and garlic and cook for about 2-3 minutes, string constantly. Add the tomatoes and gently mash as you are stirring them in. Add carrots, bay leaves, and a generous pinch of salt and bring to a simmer. Place short ribs and all the juices that may have accumulated back into pot and turn heat to the lowest setting. Cover loosely and simmer gently for about 4 hours, until meat it tender and is falling off the bone. Stir occasionally to turn short ribs and to monitor any scorching that may occur in the bottom of the pan. When meat is cooked, remove to cutting board, and discard the bones and any excess fat and connective tissue. You can either chop the meat into small pieces or gently pull the chunks apart with two forks.
Remove the bay leaves from the tomato sauce and carefully transfer to a food processor and pulse until pureed. Alternatively, you can leave the sauce in the pot and use a immersion blender, or you can leave the sauce chunky as is. Return sauce to pan over low heat, and return short rib meat to sauce. Season to taste with salt and pepper and hold over low heat.
Bring a large pot of salted water to a boil. Cook the bucatini until just al dente, then drain, and add the pasta into the sauce. Simmer the pasta in the sauce for 2-3 minutes, adding some reserved pasta water if you find it is too thick.
Chiffonade a few leaves of fresh basil and grate some parmesan cheese to garnish.
Labels:
Braising,
bucatini,
Pasta,
San Marzano,
Short Ribs,
Slow Cooking,
Tomatoes
Tuesday, August 26, 2014
Turning 30 & Banana Bundt Cake
30 is my year. This is the year that things get good. They get organized, they get balanced, and they get happy. This is the year I complete a olympic length triathlon. This is the year I finally go through the box that I dumped my college apartment desk contents into and didn't touch for seven years. This is the year I switch my career path back onto the trajectory where it belongs. This is the year I stand up for myself and leave a job that was taking over my life, and not giving much back in return. This is the year I get to say yes to taking a weekend off here and there to just be with friends, or visit a new city. This is the year I am no longer embarrassed about the state of my apartment. This is the year I start running long distances because I (almost) enjoy it. This is the year I start baking again for pleasure, and not just for work.
I am a few months into my 30's and instead of freaking out a little bit when the milestone came, as many people do, I decided a few years ago that 30 wasn't going to be scary to me. I always thought that your 30's were the time you finally had your shit together (excuse my french). It is the decade where you finally get into your groove, really start to know who you are and where you want to be. When I turned 30, I realized that I wasn't really at that place in my life yet, and as it turns out, it isn't your age that puts you in that place, it has to come from somewhere else. So I am doing something about it. It isn't all life-changing, world-altering changes, like quitting a job, or traveling across the globe. Even the little things, like buying one of those 7-day pill containers and actually taking my vitamins and aspirin everyday, can make a big difference in the peace and contentment in every day life. Instead of always thinking about all the things I should be doing better, I am making it my goal this year to simply do them.
This bundt cake was the first time in way too long that I baked something that wasn't for work, or for a personal client. It was for a friend, for his birthday, for a weekend at a lake house that I missed out on last summer. It was simple but delicious, and reminded me why I do what I do. Providing someone with something delicious, nourishing, and specially made just for them, is something I had forgotten I missed.
Banana Walnut Bundt Cake
recipe adapted from the food librarian
makes one large bundt cake
3 cups flour
2 tsp baking soda
1/2 tsp salt
8 oz butter, room temperature
2 cups sugar
2 tsp vanilla
2 eggs
4 ripe bananas
1 cup yogurt
1 cup toasted, chopped walnuts, divided
In a stand mixer fitted with the paddle attachment, cream together the butter and sugar until light and fluffy. Add the eggs one at a time, scraping the bowl well between each addition. Mix in the vanilla and bananas. In a separate bowl combine the flour, baking soda, and salt. Add 1/3 of the flour mixture to the banana mixture, followed by 1/2 of the yogurt. Scrape the bowl very well between each addition. Mix in another 1/3 of the flour, then the second half of the yogurt, followed by the rest of the flour mixture. Fold in 3/4 cups of the walnuts. Butter and flour a bundt pan or spray with baking spray. Pour batter into pan and bake at 350 for 65-75 minutes, or until a skewer inserted into the center comes out clean. Be sure not to put a baking sheet under the bundt pan, as the hot air needs to circulate through center of the pan.
Let cake cool for 10 minutes, then turn out onto a rack and let cool completely. Wrap in plastic and let sit at room temperature overnight, or freeze until ready to use.
For the glaze: combine 1 cup of powdered sugar with 2 tablespoons milk and 1/2 tsp vanilla and whisk until smooth. Pour glaze over the top of the bundt cake and immediately sprinkle on the remaining walnuts.
Labels:
Baking,
Banana,
Banana Cake,
Bundt Cake,
dessert,
Glaze,
Special Occasion,
Walnuts
Wednesday, June 25, 2014
Ranunculus and Succulents...say that ten times fast.
I keep calling it spring. Even though I know it is officially summer, I just cannot seem to get it through my head. Spring has once again flown by without notice, and all of the sudden it is 85 degrees and sunny everyday. Well, almost every day. Usually on my days off from work it rains, so there's that.
Cake season is in full swing, and I have been cranking out wedding cakes at the restaurant like it's my job. Because it is my job, or was my job I suppose. I finished up the last wedding cake I will be doing at the restaurant this past weekend, after some hard decisions were made. I have been pushing and pushing for the last year to keep wedding cakes on the table as an option for our events, because it truly is the favorite part of my job. I learned, however, in this past year that plating desserts and charcuterie boards for service while trying to do watercolor work on a 4 tiered cake or attaching 50 tiny little gum paste petals to a sugar flower, is near impossible. I wasn't achieving the quality of work on my cakes that I know I am capable of, and that is a big disappointment.
So, for now, it's back to regular service at the restaurant, and the wedding cakes will move back into my own personal kitchen for the time being. I have taken for granted how much easier it is to bang out a four tiered cake when you have a large mixer and lots of full size sheet pans. For the next week and a half, it is back to baking at the apartment for a 4th of July wedding in Wisconsin.
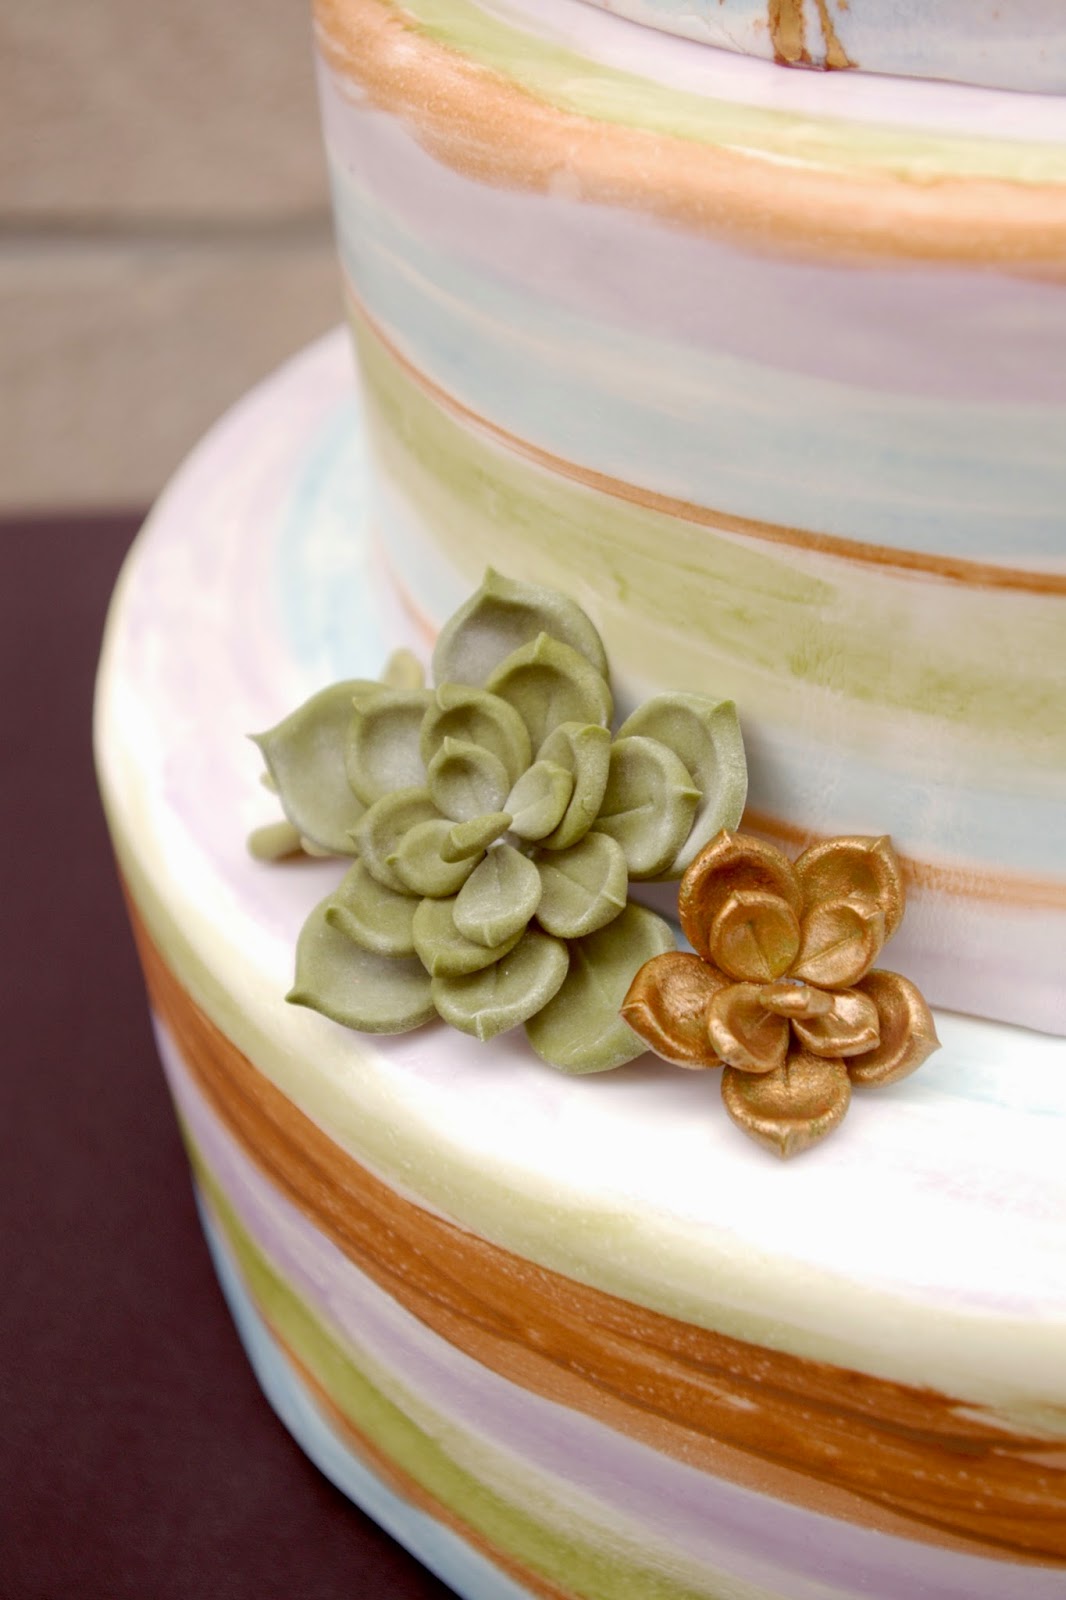
These two cakes were by far my favorite from this spring's wedding season. The clients on both of these expressed that they loved my cakes and pretty much let me do whatever I wanted, with a bit of inspiration direction. I was able to push out of my comfort zone a bit, doing gum paste flowers that I hadn't attempted before including the ranunculus, and succulents. I also took my first swing at watercoloring an entire cake. There is something truly terrifying and incredibly awesome about taking a blue soaked paintbrush to a perfectly white, fondant-covered cake 3 hours before the start of a wedding. It wasn't perfect, but I learned a lot in the process and hope that I get a chance to do it again soon.
So, happy summer to all, I for one can't wait to see what this season has in store. Changes, growth, and more new challenges, or perhaps just more rain on my off days. Only time will tell.
Tuesday, March 25, 2014
Cakes for Dudes
Tomorrow, the man in my life turns the big 3-0. This has its pros and cons. Pro: cake. Con: my big 3-0 is not far behind. But lets focus on the the positives shall we?
Turning thirty is supposed to be such a big scary thing. I make jokes a lot about it, and tease him endlessly since he is hitting the milestone before I am, but deep down I don't think either of us really care all that much. Plus, we all become mature, responsible adults when we turn thirty right? Right?? All jokes aside, we aren't big birthday celebrators in the first place, so we tend to keep things pretty low key.
I have learned that it is pretty much impossible to make a surprise cake for someone you live with. I have also learned that when you make a cake for someones birthday without having a party or a bunch of people over, the majority of the cake goes untouched in the refrigerator until it ends up in the garbage. So, I am going to forgo the cake this year (sorry Steve) and hope that the pistachio gelato and half eaten shamrock shake in the freezer will suffice.
I have made quite a few cakes in my day, and lets face it, they were pretty much all for the ladies. Even the wedding cakes I have done, though they were for a couple's celebration, it was mostly the bride that cared about the look of the cake (I find the grooms tend to only care about what is inside the cake).
Obviously there are exceptions to this, but it is always a bit tricky when asked to make a cake for an adult male. It is easy to make a pretty pattern, throw some frilly gumpaste flowers on a cake for any occasion, but that is typically seen as being 'girly', and that usually doesn't fly for the guys.
So what's a girl to do? Beer, baseball, and totally neutral colors and shapes, that's what! Yay gender roles! Actually in full disclosure, the baseball cake turned out to be for a woman, which I didn't find out until the party started and totally made me happy. I also felt guilty for just assuming it was for a man. In general, I am finding it easier to break my habits of always making 'feminine' cakes. Using darker, bolder colors, utilizing more geometric patterns and shapes, bold writing and designs, and generally staying away from flowers seem to be some basic stepping stones for creating a more masculine cake.
Making it look and taste like beer always helps.
Tuesday, February 25, 2014
A Wedding and a Baby
Before you get too excited (MOM), neither the wedding nor the baby are mine. I was however, lucky enough to be a part of both my cousin's wedding day, and my boss's baby shower. My participation in both these events was my favorite kind of participation, I was asked to make the cakes. I think one of the best parts of doing freelance baking is that you are often providing a service for a friend, a member of the family, or a friend of a friend or family member (it is all about 3 degrees of separation here). With this familiarity tends to come an immense amount of freedom. Many of my 'clients' know me, know what I can do with some cake and a bowl of buttercream, and they tend to put a lot of trust in my designs and decision making.
It can be such a contrast from working with complete strangers (at the restaurant) who hand me a picture and say 'I want this cake'. I have a big ethical problem with copying cakes. Unless it is a very generic plain buttercream cake, say with some texture, or plain fondant with ribbons on the bottom like every other wedding cake these days, I won't make a copy, I just won't do it. I will give you a cake that is inspired by your picture, has all the elements you want, and in the end, is hopefully better than what your were expecting in the first place.
I think that designing and creating cakes can be an art form, and plagiarism ethics should apply. In the age of pinterest and blogs and instagram, I realize that this isn't exactly feasible, to expect people not to copy your designs while trying promoting yourself through pictures and tutorials in these same outlets. So, in my personal credo as an 'artist' (and I do use that term loosely) I pledge not to steal other people's work. I DO pledge to be inspired by, learn from, and give credit to the cake artists that I admire and follow.
A fall themed wedding with golds, reds, pinks, and browns, and a joint baby shower for two sisters having babies just a few weeks apart. The wedding for my cousin was discussed over email from a few states away, and she put her trust in my to execute her ideas and make the trip up to Minnesota for her wedding, without even talking to me in person. For the baby shower, my boss's wife handed me her shower invitations and said 'do whatever you want, all I care about is chocolate'.
This is why I do what I do. The daily grind of production and working the line at the restaurant is a great, stable job, but the creating I get to do in the background is the icing on the cake.

Subscribe to:
Posts (Atom)


