Showing posts with label Pepitas. Show all posts

Wednesday, November 24, 2010

Home Sweet Home...and Pie


Home sweet home. I finally picked a day to drive to Minnesota that was not smack dab in the middle of a snowstorm. The past few years for Christmas and Thanksgiving, whenever i decide to make the drive, old man winter decides to throw a ridiculous snowstorm at me. I am not sure what he has against me going home, but I showed him this year. Though, it was intensely sunny and when I opened up my sunglasses case, one of the screws was missing, so I spent the entire 7 hour drive squinting into the setting sun....I can't win.


It is wonderful to be home, I am sitting in my pj's, dad cooked me truffled eggs for breakfast, we are bracing for the storm of the century, and the smells of thanksgiving dinner are beginning to waft through the house. Onions caramelizing, sage frying, homemade turkey broth bubbling, it all has me salivating for tomorrow's feast. It is just a lovely way to start the day.


Are you ready for thanksgiving? Is all your shopping done, and food prepped? The nice thing about coming home is that all I have to do is drink wine and chop/stir/plate where needed. I already had my effort-heavy thanksgiving meal last weekend, so this time around I just get to kick back and enjoy it. I was in charge of dessert last weekend, and, though most of us were too full by the time we got there, it was a tasty ending to a fun and friend-filled day.


I made this pumpkin pie from the Thanksgiving Bon Apetit Magazine, substituting my very favorite pate brisee crust. It is a beautiful twist on the plain whipped-cream topped pumpkin pie we are used to seeing around this time of year. Toasted nuts with crystallized ginger creates a pretty border and adds that crunchy extra-something to the creamy pie and buttery crust.


Pumpkin Pie with Glaze Ginger-Nut Topping
adapted from Bon Apetit Magazine

1/2 batch pate brisee (or pie crust of your choice), rolled out to 1/4 inch thick disc and chilled

Topping:

1 tablespoon butter
1/4 cup sliced almonds
1/4 cup chopped pecans
2 tablespoons pepitas
2 tablespoons brown sugar
large pinch of salt
2 tablespoons minced crystallized ginger

Filling:

1 - 15 ounce can pure pumpkin puree
1/2 cup packed brown sugar
1/2 cup sugar
1 tablespoon molasses
1 tablespoon all purpose flour
1 1/2 teaspoon ground cinnamon
3/4 teaspoon ground ginger
1/4 teaspoon ground cloves
1/4 teaspoon salt
2 large eggs + 1 large egg yolk
1 1/4 cups heavy cream

Transfer crust to a 9-inch pie pan, pressing the dough into the corners. Cut off excess dough, and crimp edges with thumbs. Freeze for 1 hour before baking.


In a large non-stick skillet, heat the butter over medium high heat. Add almonds, pecans, and pepitas and saute until nuts begin to brown slightly, just about 2 minutes. Sprinkle brown sugar and salt over and stir and cook another 2 minutes, until sugar has melted and nuts have been coated. remove from heat and stir in ginger. Set aside.


Preheat oven to 375 degrees F, with rack in center position. Line the pie crust with tin foil, and fill with pie weights, rice, or dried beans. Bake crust for 25 minutes, remove weights and tin foil, and bake for another 8 minutes. Remove crust from oven, but leave the oven on.

While the crust is blind baking, in a large bowl combine the pumpkin, both sugars, molasses, flour, cinnamon, ginger, cloves, and salt. Whisk together until combined. Add the eggs, yolk, and cream. Whisk until smooth.

Pour filling into warm crust and bake for 20 minutes. remove pie from oven, and wrap strips of foil gently around the exposed crust to prevent it from becoming too dark and/or burning. Return to oven and bake for another 40-55 minutes, depending on how deep your pie pan is. Mine is very deep so it took close to 55 minutes for middle to set. It may still jiggle a bit in the center, but if you touch the center with your finger, and it is tacky, but not liquid-y, the pie should be good to go.

Transfer to pie rack and sprinkle the nut topping around the perimeter of the filling, leaving a circle in the center exposed.

Monday, July 27, 2009

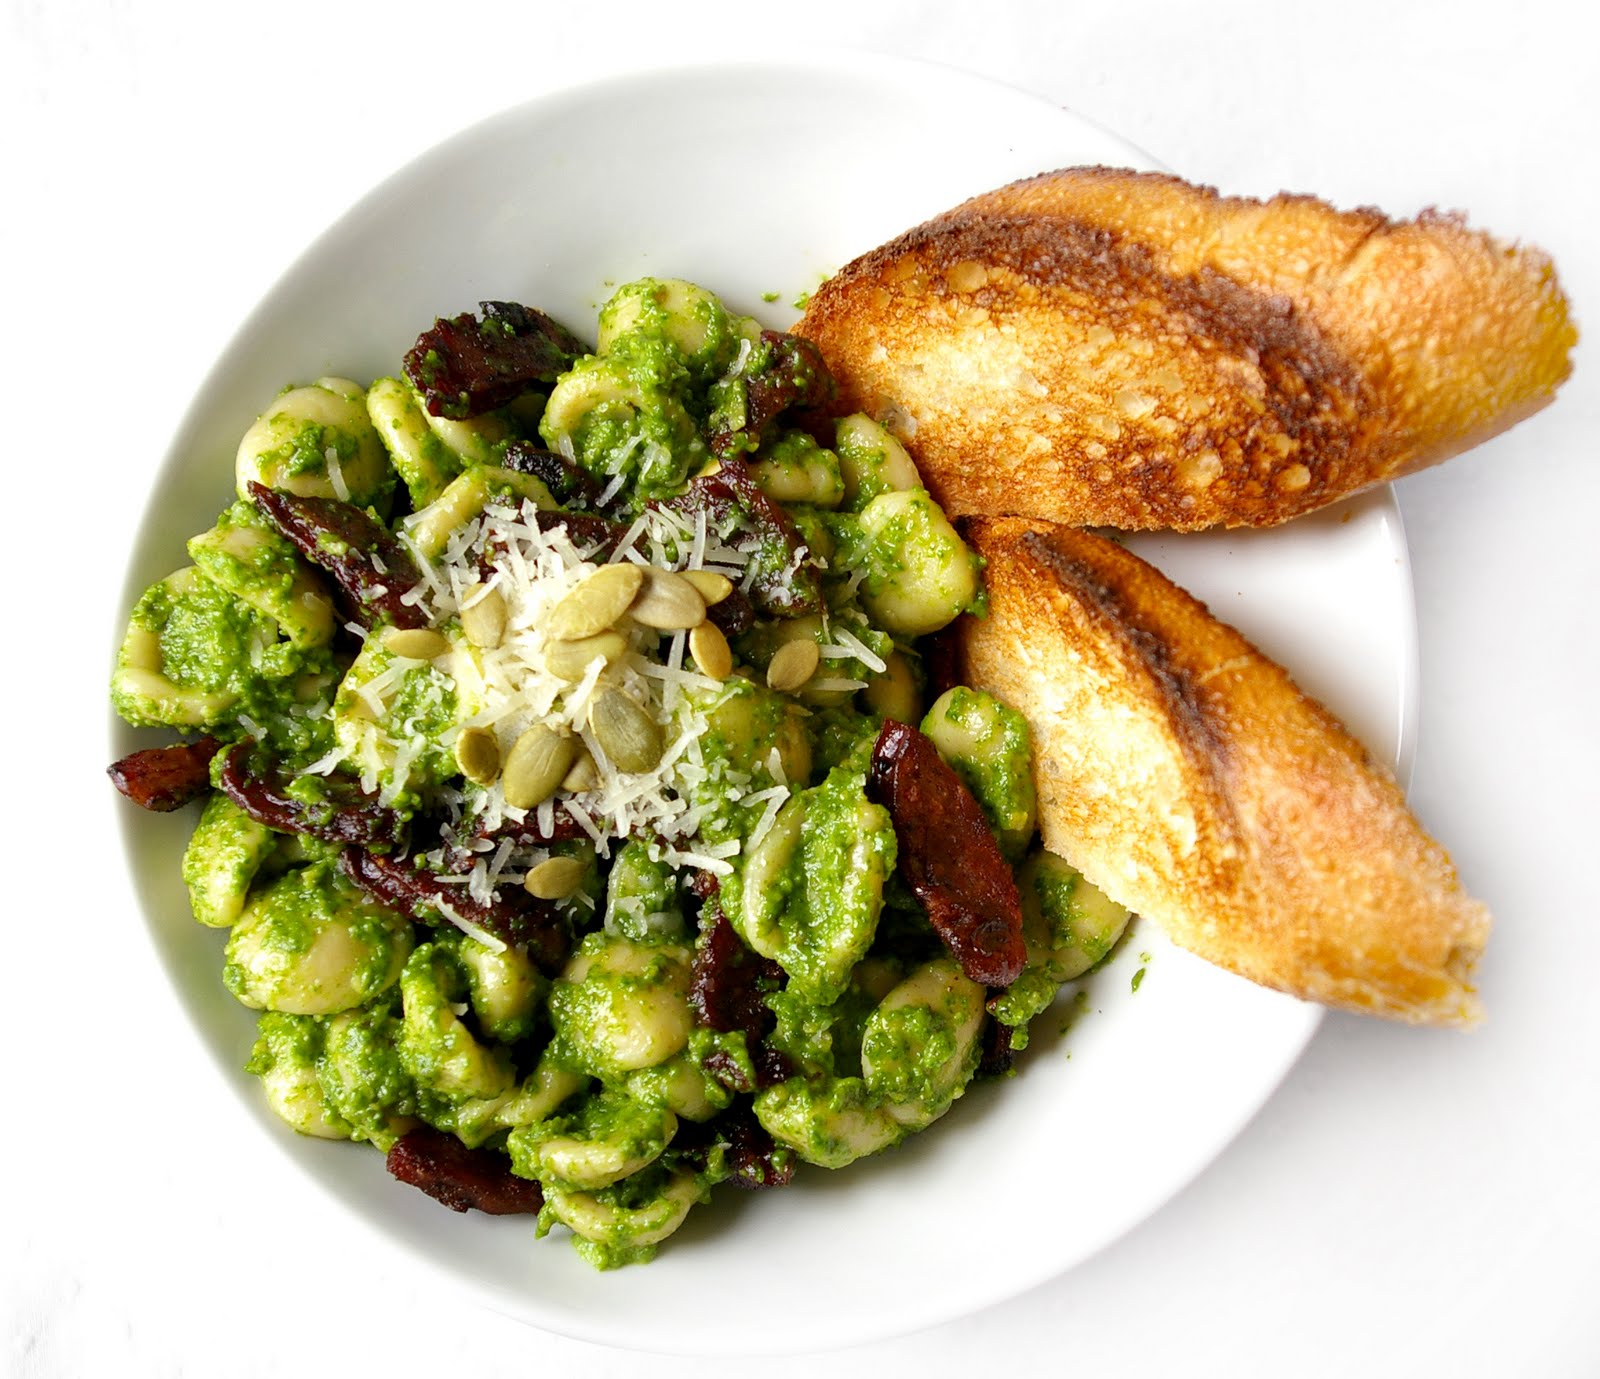
Homemade Orecchiette with Arugula and Pepita Pesto

If you read my last post, while I was waiting for my bagel dough to rest and rise, I decided that instead of relaxing or cleaning up, I would make fresh pasta. I mean, I already had the flour out, and I had some eggs in the fridge, why not? Just for future reference, I recommend not hand-kneading pasta dough and bagel dough all in the same day. Get yourself a Kitchenaid if you are going to get ambitious. Trust me on this, your arms will thank you.

To me there is almost nothing as comforting as fresh, homemade pasta. After thanksgiving each year, I pretty much make my mom use the turkey carcass to make stock, whip up some fresh egg noodles, and make the best turkey noodle soup I have ever had. I have made fettuccine, tortellini, and ravioli. Now since I don't have a pasta rolling machine, I decided to give my rolling pin a break for the day and make something a bit easier on the biceps: Orecchiette, or Little Ears.

These were fun to make, almost therapeutic even, squishing and twisting each little teeny ball of dough out over a kitchen towel until I had a little army of ears sitting to dry on my kitchen counter. Getting ready for me to boil them up and toss them with some fresh pesto and parmigiano reggiano cheese.

Homemade Orecchiette


3 1/2 Cups All purpose flour

4 extra large eggs

1 tablespoon salt


You can mix the dough together by hand, but I cheat and start it in my food processor. Place all ingredients into food processor and, using the dough blade, pulse until it forms a ball (or comes close, mine never really forms a complete ball, there is always some stragglers).


Turn dough out onto counter on a floured surface and form into mound. If it is too dry, you can add a few drops of water and work it in to the dough until it is holding together, but not sticky. Knead the dough for about 10 minutes until it becomes pliable, working in flour if it becomes tacky.


When dough is smooth, either wrap in plastic wrap or put underneath an inverted bowl for one hour. This will let the gluten relax and make it easier to shape your pasta.


At this point you can do whatever you want with this dough. You can roll it into sheets you make lasagna or fettuccine, or roll out little circles to make tortellinis. This is a good basic dough for making any type of pasta. I however chose to make the little ears.


Once the dough is fully rested, cut into 4 equal parts. Start with one of the quarters and wrap the rest in plastic wrap until you are ready to use them. Roll out the dough into a long log shape (think back to when you were a kid and used to make worms and snakes out of play dough, it'll help) until it is about 1/2-3/4 inch thickness.


Cut this log into a million little pieces (okay maybe not a million but it sure felt like it) with a pastry cutter or knife. They should be about 1/4 inch wide. Cut them smaller than you think you should, the pasta plumps when you cook it (yes, just like ball park franks) and if you make them too big, you will have more dumpling, than pasta. Which for you, may or may not be a bad thing.


Lay out a slightly damp clean kitchen towel at your work space. I remember hearing somewhere that orecchiette is suppose to have the texture of a cat's tongue, meaning it is supposed to be rough one one side. This helps sauce adhere to the pasta, and gives it a very unique characteristic. I have no clue if this is actually true or not. I didn't have the time to wiki-it.


Now, take each of the little teeny tiny pieces and roll them into a ball in your palms (if we are going back to the play dough analogy, this would be the head of the snake, or...depending on your ball shaping skills, maybe a misshapen rock for the snake to hide under)


Take your thumb, you can dust a little flour on it if you want or if the pasts starts sticking to you, and press straight down to flatten, then twist and lift you thumb to roll the piece off. Hmm....this was kind of hard to explain. Here watch this guy do it:


Watch this guy.


Except use a towel, it will be easier and you will get the cat tongue texture.


Once you have your shape, lay them in a single layer and let them dry for at least an hour before cooking or freezing them.


Arugula Pepita Pesto


I am sure I am not the first one to come up with this combination, but I didn't use a recipe.The peppery, slightly bitter arugula paired nicely with the salty nutty pepitas, but the combinations are endless when it comes to pesto. Try experimenting with different greens and nuts, its one of my favorite base sauces to play with.


4 cups packed arugula

1/4 cup pepitas (hulled pumpkin seeds)

1/4 cup Parmesan cheese

4 cloves garlic (mine were small, but feel free to alter depending on how much you like garlic...I clearly enjoy it very much)

Olive Oil (enough to thin out, this amount will vary)


Place garlic in food processor and pulse a few times until minced. Add pepitas, arugula, salt and pepper, and process until a paste forms (about 30 seconds). Stream in olive oil until paste thins out and you achieve your desired consistency (this will probably be anywhere form 1/2 cup to 1 cup of olive oil). Add parmesan cheese and pulse a few times to combine. Leave at room temperature until ready to use.


Bring a large pot of salted water to boil, throw in your ears, I mean pasta, and cook 3-5 minutes, possible more depending on how not-so-itty-bitty your orecchiette turned out. Taste testing is the best answer for deciding when pasta is done, plus its like appetizers without the hassle. Drain, and toss with pesto to coat.


I also had some leftover chicken basil sausage that I threw in as well, but grilled chicken, or shrimp would be a delicious addition as well. I had a ton of pasta and pesto leftover, which I froze separately to be used later. And by later, I mean the next day. Bon appetito!


Pin It

LinkWithin

Related Posts with Thumbnails