Wednesday, July 21, 2010

Picnic-ing


I have decided I don't picnic nearly enough. I love everything about picnics. Sitting in the grass, lounging on a blanket, planning out a delicious meal and sharing it with good friends. Throw in some amazing outdoor music and wine and I am as content as can be. Last week my boyfriend, a friend, and I went to a concert at a gorgeous venue just north Chicago, called Ravinia Festival. It is a beautiful outdoor amphitheater with a sprawling flat green lawn. I have been there a few times now, and it is always a great excuse to make fancy picnic food and grab a few bottles of wine and enjoy a great show. The spreads that people come prepared with are insane, and one of my favorite things to do there is just to walk around and see the creative food and set-ups people brought. Most people don't just show up to ravinia with some pb&j's and a can of beer (not that you aren't welcome to), you gotta go all out and bring your cute picnic basket with homemade goodies and actual glass wine glasses. So that is exactly what we did.

We had a fantastic chicken salad with giardinera on sourdough bread, Israeli cous cous and wheat berry salad with cauliflower and zucchini, and edamame hummus with garlic naan bread. It was a perfect meal to munch on throughout the serene performance by the Swell Season. The weather was beautiful, candles were glowing, wine was flowing, and the night was wonderful. If you live in the area and have never been to Ravinia for a show, make it a priority, you will not regret it. It really doesn't even matter what is playing that night, the ambiance more than makes up for any lack of interest in the music itself (however I must say that Swell Season, aka the couple from the movie Once, were absolutely incredible).


Edamame Hummus
makes a LOT of hummus, about 4-5 cups, feel free to halve the recipe

1 large can of Chickpeas
1 16 oz bag of frozen edamame, cooked according to package directions and cooled
3-4 cloves of garlic
juice of 1 large lemon
1/4 cup tahini (you can add more if you like your hummus very tahini-y)
1/4 cup olive oil (may be more or less depending on desired consistency)
Salt and pepper to taste

Combine garlic, chickpeas, edamame, lemon juice, and tahini in a food processor and pulse until ground into a paste. With processor running, slowing stream in olive oil until it reaches your desired consistency. Salt and pepper to taste and pulse to combine.

Serve with pitas or my personal favorite, toasted naan bread. Someday I will make my own, but for now you can buy some really great packaged naan in many grocery stores, all you need to do it brush it lightly with some olive oil and toast in the oven for a few minutes.

As we are nearing the waning days of summer, I hope you have time to grab some friends or loved ones and settle in on a nice comfy blanket at least once more before the leaves start changing colors.

Thursday, July 15, 2010

Mango Curd Tartlets

Someone at the latest bridal shower I attended/baked for asked me when I started baking, and as followers of my blog and spying all the recent dessert posts, I think expected me to stay "oh forever!!". I actually had to think about it for a second, and I surprised even myself that my answer was "December". It's true that I have been my mom's helper in the kitchen, you know, decorating sugar cookies, sampling chocolate chip cookie dough, etc., since I was little, but I didn't really start baking on my own until this past winter, save for a random cake or cookie here and there over the years.

I was a self proclaimed "cook", definitely not a baker. I didn't even have a muffin tin until last year, folks. I blame most of this lack of interest in baking on the fact that I am not really into eating sweets. I am wholeheartedly an appetizer and main course girl, dessert has always been an afterthought. As you may have noticed, there has definitely been a shift over here as I am realizing that not only am I cooking to eat and savor the food that I make, but I am also enjoying the process of cooking/baking just as much as, if not even more than, the final outcome.

I have also learned, and this will make my parents and their empty wallets happy, that my design degree turns out to be a great background to have in the world of baking. It is quite often that I find myself using the knowledge that I attained while studying hard for four years (okay five, but who's counting?) getting my bachelors in industrial design. My main job as an industrial designer is to make things look good. Superficial? Yes, most of the time, but its also about spending the hours, days, and weeks to make sure what you are designing actually works. Modeling, testing, throwing it away, and starting from scratch is how I spent countless nights in the design studio.This gave me the patience to accept that baked goods don't just miraculously happen, you have to test and test again (and sometimes, test again...twice).

Years of building prototypes of various kitchen utensils and power tools has given me solid, concrete, tangible skills that make me not think twice about the logistics of baking and building a wedding cake. I got this. Wrapping two layer cakes in fondant? Pshh, how about carving a wacky plunger handle out of wood and covering it in a perfectly smooth layer of bondo? I realize that it's not exactly the same, but my experience in design has allowed me to jump into the deep end of dessert land and not look back. I mean, the first thing I made when I got my stand mixture for Christmas this year was French Macarons. Talk about the deep end...

I feel a sense of confidence in the kitchen that I haven't felt in a long time, and its really refreshing in this time of uncertainty. Working two part time, possibly temporary, jobs when you feel like you need to have a 9 to 5 really takes a toll on your sense of stability and direction in life. But, at the end of the day, (and sometimes all night) I can step into the kitchen and create something beautiful and delicious, and it does wonders to boost my ego back up to a normal level. Who needs prozac when you have tart molds and a stand mixer?

[Insert shameless segue here] I am thinking something along the lines of 'speaking of tart molds and stand mixers, nudge nudge wink wink'...

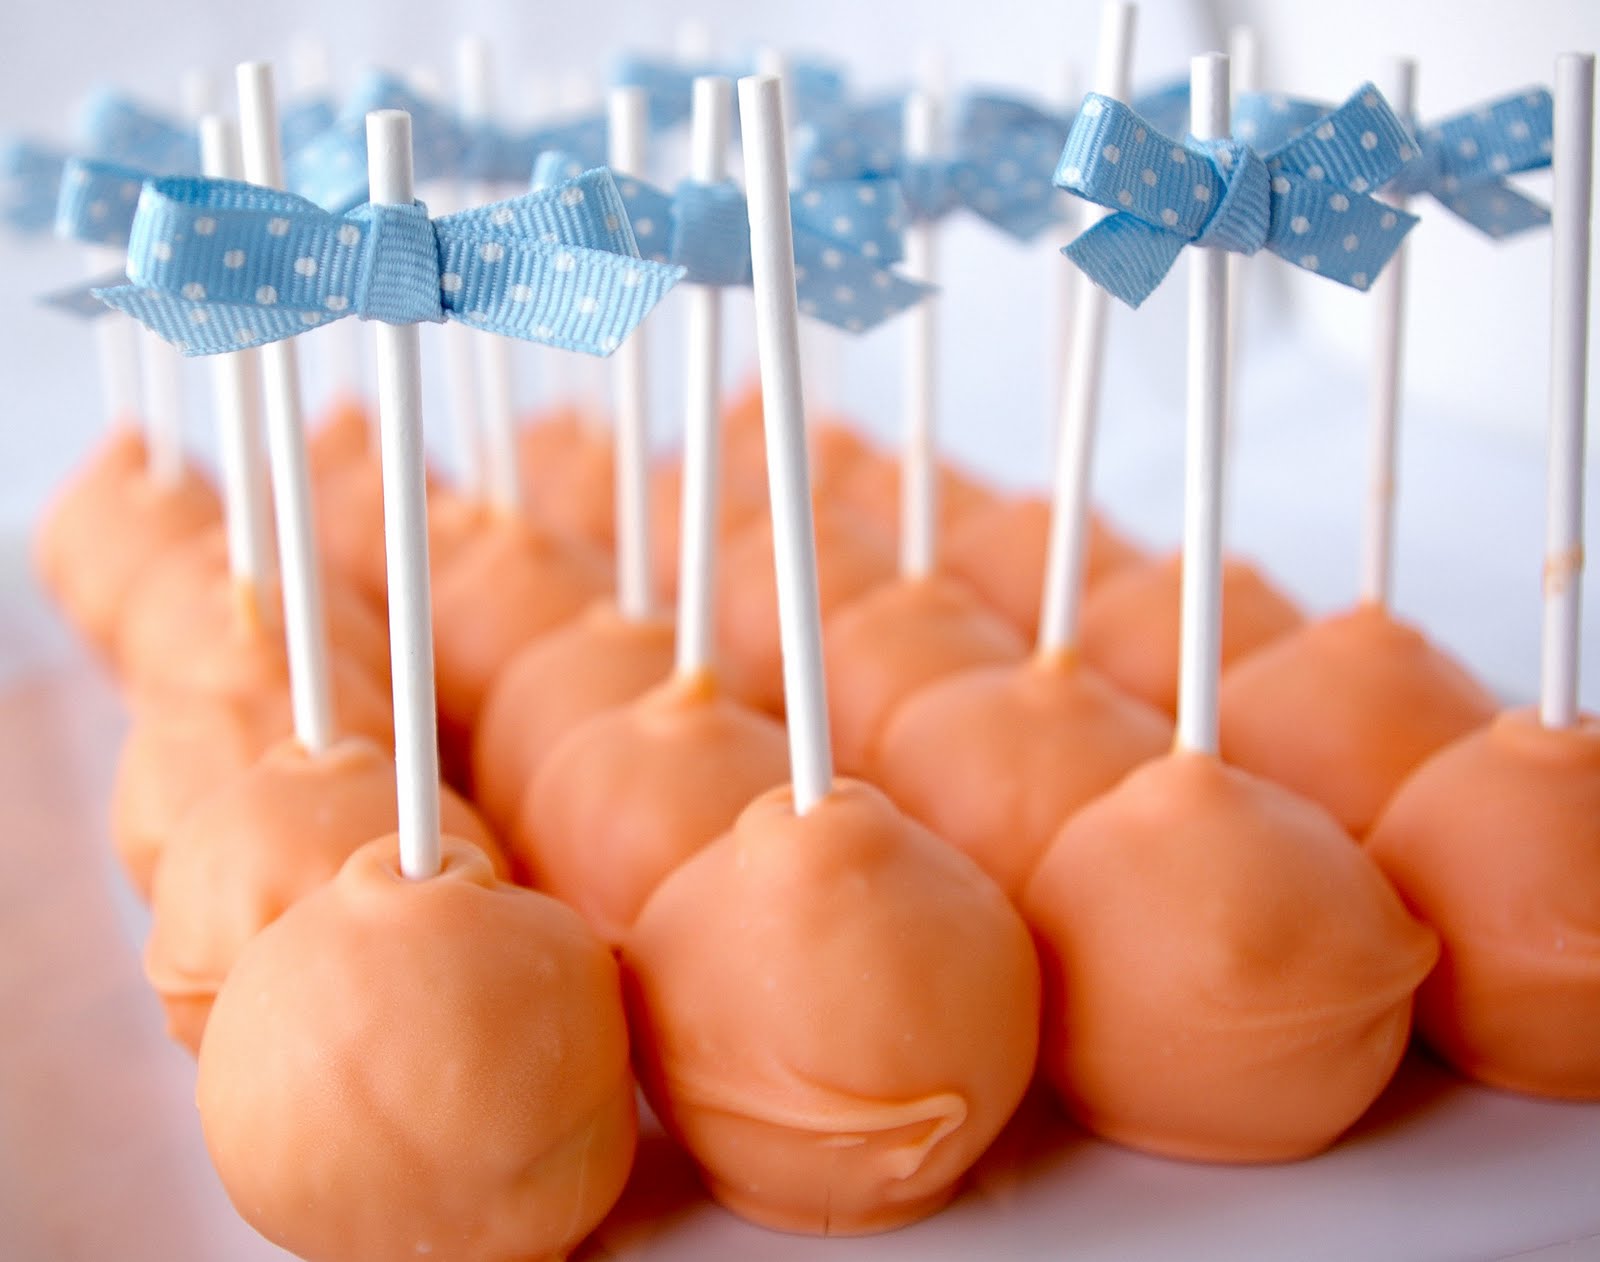
In addition to the cute orange, blue, and white cake pops I made for the shower a few weekends ago, I went a little overboard and made tartlets with the same color scheme. Cake pops are fine and good, but they are pure sugar bombs, and I wanted something fresh and fruity to balance out the dessert selection.

I was aiming for a more natural incarnation of the orange and blue theme, and behold, mango curd tartlets with fresh whipped cream and blueberries were born. These were delicious, rich, tart, and creamy. The mango curd you could probably just eat out of a bowl with a spoon, but putting it in a nice compact little tart shell might make you feel better about yourself.

Mango Curd Tartlets with Blueberries

Mango Curd:

1 - 15 ounce, very ripe mango, peeled, pitted, and cubed
1/2 cup sugar
3 tablespoons lime juice
4 large egg yolks
pinch of salt
4 tablespoons unsalted butter, cut into 1/2 inch pieces

Place mango, sugar, lime juice, and salt in your food processor and blend until smooth. Add egg yolks and puree another 15 seconds. At this point, you can strain the mixture through a fine sieve and remove all the little mango bits, which in turn will make your curd much more translucent and shiny. I skipped this step. Why? Because I couldn't find my strainer and it was 1:00 in the morning. Thats why. Still turned out wonderfully.

Place the mixture in a medium metal or glass bowl set over a saucepan of gently simmering water. Whisk puree constantly until temperature reaches 170 F and has thickened. This will take about 10-15 minutes. Remove from heat and whisk in butter one piece at a time. Let cool a little on the counter, then place in an air tight container and refrigerate at least overnight.

Tart Shells:

1 1/2 cups all purpose flour
1/2 cup powdered sugar
1/4 teaspoon salt
1 stick (1/2 cup) plus 2 tablespoons unsalted butter, cut into 1/2 inch pieces
1 large egg yolk

Place flour, sugar, and salt in food processor and pulse a few times to combine. Sprinkle butter over flour and pulse until butter in in pea sized pieces. In a small bowl break up the egg yolk with a fork and pour over the flour-butter mixture. Pulse to combine, and increase your pulses to around 10-15 seconds until large clumps form. The mixture will be crumbly, but will stick together when you press it into the tart forms.

Turn dough out onto your counter or a large cutting board and knead two or three times just to combine any stray dry bits. At this point you can press the dough into one large tart pan or you can get about 20-24 small 3-inch round tart shells out of this batch. Press the crumbles in gently to the tart molds, you want the dough to be able to bind together when cooking, but not press so hard that the lovely flaky layers get pulverized. Place filled tart molds in the freezer for 15-30 minutes.

Preheat oven to 350 degrees F and place a rack in the middle of the oven. Bake tart shells for 10-15 minutes, turning pan once halfway through, until they turn a light brown color. Feel free to press the bottoms of the shells down with the back of a spoon if they start to puff up during cooking. Let cool in molds then gently remove and let cool completely on wire rack.

When shells are completely cooled, fill with 1-2 tablespoons mango curd and top with fresh whipped cream and a few fresh blueberries or blackberries (or really any other fresh fruit).

I will leave you dear readers tonight with the wish that you find your happy place whether it be in the kitchen or otherwise. The place where you can get lost for a few hours and not think about any of the stresses in life, the place where you feel confident and in control. Because we all need that place.

Wednesday, June 30, 2010

More pops...


I realize this is a bit early in my blogging career to be repeating recipes, but screw it. Here's some more cake pops.

I couldn't resist. They are just too freaking cute. Seriously look at how cute they are! I am so humble.

I attended my boyfriend's cousin's bridal shower this past weekend and was asked to do the desserts. After some of the ladies saw my last cake pop post, they requested that I make them for the shower, of course I obliged. The wedding colors this time let me experiment with some new flavors and food colorings, plus I decided this time, I would go completely from scratch. I was regretting this decision a little when 4:30 am rolled around the night before the shower, and I was still sitting at my center island tying little tiny bows on the sticks, but was quickly reassured that they tasted WAY better than the boxed cake versions. Whew, all worth it. Thank god.

The colors if you haven't guessed by now were orange and blue, and I did my best to match the bride's invitations with the candy melt coating and the bows.

I made some with standard yellow cake, with an added buttermilk tang, which were then mixed with vanilla buttercream and dipped in orange candy melts. The second batch consisted of blue velvet cake, mixed with cream cheese frosting, and dipped in white candy melts. If i didn't have an severe dislike of any and all blue-colored foods, I would have eaten a whole lot of these guys. My waistline thanks me for this unfounded and completely irrational food aversion.

These turned out VERY blue, even though I used way less food coloring than called for. I need to work on my food coloring skills, well that among may other baking-related skills.

If I have learned anything though, it is that people love these bad boys, and I can imagine I will be making these over and over again, with endless possibilities of fillings and toppings, flavors and colors. I can barely stop thinking about the cake pops in my future, though that may be the fault of the sugar bomb I just consumed. Yep, I have leftovers. Thank god for leftovers.

Cake Pops

The majority of this round of pops (with the exception of the yellow cake, recipe below) is mish-mashed from previous posts on cake pops and cupcakes. I used my red velvet cake recipe and just substituted blue food coloring for the blue velvet pops. You can find the recipes and pop directions here:

Blue (Red) Velvet Cake and Cream Cheese Frosting Recipes
Buttercream Frosting Recipe and General Assembly Directions

Yellow Buttermilk Cake
adapted from Culinary Institute of America

3 1/2 cups cake flour
2 cups granulated sugar
1 tablespoon baking powder
1/2 teaspoon salt
1 cup unsalted butter (2 sticks) room temperature
1 cup buttermilk, room temperature
4 large eggs, room temperature
2 large egg whites, room temperature
2 teaspoons vanilla extract

Preheat oven to 350 degrees F. Lightly butter and flour two 8 or 9-inch round cake pans.

In the bowl of your stand mixer, sift or whisk together the cake flour, sugar, baking powder, and salt. Add the butter and half the buttermilk. Beat with the paddle attachment on a medium-low speed until combined and smooth, about 3-4 minutes.

In a medium sized bowl, with a fork, whisk together the eggs, egg whites, the rest of the buttermilk, and the vanilla to combine, just until eggs are broken up. Add the egg mixture to the batter in 3 additions, mixing on medium speed for 2 minutes after each addition, being sure to scrap down the sides of the bowl frequently.

Divide the batter evenly between the two pans, and bake on the middle rack of the oven for 35-40 minutes or until a toothpick or skewer inserted into the center comes out clean. Let cool in pans until they are cool to the touch, then turn out of pans and cool completely on wire racks.

As always, make sure the cakes are completely cool before you attempt the cake pops, otherwise your frosting will melt and you may some some trouble rolling intact balls.


Like I said the possibilities are endless when it comes to cake pops, if anyone has any interesting combinations or new fun flavors, I would love for you to share them in the comments! After all, cake pops are for sharing. Happy cake pop making, and hope you all have a wonderful 4th of July weekend!

Monday, June 28, 2010

Another Reason I Want to Move to Canada.


One word: Poutine.

Poutine is amazing. It is everything that I love, all layered together in one dish. It is crispy, salty, gooey, rich, fatty, sinful, and absolutely delicious. It is just starting to make it's name here in the states, but is something I would consider moving to Canada for. A traditionally Canadian dish, I hear you can even get versions of it in fast food joints across the country.

But what is in it you ask? Are you ready for this? French fries. Gravy. Cheese curds. Yep, you heard me right, all three of those, smothered on top of each other to make an insane bowl of goodness. If this can't cure a hangover, I don't know what will. Oh wait, did I tell you I added leftover rib meat? It doesn't get much better than this, folks.


My first attempt at deep frying my own french fries, was just okay. They weren't as crispy as I would have liked, but I think perfection is in my near future. I was home visiting my family this past weekend, and my parents used a fry recipe from America's Test Kitchen, which starts the potatoes in cold oil, brings them to a boil and fries them for a good 20-30 minutes. The ones my parents made were freaking amazing, but mine need a little tweaking. It may have been my giant pot. Meet my new, wonderful, addition to my cookware family, a 13-quart LeCrueset dutch oven:


I call her Big Red. God she's beautiful. Anyhoo...

Even though the fries weren't quite up to par, drench them in fresh-from-Wisconsin cheese curds, beef gravy, and little chunks of Dad's smoked baby back ribs, and I didn't even notice.

Poutine
makes two very generous servings

I made a simple beef gravy since I didn't have any real stuff on hand. If you happen to have any leftover turkey gravy or pot roast drippings or something similar, feel free to use that. From my very sparse research I found that traditional poutine is made with chicken gravy, but I used beef since I was tossing in some leftover rib meat for good measure. As if it wasn't decadent enough.

1 pound yukon gold potatos, cut into 1/4 inch matchsticks
vegetable oil (just enough to cover your potatoes in the pot)
1 cup or so cheese curds
1/2 cup baby back rib meat (or any other leftover meat) cut into 1/2 inch cubes
2 1/2 cups beef stock
2 tablespoons flour
2 tablespoons butter
salt and pepper to taste

Place cut potatoes in a large dutch oven or other deep heavy bottom pot. Fill with vegetable or peanut oil until potatoes are covered. Bring the oil to a boil, and keep at the boil without touching the potatoes for a solid 10 minutes. With my giant pot, I should have kept the burner on high the entire time, I believe I had the flame a bit too low. You want a good strong, but controlled boil for the entirety of the frying. After the first untouched 10 minutes, gently stir the potatoes around with a large metal spider or tongs. Let the potatoes fry at a rolling boil for another 10-20 minutes (depending on how crispy you want them), stirring occasionally. you can test a fry by taking one out of the oil and drying it on a paper towel. DO NOT go directly from pot to mouth, you will regret it.

When fries are crisped to your desired consistency, remove from oil with a spider and set to drain in a paper towel-lined dish. You can place the dish in a warm oven until you are ready to assemble if needed, but they are best right away.

While the potatoes are frying, melt the butter in a medium sized skillet over medium heat. Whisk in the flour and cook for just a minute until the mixture turns a light brown color. Slowly whisk in the beef broth and simmer over medium-low heat for about 5 minutes, until sauce reduces and thickens. Stir in your meat pieces and season to taste with salt and plenty of black pepper. You can keep this over low heat until the fries are done, stirring occasionally, or make it ahead of time, bringing it to high heat before topping the poutine.

When fries and gravy are ready, its time to assemble. Heap a pile of fries into a shallow bowl or plate. Top with a generous handful of cheese curds and pour the piping hot gravy over the top. I suppose you could sprinkle some fresh Italian parsley on top to give it some green, but really, what's the point?

Yes, its true you may need to run a few extra miles the next day for eating this. But it is seriously worth it.

Monday, June 21, 2010

The Final Chapter


Photo by Glen Abog Photography

Well, that sounds a little extreme, no? What I mean is this is the last post about the wedding dessert table, then it is on to new and exciting adventures.

The fourth and final dessert on the table was sort of a re-do of the lime tarts I made for the bride's bridal shower. I used Dorie Greenspan's sweet shortbread tart crust instead of the macadamia nut crust I had used previously. I needed a more sturdy, leak-proof vessel for the filling, and these worked wonderfully.

After weeks of planning, and stressful days and long nights spent baking, I can't tell you how relieved I was when all 700 or so desserts were plated, packaged, and delivered.

I think I yelled "someone get me a glass of wine", which may not have been appropriate since we were on our way to the church for the rehearsal dinner, but I digress.

Would I do this again? Absolutely, as long as I am not in the wedding. It was a blast, and a huge learning experience. The excitement that it gave the guests at the end of the evening was priceless, and absolutely worth the sleepless week leading up to the big day.

So congratulations to Rebecca and Michael on a beautiful wedding, and here is to a wonderful life together. I hope I am still baking desserts for you two on your 50th wedding anniversary.


Monday, June 14, 2010

Pistachio Brittle

I got it into my head somehow that I had some mad macaron-making skills. I had made them about 5 times, and all 5 times, they turned out wonderfully. Was this just beginners luck? Perhaps, because as soon as I suggested I make about 100 pistachio macs for the wedding dessert table, they turned on me. Three entire batches, in the garbage. I had a tight schedule in the two and a half weeks leading up to this wedding, with every minute planned and prepped for. This was not going to work, and boy was I um...crabby (this is a expletive-less way of saying how I felt the night that I threw 6 pans of exploded/runny/cracked/flat/hollow/feetless macarons into the garbage). I had to come up with a new game plan, and fast. I didn't have the time to make 100 macarons even if every other pan worked beautifully, it would be a waste of ingredients and a waste of the very little time I had.

Since I had two 3 pound bags of shelled pistachios already purchased for the wedding, I wanted to use them in whatever dessert I made in place of the macarons. It needed to be something easy, fairly quick, but incredibly delicious. I mean, it had to fill the shoes of french macarons, and thats a lot to live up to. My thoughts turned to a cake that I had made last summer that had a crushed pistachio brittle coating around the outside, and how tasty the brittle was on its own.

After a quick food site search, I made a decision. The fourth dessert would be thick squares of dark, rich, nutty pistachio brittle. It was fast, fairly foolproof, and filled a hole in the table that I hadn't realized was there before. I was missing a option for the candy lovers. Not anymore. These were a much bigger hit than I was anticipating, and maybe even a close second to the cake pops. The photographer at the wedding was nice enough to stick around until the dessert table came out to snap some pics for me (my big camera just didn't go with my little champagne colored dress).

Photo by Glen Abog of Glen Abog Photography

I think there are many versions of this brittle in my future. Different nuts, possible dipped coatings, multiple layers...mmm I am getting a sweet tooth just thinking about it.

Pistachio Brittle
adapted from Food & Wine

2 cups granulated sugar
1/2 cup water
1/2 cup unsalted butter (1 stick, preferably room temperature)
1/3 cup light corn syrup
1/2 teaspoon baking soda
8-10 ounces shelled roasted pistachios

Line a 9.5 X 11 baking dish with either parchment paper or a silpat, letting the paper or silpat go up and over the sides of the pan. Basically you need to be able to get the brittle out of the pan and if you have some excess paper or silpat on all sides, it will be very easy to just pull it up and out, and peel the paper or silicone off the brittle. Spread about 3/4 of the pistachios evenly across the bottom of the lined pan.

In a medium saucepan with a candy/deep fry thermometer inserted, combine the sugar, butter, corn syrup, and water and set over medium high heat. Bring to a gentle boil, and keep over medium high heat until the temperature reaches about 300 degrees F, stirring occasionally. This will take anywhere from 10-20 minutes depending on the intensity of your heat source. I typically err on the lower heat side, raising the temp a bit slower so I can hopefully decrease my chances of blowing way past the 300 degree mark and ending up with a brick of burnt sugar.

When your caramel mixture reaches 300 degrees and it has turned a dark amber color, remove from heat and remove the candy thermometer. Working quickly, stir in the baking soda (it will bubble and foam up) then pour over the pistachios in the lined baking dish. Immeadiately spread the mixture evenly across the pan with a silicone spatula and sprinkle the remaining pistachios over the top, using the spatula to press the nuts into the caramel a bit.

If you are wanting to cut the brittle into nice, neat squares or rectangles you will want to score it before it sets up completely. After a minute or two, when the brittle has firmed up a bit, but is still warm you can score it with a pastry cutter or knife, pressing your implement of choice firmly into the brittle. You may want to do this more than once during the cooling process. The deeper your scoring, the easier it will be to get clean cut pieces once it hardens.

When the brittle is completely cool, pull it out of the pan, and peel off the parchment paper or silpat. With a very sharp knife, and using a firm and quick chopping motion, cut the brittle into squares along your score lines. You will have some casualties, but those can just go into the reject bowl for you to snack on while reveling in your newly acquired candy making skills. Brittle will keep for 1 month stored in an air-tight container at room temperature.


Monday, June 7, 2010

It's Cake...On A Stick!

I do not know what it is about cake pops, but people seem to go a little nuts after they have had one...or five. They are like crack, people can't get enough, and the emails and phone calls have been flowing in with questions about how they can get their next fix. Insanity right?

I kid you not, 350 of these puppies vanished within an hour at the wedding reception last weekend. You take something with which people have a long-established love affair, cake, mix it with some decadent homemade buttercream frosting (this may be where the crack factor comes in), add a little whimsy by putting it on a stick, and people just lose their minds.

Need to make some friends? Make some cake pops. Need to impress your co-workers or boss? Make some cake pops. Woo-ing a boy? Make a lot of cake pops. No really, make some cake pops. These little spherical balls of cake have some sort of magnetic energy field surrounding them that just pulls people in and makes them gush compliments at you. Its like magic. Seriously, you will thank me later.

I got the basic recipe from the cake pop queen, Bakerella. If you haven't been over to her site, drop everything you are doing, and check it out. Just be sure to come back here afterwards. Thanks. She calls for boxed cake mix and canned frosting, but since these were for a wedding, I thought I would up the game a bit. Now, I couldn't pass up the buy 2 get 3 free boxes of cake mix at the grocery store, but I did make my own swiss buttercream frosting, which is what I think you really taste the most. If I had made a normal amount of these (you know like 50 or so, rather than 350) I would have made my own cake, but quantity and convenience won this round. Who knows, there may be homemade red velvet cake pops in my future, possibly decorated in blue and white, possibly for the fourth of July? Just a thought.


Cake Pops
adapted from Bakerella
makes about 50-60 cake pops (depending on the size you roll)

1 box vanilla or chocolate cake mix, baked as directed on the box in whichever form you like
1 cup of sugar
4 egg whites
3 sticks of unsalted butter, room temperature
1 teaspoon vanilla extract
1-2 packages white vanilla candy melts
sprinkles (optional)
50 4-inch lollipop sticks

Bake the cakes according to package directions. Let cool completely.

Make the frosting. In a small metal or glass bowl set over a pan of barely simmering water, whisk together the egg whites and the sugar, whisking constantly until the sugar has dissolved and the mixture resembles marshmallow cream, about 3-4 minutes. Pour the mixture into the bowl of a stand mixer fitted with the whisk attachment. Beat on medium speed until the mixture has cooled a bit and has formed a thick, shiny meringue, about 5 minutes. Change over to the paddle attachment and beating on a medium speed, add the butter one tablespoon at a time, mixing until completely incorporated after each addition. After all the butter has been added, mix in the vanilla, then beat on medium-high speed for 6-8 minutes, until frosting is light and fluffy and smooth.

When the cakes are room temperature, crumble them into a large bowl with your fingers until broken up into pea-sized bits. Mix in 1 and 1/4 cups of the frosting to start with, using either a large wooden spoon, or you hands if you want to get messy. Mix until the frosting is evenly dispersed. Take a quarter sized about of the cake mixture and try rolling it into a ball with the palms of your hands. If it stays together, continue to roll the rest of your cake mixture into balls and place them on a parchment or wax paper lined baking sheet. If they fall apart or do not hold together, add a little more frosting until the mix is moist enough to allow you to roll an intact ball.

Once you have rolled all the cake mix into balls, place in refrigerator and chill for about 30 minutes. When the cake balls have been chilled, melt a small amount of the candy melts in a microwave safe bowl according to package directions. Take one of the sticks, dip about 1/2 inch of the end into the melted candy and stick it about half to three-quarters of the way through the cake ball. Don't go too far into the cake ball, or it will fall apart. The candy melts will help adhere the stick to the cake.

Place the cake pop (we can officially call them pops now since they are now on a stick) back onto the parchment and repeat process with all remaining balls. Place the cake pops in the freezer for 15-30 minutes before coating. This will save you a lot of headache when trying to dip the cake pops into the hot candy melts. If they are mostly frozen, you will have a much easier time getting them to stay on the stick while dipping and tapping the excess coating off. So don't rush this step.

Once the cake pops have been chilled, melt the rest of the package of candy melts according to package directions, and add your candy coloring, if using. I kept the majority of the cake pops in the freezer and took them out about 5 at a time. This way, the whole pan of cake pops doesn't come up to room temperature while you are dipping the first batch.

One at a time, dip the cake pops into the melted candy coating being sure to get the coating all the way up over where the stick is attached to really seal it in. GENTLY tap off the excess coating on the edge of the bowl while rotating the cake pop, to get a even layer all the way around.

At this point you can do one of two things. If you want lollipop-like cake pops, you can stick them in a piece of styrofoam, let them dry pop side up, and serve them just like that. If you do it this way, you may want to reshape the tips of the balls a bit with your fingers before dipping them, as they may have a flattened bottom from sitting and chilling.

If you are making 350 of them it may be easier for you to put them pop side down with the sticks up in the air. They are still just as cute, but easier to make in large quantities, plus you don't have to worry about the flattened bottom since you are just putting it back in that same position anyway. I will leave it up to you.

While the candy coating is still wet, feel free to go crazy with sprinkles, edible glitter, or even crushed nuts. If you are piping or dipping another color onto the pops, wait until the base layer is completely dry before doing so. You may need to melt more candy melts depending on how thick your coating ends up, always have extra bags on hand.

Let cake pops dry for at least an hour or two before packaging them up. I placed mine in a paper towel-lined ziploc baggies and put them into the fridge. You can leave them at room temp for a day or two, especially if you are using canned frosting, or even freeze them for a few weeks. These things have the shelf life of canned goods, I swear to god. My neighbors were actually still rationing the 10 or so that I gave them in return for fridge space, nearly two weeks after the wedding. I told you, crack on a stick, that is the only explanation I have.

Pin It

LinkWithin

Related Posts with Thumbnails