Showing posts with label Cake Pops. Show all posts

Sunday, December 16, 2012

Cake Pop Winter Wonderland


I am a little lacking in the christmas spirit this year. I have no clue why, but it just doesn't feel christmas-y around here. I have the tree up, the candles burning bright, the oven is churning out goodies, Vince Guaraldi is playing on loop, and yet it is still not sinking in.  Perhaps thats how I ended up with pink and silver holly and christmas trees...


Maybe all I need is some snow, but the forecast here in Chicago is not cooperating with me on that front. From the looks of these pictures I took matters into my own hands and made myself a little snowy wonderland filled with cotton candy pink and shiny silver christmas trees. It seems as though I am only a few years away from a little christmas village taking over half of my living room. 
Thats not good. 


I figured since I was using gingerbread cake, that I should probably make some gingerbread people. I must say I had trouble deciding which would be less vulgar, to put the sticks in their heads or up their butts...heads it is. Now they look like a cross between the Michelin man and a tele-tubbie. Either way, they were tasty little buggars. 


Oh I also decided to go the more traditional route and make some green and red ones. 


But we can all agree the glittery pink disco trees are way more fun right?


Right. 

Gingerbread Cake Pops with Caramel Buttercream
adapted from La Cuisine d'Helene
makes 2 - 9 inch cake layers

2 1/4 cups all purpose flour
1/2 teaspoon baking soda
1/2 teaspoon salt
1/2 teaspoon allspice
1/2 teaspoon ground cloves
1/2 teaspoon ground nutmeg
1 teaspoon cocoa powder
1 teaspoon ground cinnamon
2 teaspoons ground ginger
1 stick (8 tablespoons) unsalted butter, melted then brought to room temperature
3/4 cup dark molasses
3/4 cup sugar
1 large egg
1/2 cup buttermilk
1/2 cup whole milk

Butter and flour two 9-inch cake pans and preheat your oven to 350 degrees Fahrenheit.

In a medium bowl whisk together the flour, baking soda, salt, allspice, cloves, nutmeg, cocoa powder, cinnamon, and ginger.

In the bowl of a stand mixer fitted with the paddle attachment, beat together the molasses, sugar, and butter until well combined. Add the egg, and beat until combined.

Slowly beat in the milk and buttermilk. It will look like it has curdled, but don't worry, this is supposed to happen. It will fix itself when you add the dry ingredients.

In a few additions, beat in the flour mixture, scraping down the sides of the bowl between each addition. Mix until just combined.

Divide the batter evenly between the two cake pans. Bake on the middle rack of the oven for 30-40 minutes, or until a toothpick inserted into the center of the cakes comes out clean.

Let cool in pan for about 20 minutes, then turn out onto a baking rack and cool completely.

Italian Meringue Buttercream

4 oz egg whites
8 oz granulated sugar
2 oz water
12 oz unsalted butter, room temperature, cubed
1 tsp vanilla
1/2 cup caramel sauce, room temperature

Place your egg whites in the bowl of your stand mixer fitted with the whisk attachment. 

Heat the sugar and water in a small sauce pan over high heat. Using a candy thermometer, bring the sugar to a boil and continue cooking until it reaches 230 degrees F. When it hits that temperature, turn your stand mixer to medium to begin mixing the egg whites until they are foamy. When the temperature hits 240 F, remove from heat and slowly pour into the egg whites on a medium speed. As soon as all of the sugar is in, turn the mixer to medium high and mix until the meringue is cool to touch. Add the butter a few tablespoons at a time and whip until thick, which may take a few minutes. Pour in the caramel sauce and mix until combined. 

Cake Pop Assembly

To make the cake pops, see my original post HERE on their assembly. For the Christmas tree and holly shapes, I pushed the cake dough into a mini cookie cutter and then gently pushed it out. There is enough butter in the frosting to make this quite easy and not sticky at all.  Once the shapes are formed, chill them and proceed as you normally would for round cake pops. 


Happy holidays, whatever color your trees happen to be this year. 

Thursday, November 8, 2012

The Art of Impermanance


For some reason or another, I have been putting off writing this post. Whether it's sheer laziness on my part, or the thought that I really don't want to write about food after working at the restaurant all week, I just couldn't get it started. Maybe it's the fact that I didn't want to just write another superfluous post about a wedding cake that I made for person a, and it contains a,b, and c, flavors, and it was this (insert difficult sounding adjective here) hard to make. Maybe it was the fact that I am feeling guilty that the person I made this cake for is one of my very best friends, and I haven't talk to her in far too long. Maybe it's because this was the last of the wedding cakes for the year, and I am sad to know there won't be any more for the next few months. So, here I am, holding onto the pictures in hopes that they will tide me over until the next one comes along.


But that's the thing about this industry, they are just pictures. There is no cake left (I sincerely hope not) to eat, or gumpaste flowers to swoon over, they are long gone. In my previous life as a product designer my art was permanent. It was sketched, modeled, and produced in various materials, such as plastic, metal, fabric. The sketches were filed, documents backed up, and finished products were sold to eager consumers. It's all still around in one way or another, but my new art is so much different. My new art is the epitome of impermanence and its been quite the adjustment.


I wonder if I will ever get used to watching my cakes be cut and completely disassembled in five minutes flat. Something that I put hours and hours into is destroyed in less time than it took to mix and bake just one of the many layers it contains. The consolation of course is when the client, be it your best friend or someone you've met only once, takes that first bite and an exstatic smile starts spreading across their face. This is when your nerves calm, and the heartbreak you experience from watching the knife stab through the intricate decorations starts to subside, and you remember this is what it's all about. In that one moment, you get to make someone really happy. They are celebrating something big, whether it be a birthday, wedding, baby or engagement, and they just ate something that will stick in their memory for years to come.

The satisfaction of that moment is enough, and it has to be to keep on going in this industry. Unless I start making styrofoam cakes and decorating my apartment with them...just kidding.


There were some new flavors in this cake that I just have to share with you. The groom is from florida and the bride requested that two of the tiers resemble key lime pie in some way. I went through a few variations and quickly found a winner. The cake is a richly flavored vanilla cake with buttermilk and lime zest, filled with key lime curd, and brought over the top with coconut buttercream. It was like florida on a plate, or so I was told, I haven't been to florida in years so I will reserve judgment.

Key Lime Cake
adapted from Bon Apetit
This recipe makes 2 fairly thin 9 inch rounds, I like to double it and make three thicker layers, I pretty much always go for a taller cake.

1 cup ap flour
3/4 cup cake flour, sifted
1/2 tsp baking powder
1/2 tsp baking soda
1/2 tsp salt
1/2 cup butter, room temperature
1 1/4 cup granulated sugar
2 eggs
2 1/2 tbl key lime juice
1 tbl key lime zest
1 tsp vanilla extract
3/4 cup buttermilk

Preheat oven to 350 degrees F. Line pans with parchment, and lightly butter and flour sides. In a medium bowl, whisk together the flours, baking powder, baking soda, and salt. In a stand mixer, cream together the butter and sugar. Add the eggs, one at a time, scraping the bowl between each addition. Add the lime juice, zest, and vanilla, and mix to combine. Add 1/3 of the flour mixture, mix just to combine, scrape bowl. Add half the buttermilk, mix to combine, scrape bowl. Add another third of the flour, followed by the remainder of the buttermilk, and the remainder of the flour, scraping well between each addition.

Divide batter between pans, and bake for 20-25 minutes, or until top of cake springs back completely when gently pushed with your index finger. Let cool in pans for about 5-10 minutes, then turn out and cool completely.

Key Lime Curd
adapted from Ina Garten
Makes about 3 cups, I add a little gelatin to this recipe when I use to to fill cakes. It makes it much more sturdy and you wont have to worry about it running out the sides of the cake (not that I have had that happen, I swear).

Zest of 4 limes
1 1/2 cups sugar
1/4 pound butter, room temperature
4 eggs
1/2 cup key lime juice
pinch of salt
1 tsp gelatin
1 tbl water

Place sugar and zest in a food processor and pulse until zest and sugar are finely ground together. Place the sugar into a large, heavy saucepan, but do not place over heat yet. Whisk together the sugar and butter, then add the eggs, one at a time, mixing until completely incorporated after each addition. Add the lime juice and salt, then place over medium heat and cook until the temperature reaches 175 degrees F, whisking vigorously constantly. Remove from heat. Bloom gelatin in the water and let stand for about 5 minutes. Heat gelatin in the microwave  for 5 second intervals, just until it melts completely. Whisk the hot gelatin into the still warm lime curd. Transfer curd to a bowl, cover, and refrigerate until set, at least 4 hours, before using.

Coconut Buttercream

4 oz egg whites
2 oz water
8 oz sugar
12 oz butter
1/2 tsp vanilla extract
1/2 coconut extract

Place egg whites in the bowl of your stand mixer fitted with the whisk attachment and begin whipping the whites on medium-high speed. Place the sugar and water in a small saucepan and using a candy thermometer, heat the sugar to soft ball stage, or 240 F. The eggs at this point should  be voluminous and frothy. Slowly pour the sugar into the egg whites in a steady stream, while the mixer is on high.
Let the mixer run on high (I usually set it to one number below the very highest setting) until the mixture has cooled completely. Switch to the paddle attachment, and add the butter one tablespoon at a time, mixing on a medium-low speed. Once all the butter has been added, turn your mixer to high and whip for 3-5 minutes until frosting is light and smooth. Add the vanilla and coconut extracts.


Special shout-out to my mom for helping me with these cakes, and the over 100 cake pops that were made for this wedding, especially for helping me cut out each and every of the hundreds of fondant flowers that cover the sides of this cake. Thank you to Erica for taking all the lovely pictures, so that I didn't have to! Last but not least, congratulations to my best friend Heather, and her best friend Matt, you two are so incredibly lucky to have each other, and I love you both.

Tuesday, April 17, 2012

Spring Has Sprung...or Popped?


A cake pop and a gin and tonic totally counts as dinner right? It may be a Tuesday night, but with a new job comes a new schedule and mid-week has become my weekend. It may have been apparent that I haven't updated here in a while and I have a good reason for that.


A whirlwind of a month and an amazing job offer that materialized out of thin air meant little time for sleep, free time, or even time to catch my sanity. Life is starting to settle into its new groove, but unfortunately my body and mind are lagging a bit behind. So on my Friday, all I want to do is curl up on the couch have a strong cocktail and enjoy a sugar bomb that is the cake pop.


When Easter rolled around this year, I found that I actually needed to think about where to go and what to make. The last two years, I have been out of the country, most likely underwater doing some scuba diving or laying on a beach on a tropical island. Sigh...not this year, I guess that's the price I pay for working in a restaurant kitchen. Instead, I was able to spend a lovely afternoon with my boyfriend's family and found an excuse to make some cute easter-y desserts.

I think I have found my new favorite cake pop flavor, and from the sounds of pure satisfaction coming from all who ate them, I think most are in agreement; banana cake pops are a winner. The banana lends a nice rich flavor without being overly sweet, the candy coating takes care of that. Combined with a buttery and once again, not overly sweet, italian meringue buttercream, the banana cake pops will definitely be making more appearances on my cake pop flavor roll.


Banana Cake
recipe adapted from the Food Librarian
(makes enough for about 40 cake pops)

1 1/2 cups flour
1 teaspoon baking soda
1/4 teaspoon salt
1 stick unsalted butter (4 oz., room temperature)
1 cup sugar
1 teaspoon vanilla
1 large egg
2 ripe bananas, mashed
1/2 cup plain yogurt

Preheat oven to 350 F. Line a 9-inch round cake pan with parchment and lightly coat with non-stick spray.

In a medium sized bowl, whisk together the flour, baking soda, and salt. In a stand mixer fitted with the paddle attachment, cream together the butter and the sugar until light and fluffy. Beat in the vanilla, then the egg. Scrape the bowl down very well after each addition.

On low speed, mix in the mashed bananas. Add half the dry ingredients, and mix just until incorporated, then add the sour cream, followed by the rest of the dry ingredients, again scraping the bowl in between each addition.

Pour into your prepared cake pan and bake for 30-40 minutes, just until a toothpick inserted into the center comes out clean, or a finger pressed gently on the top of the cake springs back fully.

Let cool in pan for 5-10 minutes, then let cool completely on a wire rack.

Italian Meringue Buttercream

4 oz egg whites
8 oz granulated sugar
2 oz water
12 oz unsalted butter, room temperature, cubed
1 tsp vanilla

Place your egg whites in the bowl of your stand mixer fitted with the whisk attachment. 

Heat the sugar and water in a small sauce pan over high heat. Using a candy thermometer, bring the sugar to a boil and continue cooking until it reaches 230 degrees F. When it hits that temperature, turn your stand mixer to medium to begin mixing the egg whites until they are foamy. When the temperature hits 240 F, remove from heat and slowly pour into the egg whites on a medium low speed. As soon as all of the sugar is in, turn the mixer to medium high and mix until the meringue is cool to touch. Add the butter a few tablespoons at a time and whip until thick, which may take a few minutes. 


To make the cake pops, see this post for detailed instructions! Happy Spring!! 

Monday, May 2, 2011

Will Starbucks Kill the Cake Pop?


**This post was originally published on HonestCooking.com, a brand new online food magazine, for which I am a contributor. The website launched in March, and it is a great new resource for recipes, travel, restaurant reviews and foodie opinion pieces. Check it out here!**

I can’t tell you how many people in the past few weeks have asked me “did you know that Starbucks sells cake pops now?”. Some say cake pops are the new cupcake, and they seem to be everywhere you look. They are taking over food blogs, they are replacing cupcakes at weddings, and now they are being sold at the international coffee chain, Starbucks.

A cake pop is essentially cake, crumbled and mixed with frosting, formed into a ball, popped on a stick, and dipped in a super-sweet candy coating. I made cake pops for the first time for a friend’s wedding last spring (about 350 of them to be exact) and since then, virtually everyone I know has become obsessed. Certain friends (who shall remain anonymous) have been known to hoard them in their freezer and ration them out until the next batch of leftovers is delivered. It’s madness I tell you.


Will the appearance of cake pops at Starbucks mark the beginning of the inevitable cake pop backlash? The overexposure and obsession with a new food trend can quickly turn it from hip and current to passé and cheesy. With their new home at a coffee chain that many people already love to hate, will 2011 be the year of the death of the cake pop trend? Only time will tell I guess.


Until then, we can still delight in the near-sickeningly sweet treat that is the cake pop. Here are instructions for some bright colorful pops, perfect for a spring celebration or a fun Easter treat.


Lemon Cream Cheese Cake Pops
Makes about 50 pops

Cake Pops:
1 batch lemon-buttermilk cake, baked and cooled
1 batch cream cheese frosting (recipe below)
1-2 packages white vanilla candy melts (if you cannot find candy melts, you can use white chocolate, or almond bark the same way)
candy melt coloring (optional, but you cannot use frosting coloring, or liquid coloring unfortunately, the candy melts will seize from the water content)
sprinkles (optional)
50 4-inch lollipop sticks

Crumble the cakes into a large bowl with your fingers until broken up into pea-sized bits. Mix in about 2/3 of the frosting to start with, using either a large wooden spoon, or your hands if you want to get messy. Mix until the frosting is evenly dispersed. Take a small amount of some of the cake mixture (approximately 2 tablespoons or so) and try rolling it into a ball with the palms of your hands. If it stays together, continue to roll the rest of your cake mixture into balls and place them on a parchment or a wax paper lined baking sheet. If they fall apart or do not hold together, add a little more frosting until the mix is moist enough to allow you to roll an intact ball. You may not need to use all your frosting. I like to use the least amount of frosting possible, as it helps keep the texture of the cake pops more cake-like, and less mushy.

Once you have rolled all the cake mix into balls, place in refrigerator and chill for about 30 minutes. When the cake balls have been chilled, melt a small amount of the candy melts in a microwave safe bowl according to package directions. Take one of the sticks, dip about 1/2 inch of the end into the melted candy and stick it about half to three-quarters of the way through the cake ball. Don’t go too far into the cake ball, or it will fall apart. The candy melts will help adhere the stick to the cake.

Place the cake pop (we can officially call them pops now since they are now on a stick) back onto the parchment and repeat process with all remaining balls. Place the cake pops in the freezer for 30-60 minutes before coating. This will save you a lot of headache when trying to dip the cake pops into the hot candy melts. If they are mostly nearly frozen, you will have a much easier time getting them to stay on the stick while dipping and tapping the excess coating off, so don’t rush this step!

Once the cake pops have been chilled, melt the rest of the package of candy melts according to package directions, and add your candy coloring, if usingdesired. I kept the majority of the cake pops in the freezer and took them out about five5 at a time. This way, the whole pan of cake pops doesn’t come up to room temperature while you are dipping the first batch.

One at a time, dip the cake pops into the melted candy coating being making sure to get the coating all the way up over where theon to the stick is attached to really seal it into create a good seal. GENTLY tap off the excess coating on the edge of the bowl while rotating the cake pop, to get a nice even layer all the way around. You will want to do this quickly in order to make sure to reduce any excess of the candy coating off before it starts to set.

At this point you can do one of two things. If you want lollipop-like cake pops, you can stick them in a piece of styrofoam, let them dry pop side up, and serve them just like that. If you do it this way, you may want to reshape the tips of the balls a bit with your fingers before dipping them, as they may have a flattened bottom from sitting and chilling.

I tend prefer to to place them pop side down with the sticks up in the air. They are still just as cute, but easier to make in large quantities. Plus, you don’t have to worry about the flattened bottom since you are just putting it back in that same position anyway.

While the candy coating is still wet, feel free to go crazy with sprinkles, edible glitter, or even crushed nuts. If you are piping or dipping another color onto the pops, wait until the base layer is completely dry before doing so. You may need to melt more candy melts depending on how thick your coating ends up. , it’s always good have a few extra bags on hand.

Let your cake pops dry for at least an hour or two before packaging them up. I placed mine in a paper towel-lined ziploc baggies and put them into the refrigerator. You can leave them at room temp for a day or two, or even freeze them for a few weeks.


Lemon Buttermilk Cake:
3 1/2 cups (349 grams) cake flour
2 cups (383 grams) granulated sugar
1 tablespoon baking powder
1/2 teaspoon salt
1 cup unsalted butter (2 sticks, 459 grams) room temperature
1 cup buttermilk (3,5 dl) room temperature
4 large eggs, room temperature
2 large egg whites, room temperature
1 teaspoon vanilla extract
1 teaspoon lemon extract
zest of one large or two small lemons

Preheat oven to 350 degrees F. Lightly butter and flour two 8 or 9-inch round cake pans.

In the bowl of your stand mixer, sift or whisk together the cake flour, sugar, baking powder, salt, and lemon zest. Add the butter and half the buttermilk. Beat with the paddle attachment on a medium-low speed until combined and smooth, about 3-4 minutes.

In a medium sized bowl, with a fork, whisk together the eggs, egg whites, the rest of the buttermilk, and the vanilla and lemon extracts to combine, just until eggs are broken up. Add the egg mixture to the batter in 3 additions, mixing on medium speed for 2 minutes after each addition, being sure to scrap down the sides of the bowl frequently.

Divide the batter evenly between the two pans, and bake on the middle rack of the oven for 35-40 minutes or until a toothpick or skewer inserted into the center comes out clean. Let cool in pans until they are cool to the touch, then turn out of pans and cool completely on wire racks.

Cream Cheese Frosting:
16 ounces (454 grams) cream cheese, softened
1/2 cup unsalted butter (230 grams) room temperature
1 teaspoon vanilla extract
2 1/2 cups (325 grams) confectioners’ sugar
pinch of salt

In a stand mixer, combine the cream cheese and butter, and beat on medium high speed until smooth. Add the vanilla and salt and mix until incorporated. Gradually add the sugar, and beat until light and fluffy, about 3-4 minutes.

Tuesday, October 26, 2010

BOO!

I love Halloween. I love the decorations, the costumes, and the weather. I also love having an excuse to eat a whole bag of mini sized Butterfinger bars. Or a dozen little ghost shaped cake pops...


Don't they just beg to have their little heads bitten off? I realize I am evil. I have accepted that fact.


I made a special one in honor of my favorite Halloween movie, It's The Great Pumpkin Charlie Brown! 


Can't you just picture this little guy saying "I got a rock....."? Poor Charlie Brown, he depresses me a little. I would share my cake pops with him if I could, maybe he just needs some sugar. 


These pops would probably fit that bill. Just a touch of sugar on these little guys. They look like they have done something mischievous, yes? 


Too bad I didn't get a picture of the drunk looking ghosts. I may need to work on my piping skills.

This round of cake pops used a spooky black velvet cake with a dark gray cream cheese frosting. They WILL dye your mouth black, but only for a minute or two, I promise. Its worth it though. Maybe you could try working a black tinted mouth into your Halloween costume. Just sayin. 


Black Velvet Cake Pops with Cream Cheese Frosting (Ghosts and Pumpkins!)
makes about 40-50 cake pops, depending on how big you roll them 

Cake: 

2 1/2 cups cake flour
1 teaspoon baking powder
1 teaspoon salt
2 tablespoons unsweetened cocoa powder
1 - 1 ounce bottle of black liquid food coloring
1 cup unsalted butter, room temperature
1 1/2 cups sugar
2 eggs, room temperature
1 teaspoon vanilla extract
1 cup buttermilk, room temperature
1 teaspoon baking soda
1 teaspoon white vinegar

Butter and flour your cake pans and set aside. Preheat your oven to 350 degrees F.

In a large bowl sift the flour, baking powder, and salt. In a small bowl, mix the food coloring and cocoa powder until completely incorporated. Set aside.

In a stand mixer (or using a hand mixer) cream the butter and sugar on medium high speed until light and fluffy. Add the eggs one at a time, and beat until thoroughly combined, being sure to scrape down the sides. Add the vanilla and the red food coloring-cocoa mixture and beat well to combine. Add 1/3 of the flour mixture, beat on medium speed until combined, then add 1/2 of the buttermilk, and beat until incorporated. Add another 1/3 of the flour, beat well, then the other half of the buttermilk, scraping down the sides after each addition. Finish with the last 1/3 of the flour mixture and beat until just combined.

In a small bowl, mix the vinegar and baking soda, and immediately add to batter. Mix on high speed for just a few seconds until evenly dispersed, and pour right away into cake pans or lined cupcake pans.

Bake 2 9-inch cakes for about 40 minutes, or until a toothpick inserted into the middle comes out clean. Let cool completely before making your pops! 

Frosting: 

16 ounces cream cheese, softened
1/2 cup unsalted butter, room temperature
2-3 tablespoons black food coloring (enough to make the frosting a dark gray color)
1 teaspoon vanilla extract
2 1/2 cups confectioners sugar
pinch of salt

In a stand mixer, combine the cream cheese and butter, and beat on medium high speed until smooth. Add the vanilla and salt and mix until incorporated. Gradually add the sugar, and beat until light and fluffy, about 3-4 minutes.Beat in the food coloring until nice and dark. You want it to be dark enough so that your cake doesn't turn gray from adding a ton of fluffy white frosting.

Pops:

2-3 bags white candy melts
50 or so lollipop sticks
Cake, baked and cooled
Frosting, room temperature
black piping frosting (I just used Wilton ready-to-decorate icing tubes)
Orange sprinkles

When the cakes are room temperature, crumble them into a large bowl with your fingers until broken up into pea-sized bits. Mix in 1 and 1/4 cups of the frosting to start with, using either a large wooden spoon, or you hands if you want to get messy. Mix until the frosting is evenly dispersed. Take a quarter sized about of the cake mixture and try rolling it into a ball with the palms of your hands. If it stays together, continue to roll the rest of your cake mixture into balls and place them on a parchment or wax paper lined baking sheet. If they fall apart or do not hold together, add a little more frosting until the mix is moist enough to allow you to roll an intact ball. If you are making ghosts, mold into a tapered shape instead of a round ball.


Once you have rolled all the cake mix into balls or ghosts, place in refrigerator and chill for about 1 hour. When the cake balls have been chilled, melt a small amount of the candy melts in a microwave safe bowl according to package directions. Take one of the sticks, dip about 1/2 inch of the end into the melted candy and stick it about half to three-quarters of the way through the bottom flat part of the cake ball or ghost. Don't go too far into the cake ball, or it will fall apart. The candy melts will help adhere the stick to the cake.

Once the cake pops have been chilled, melt the rest of the package of candy melts according to package directions, and add your candy coloring, if using. I kept the majority of the cake pops in the freezer and took them out about 5 at a time. This way, the whole pan of cake pops doesn't come up to room temperature while you are dipping the first batch.  

One at a time, dip the cake pops into the melted candy coating being sure to get the coating all the way up over where the stick is attached to really seal it in. GENTLY tap off the excess coating on the edge of the bowl while rotating the cake pop, to get a even layer all the way around. 
Stick the coated pop ghost side up into a Styrofoam block to dry. If you are doing the sparkling pumpkins, coat with sprinkles immediately after dipping each pop. For the ghosts, let cake pops cool and dry for at least 30 minutes before piping the faces on.  Let all decorations set for at least an hour before packaging them up. They can be frozen in plastic Ziploc bags, if you put them in the refrigerator the candy coating will weep and become sticky. If you are not using cream cheese frosting, they can be kept at room temperature for a few days.

Wednesday, June 30, 2010

More pops...


I realize this is a bit early in my blogging career to be repeating recipes, but screw it. Here's some more cake pops.

I couldn't resist. They are just too freaking cute. Seriously look at how cute they are! I am so humble.

I attended my boyfriend's cousin's bridal shower this past weekend and was asked to do the desserts. After some of the ladies saw my last cake pop post, they requested that I make them for the shower, of course I obliged. The wedding colors this time let me experiment with some new flavors and food colorings, plus I decided this time, I would go completely from scratch. I was regretting this decision a little when 4:30 am rolled around the night before the shower, and I was still sitting at my center island tying little tiny bows on the sticks, but was quickly reassured that they tasted WAY better than the boxed cake versions. Whew, all worth it. Thank god.

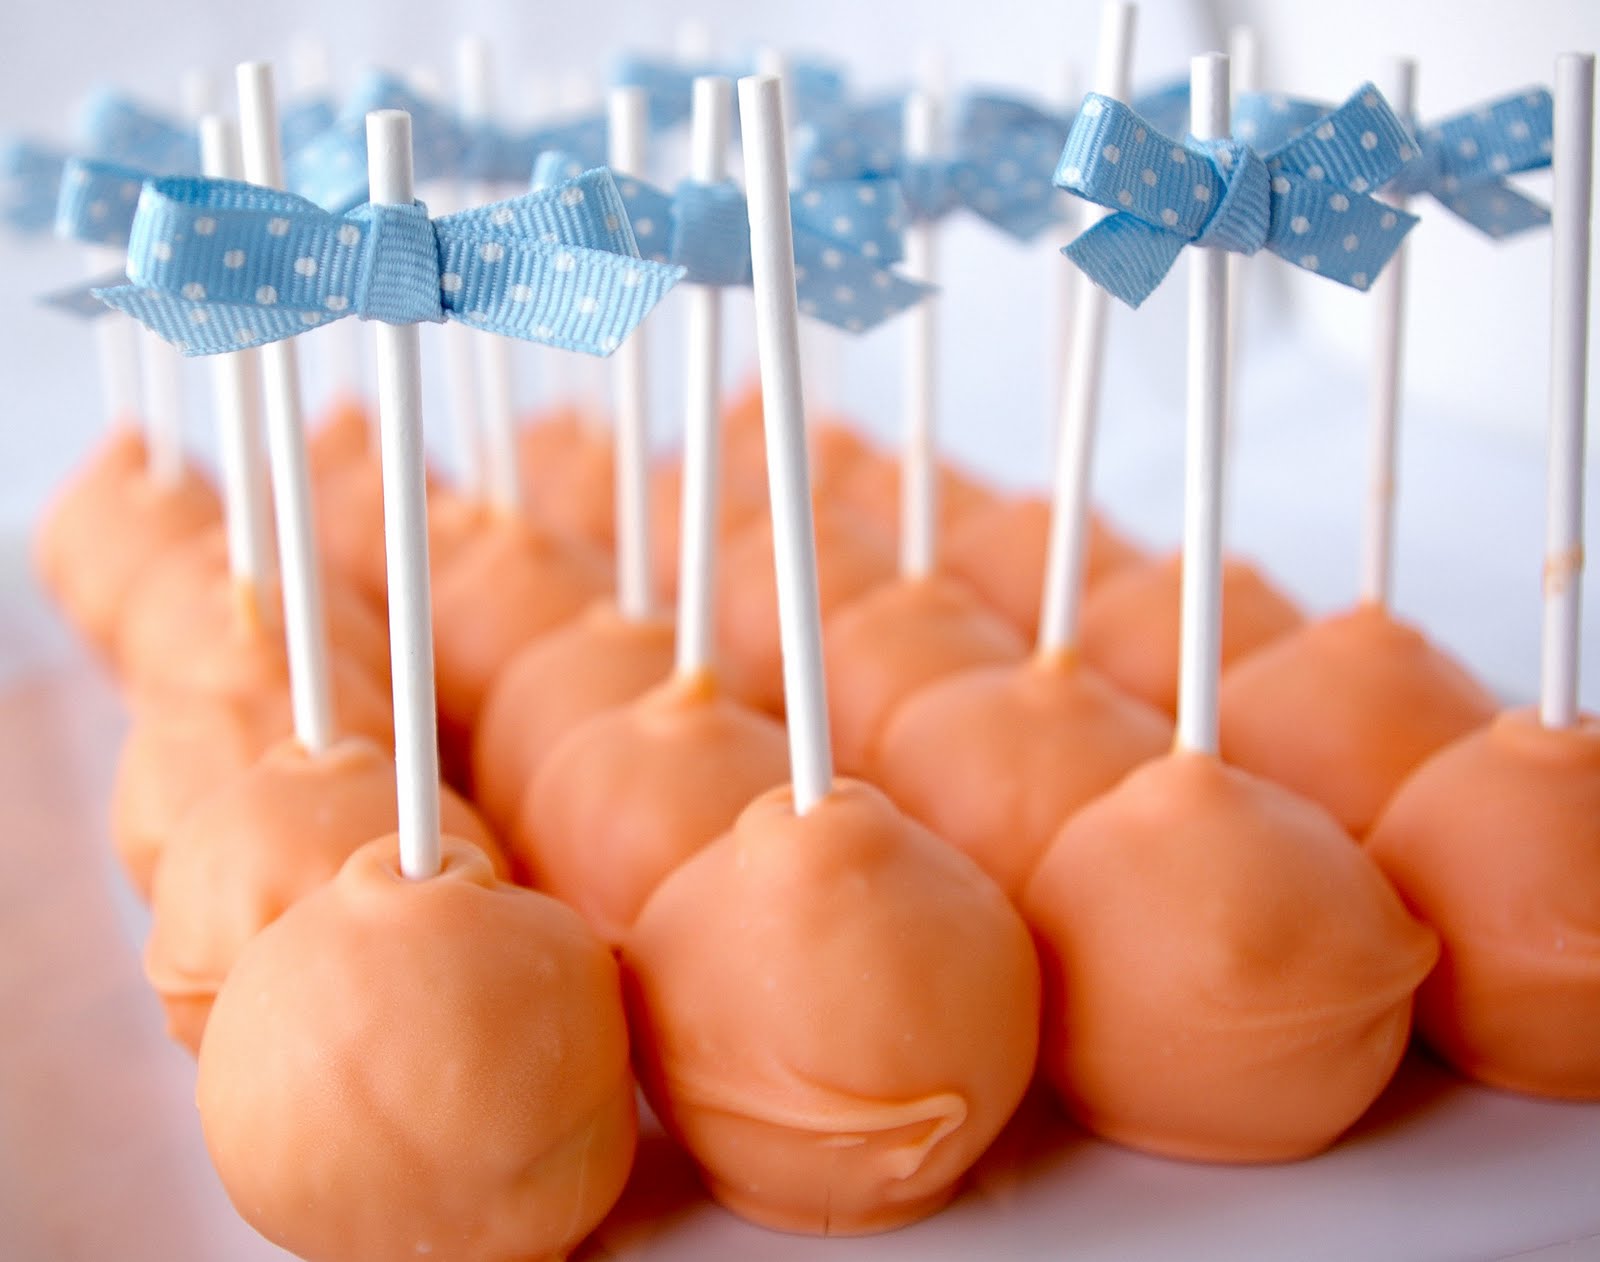
The colors if you haven't guessed by now were orange and blue, and I did my best to match the bride's invitations with the candy melt coating and the bows.

I made some with standard yellow cake, with an added buttermilk tang, which were then mixed with vanilla buttercream and dipped in orange candy melts. The second batch consisted of blue velvet cake, mixed with cream cheese frosting, and dipped in white candy melts. If i didn't have an severe dislike of any and all blue-colored foods, I would have eaten a whole lot of these guys. My waistline thanks me for this unfounded and completely irrational food aversion.

These turned out VERY blue, even though I used way less food coloring than called for. I need to work on my food coloring skills, well that among may other baking-related skills.

If I have learned anything though, it is that people love these bad boys, and I can imagine I will be making these over and over again, with endless possibilities of fillings and toppings, flavors and colors. I can barely stop thinking about the cake pops in my future, though that may be the fault of the sugar bomb I just consumed. Yep, I have leftovers. Thank god for leftovers.

Cake Pops

The majority of this round of pops (with the exception of the yellow cake, recipe below) is mish-mashed from previous posts on cake pops and cupcakes. I used my red velvet cake recipe and just substituted blue food coloring for the blue velvet pops. You can find the recipes and pop directions here:

Blue (Red) Velvet Cake and Cream Cheese Frosting Recipes
Buttercream Frosting Recipe and General Assembly Directions

Yellow Buttermilk Cake
adapted from Culinary Institute of America

3 1/2 cups cake flour
2 cups granulated sugar
1 tablespoon baking powder
1/2 teaspoon salt
1 cup unsalted butter (2 sticks) room temperature
1 cup buttermilk, room temperature
4 large eggs, room temperature
2 large egg whites, room temperature
2 teaspoons vanilla extract

Preheat oven to 350 degrees F. Lightly butter and flour two 8 or 9-inch round cake pans.

In the bowl of your stand mixer, sift or whisk together the cake flour, sugar, baking powder, and salt. Add the butter and half the buttermilk. Beat with the paddle attachment on a medium-low speed until combined and smooth, about 3-4 minutes.

In a medium sized bowl, with a fork, whisk together the eggs, egg whites, the rest of the buttermilk, and the vanilla to combine, just until eggs are broken up. Add the egg mixture to the batter in 3 additions, mixing on medium speed for 2 minutes after each addition, being sure to scrap down the sides of the bowl frequently.

Divide the batter evenly between the two pans, and bake on the middle rack of the oven for 35-40 minutes or until a toothpick or skewer inserted into the center comes out clean. Let cool in pans until they are cool to the touch, then turn out of pans and cool completely on wire racks.

As always, make sure the cakes are completely cool before you attempt the cake pops, otherwise your frosting will melt and you may some some trouble rolling intact balls.


Like I said the possibilities are endless when it comes to cake pops, if anyone has any interesting combinations or new fun flavors, I would love for you to share them in the comments! After all, cake pops are for sharing. Happy cake pop making, and hope you all have a wonderful 4th of July weekend!

Monday, June 7, 2010

It's Cake...On A Stick!

I do not know what it is about cake pops, but people seem to go a little nuts after they have had one...or five. They are like crack, people can't get enough, and the emails and phone calls have been flowing in with questions about how they can get their next fix. Insanity right?

I kid you not, 350 of these puppies vanished within an hour at the wedding reception last weekend. You take something with which people have a long-established love affair, cake, mix it with some decadent homemade buttercream frosting (this may be where the crack factor comes in), add a little whimsy by putting it on a stick, and people just lose their minds.

Need to make some friends? Make some cake pops. Need to impress your co-workers or boss? Make some cake pops. Woo-ing a boy? Make a lot of cake pops. No really, make some cake pops. These little spherical balls of cake have some sort of magnetic energy field surrounding them that just pulls people in and makes them gush compliments at you. Its like magic. Seriously, you will thank me later.

I got the basic recipe from the cake pop queen, Bakerella. If you haven't been over to her site, drop everything you are doing, and check it out. Just be sure to come back here afterwards. Thanks. She calls for boxed cake mix and canned frosting, but since these were for a wedding, I thought I would up the game a bit. Now, I couldn't pass up the buy 2 get 3 free boxes of cake mix at the grocery store, but I did make my own swiss buttercream frosting, which is what I think you really taste the most. If I had made a normal amount of these (you know like 50 or so, rather than 350) I would have made my own cake, but quantity and convenience won this round. Who knows, there may be homemade red velvet cake pops in my future, possibly decorated in blue and white, possibly for the fourth of July? Just a thought.


Cake Pops
adapted from Bakerella
makes about 50-60 cake pops (depending on the size you roll)

1 box vanilla or chocolate cake mix, baked as directed on the box in whichever form you like
1 cup of sugar
4 egg whites
3 sticks of unsalted butter, room temperature
1 teaspoon vanilla extract
1-2 packages white vanilla candy melts
sprinkles (optional)
50 4-inch lollipop sticks

Bake the cakes according to package directions. Let cool completely.

Make the frosting. In a small metal or glass bowl set over a pan of barely simmering water, whisk together the egg whites and the sugar, whisking constantly until the sugar has dissolved and the mixture resembles marshmallow cream, about 3-4 minutes. Pour the mixture into the bowl of a stand mixer fitted with the whisk attachment. Beat on medium speed until the mixture has cooled a bit and has formed a thick, shiny meringue, about 5 minutes. Change over to the paddle attachment and beating on a medium speed, add the butter one tablespoon at a time, mixing until completely incorporated after each addition. After all the butter has been added, mix in the vanilla, then beat on medium-high speed for 6-8 minutes, until frosting is light and fluffy and smooth.

When the cakes are room temperature, crumble them into a large bowl with your fingers until broken up into pea-sized bits. Mix in 1 and 1/4 cups of the frosting to start with, using either a large wooden spoon, or you hands if you want to get messy. Mix until the frosting is evenly dispersed. Take a quarter sized about of the cake mixture and try rolling it into a ball with the palms of your hands. If it stays together, continue to roll the rest of your cake mixture into balls and place them on a parchment or wax paper lined baking sheet. If they fall apart or do not hold together, add a little more frosting until the mix is moist enough to allow you to roll an intact ball.

Once you have rolled all the cake mix into balls, place in refrigerator and chill for about 30 minutes. When the cake balls have been chilled, melt a small amount of the candy melts in a microwave safe bowl according to package directions. Take one of the sticks, dip about 1/2 inch of the end into the melted candy and stick it about half to three-quarters of the way through the cake ball. Don't go too far into the cake ball, or it will fall apart. The candy melts will help adhere the stick to the cake.

Place the cake pop (we can officially call them pops now since they are now on a stick) back onto the parchment and repeat process with all remaining balls. Place the cake pops in the freezer for 15-30 minutes before coating. This will save you a lot of headache when trying to dip the cake pops into the hot candy melts. If they are mostly frozen, you will have a much easier time getting them to stay on the stick while dipping and tapping the excess coating off. So don't rush this step.

Once the cake pops have been chilled, melt the rest of the package of candy melts according to package directions, and add your candy coloring, if using. I kept the majority of the cake pops in the freezer and took them out about 5 at a time. This way, the whole pan of cake pops doesn't come up to room temperature while you are dipping the first batch.

One at a time, dip the cake pops into the melted candy coating being sure to get the coating all the way up over where the stick is attached to really seal it in. GENTLY tap off the excess coating on the edge of the bowl while rotating the cake pop, to get a even layer all the way around.

At this point you can do one of two things. If you want lollipop-like cake pops, you can stick them in a piece of styrofoam, let them dry pop side up, and serve them just like that. If you do it this way, you may want to reshape the tips of the balls a bit with your fingers before dipping them, as they may have a flattened bottom from sitting and chilling.

If you are making 350 of them it may be easier for you to put them pop side down with the sticks up in the air. They are still just as cute, but easier to make in large quantities, plus you don't have to worry about the flattened bottom since you are just putting it back in that same position anyway. I will leave it up to you.

While the candy coating is still wet, feel free to go crazy with sprinkles, edible glitter, or even crushed nuts. If you are piping or dipping another color onto the pops, wait until the base layer is completely dry before doing so. You may need to melt more candy melts depending on how thick your coating ends up, always have extra bags on hand.

Let cake pops dry for at least an hour or two before packaging them up. I placed mine in a paper towel-lined ziploc baggies and put them into the fridge. You can leave them at room temp for a day or two, especially if you are using canned frosting, or even freeze them for a few weeks. These things have the shelf life of canned goods, I swear to god. My neighbors were actually still rationing the 10 or so that I gave them in return for fridge space, nearly two weeks after the wedding. I told you, crack on a stick, that is the only explanation I have.

Pin It

LinkWithin

Related Posts with Thumbnails