Showing posts with label Bridal Shower. Show all posts

Monday, May 2, 2011

Will Starbucks Kill the Cake Pop?


**This post was originally published on HonestCooking.com, a brand new online food magazine, for which I am a contributor. The website launched in March, and it is a great new resource for recipes, travel, restaurant reviews and foodie opinion pieces. Check it out here!**

I can’t tell you how many people in the past few weeks have asked me “did you know that Starbucks sells cake pops now?”. Some say cake pops are the new cupcake, and they seem to be everywhere you look. They are taking over food blogs, they are replacing cupcakes at weddings, and now they are being sold at the international coffee chain, Starbucks.

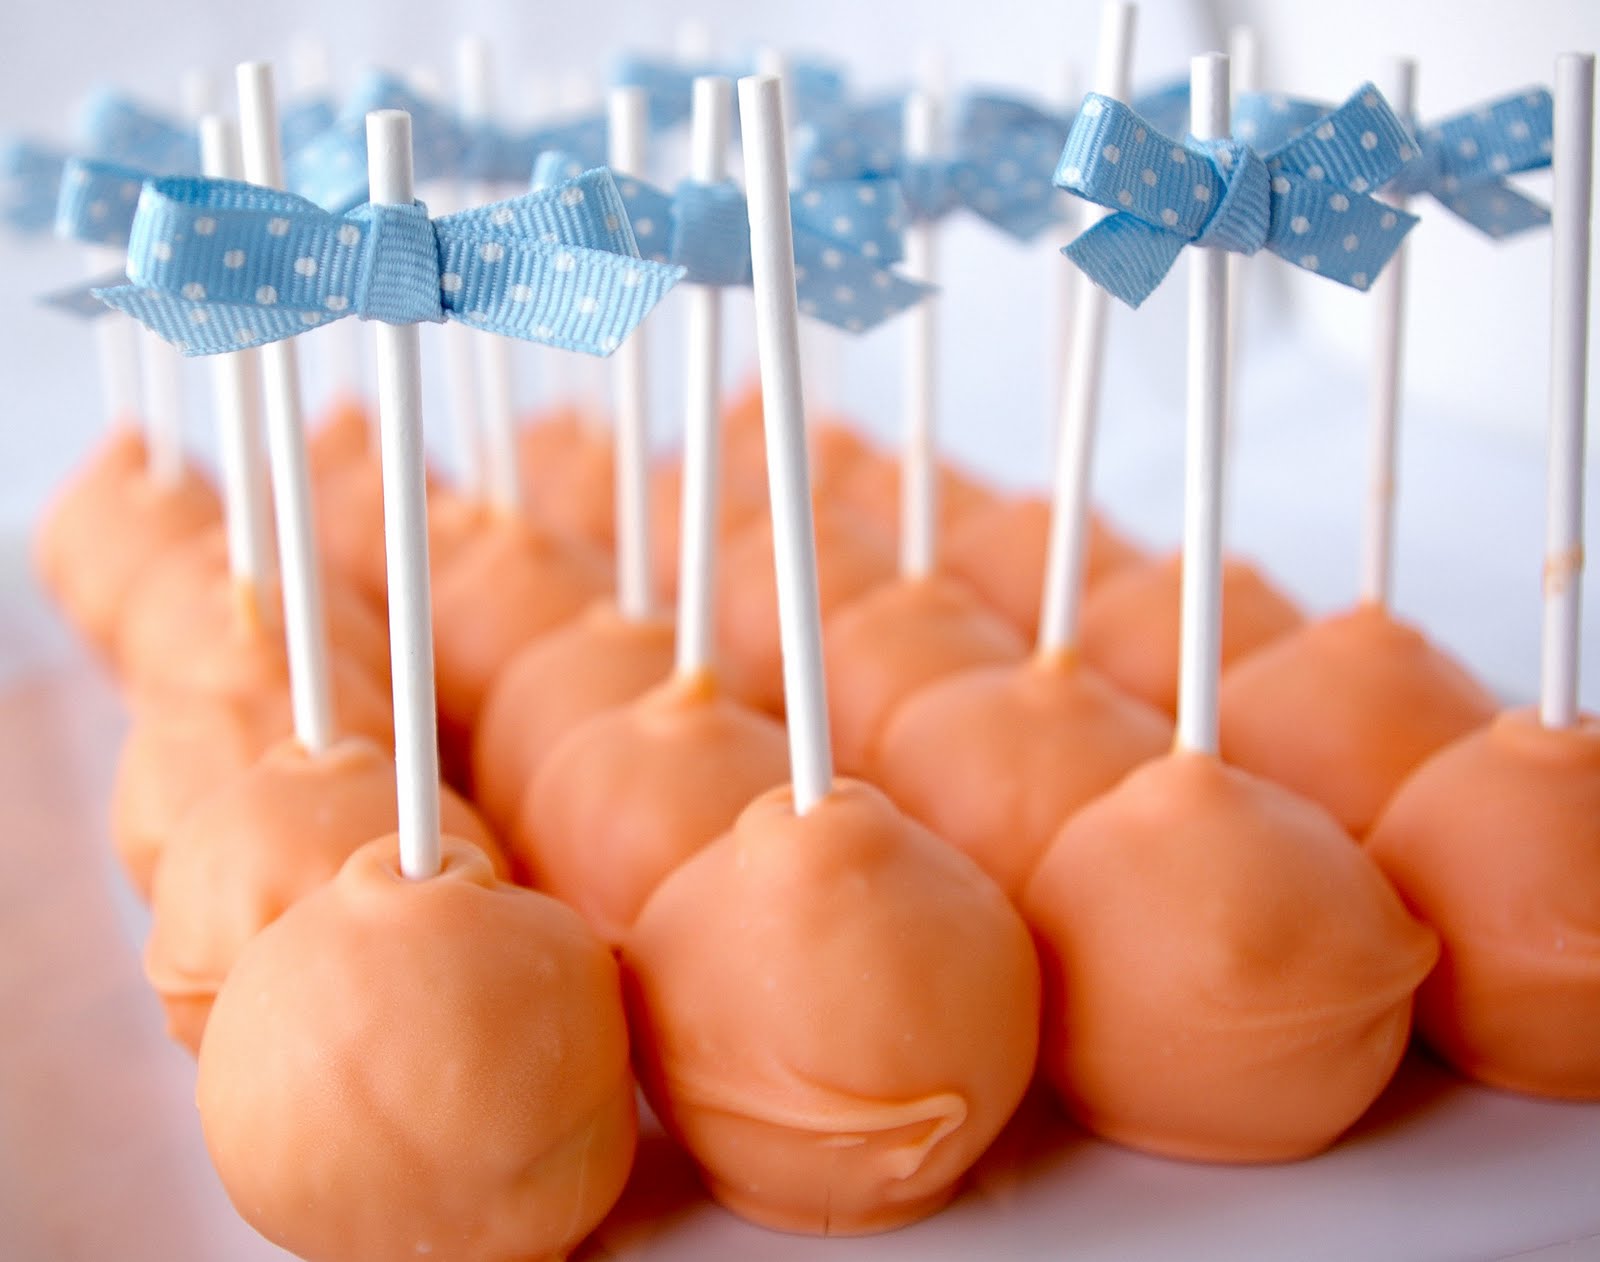
A cake pop is essentially cake, crumbled and mixed with frosting, formed into a ball, popped on a stick, and dipped in a super-sweet candy coating. I made cake pops for the first time for a friend’s wedding last spring (about 350 of them to be exact) and since then, virtually everyone I know has become obsessed. Certain friends (who shall remain anonymous) have been known to hoard them in their freezer and ration them out until the next batch of leftovers is delivered. It’s madness I tell you.


Will the appearance of cake pops at Starbucks mark the beginning of the inevitable cake pop backlash? The overexposure and obsession with a new food trend can quickly turn it from hip and current to passé and cheesy. With their new home at a coffee chain that many people already love to hate, will 2011 be the year of the death of the cake pop trend? Only time will tell I guess.


Until then, we can still delight in the near-sickeningly sweet treat that is the cake pop. Here are instructions for some bright colorful pops, perfect for a spring celebration or a fun Easter treat.


Lemon Cream Cheese Cake Pops
Makes about 50 pops

Cake Pops:
1 batch lemon-buttermilk cake, baked and cooled
1 batch cream cheese frosting (recipe below)
1-2 packages white vanilla candy melts (if you cannot find candy melts, you can use white chocolate, or almond bark the same way)
candy melt coloring (optional, but you cannot use frosting coloring, or liquid coloring unfortunately, the candy melts will seize from the water content)
sprinkles (optional)
50 4-inch lollipop sticks

Crumble the cakes into a large bowl with your fingers until broken up into pea-sized bits. Mix in about 2/3 of the frosting to start with, using either a large wooden spoon, or your hands if you want to get messy. Mix until the frosting is evenly dispersed. Take a small amount of some of the cake mixture (approximately 2 tablespoons or so) and try rolling it into a ball with the palms of your hands. If it stays together, continue to roll the rest of your cake mixture into balls and place them on a parchment or a wax paper lined baking sheet. If they fall apart or do not hold together, add a little more frosting until the mix is moist enough to allow you to roll an intact ball. You may not need to use all your frosting. I like to use the least amount of frosting possible, as it helps keep the texture of the cake pops more cake-like, and less mushy.

Once you have rolled all the cake mix into balls, place in refrigerator and chill for about 30 minutes. When the cake balls have been chilled, melt a small amount of the candy melts in a microwave safe bowl according to package directions. Take one of the sticks, dip about 1/2 inch of the end into the melted candy and stick it about half to three-quarters of the way through the cake ball. Don’t go too far into the cake ball, or it will fall apart. The candy melts will help adhere the stick to the cake.

Place the cake pop (we can officially call them pops now since they are now on a stick) back onto the parchment and repeat process with all remaining balls. Place the cake pops in the freezer for 30-60 minutes before coating. This will save you a lot of headache when trying to dip the cake pops into the hot candy melts. If they are mostly nearly frozen, you will have a much easier time getting them to stay on the stick while dipping and tapping the excess coating off, so don’t rush this step!

Once the cake pops have been chilled, melt the rest of the package of candy melts according to package directions, and add your candy coloring, if usingdesired. I kept the majority of the cake pops in the freezer and took them out about five5 at a time. This way, the whole pan of cake pops doesn’t come up to room temperature while you are dipping the first batch.

One at a time, dip the cake pops into the melted candy coating being making sure to get the coating all the way up over where theon to the stick is attached to really seal it into create a good seal. GENTLY tap off the excess coating on the edge of the bowl while rotating the cake pop, to get a nice even layer all the way around. You will want to do this quickly in order to make sure to reduce any excess of the candy coating off before it starts to set.

At this point you can do one of two things. If you want lollipop-like cake pops, you can stick them in a piece of styrofoam, let them dry pop side up, and serve them just like that. If you do it this way, you may want to reshape the tips of the balls a bit with your fingers before dipping them, as they may have a flattened bottom from sitting and chilling.

I tend prefer to to place them pop side down with the sticks up in the air. They are still just as cute, but easier to make in large quantities. Plus, you don’t have to worry about the flattened bottom since you are just putting it back in that same position anyway.

While the candy coating is still wet, feel free to go crazy with sprinkles, edible glitter, or even crushed nuts. If you are piping or dipping another color onto the pops, wait until the base layer is completely dry before doing so. You may need to melt more candy melts depending on how thick your coating ends up. , it’s always good have a few extra bags on hand.

Let your cake pops dry for at least an hour or two before packaging them up. I placed mine in a paper towel-lined ziploc baggies and put them into the refrigerator. You can leave them at room temp for a day or two, or even freeze them for a few weeks.


Lemon Buttermilk Cake:
3 1/2 cups (349 grams) cake flour
2 cups (383 grams) granulated sugar
1 tablespoon baking powder
1/2 teaspoon salt
1 cup unsalted butter (2 sticks, 459 grams) room temperature
1 cup buttermilk (3,5 dl) room temperature
4 large eggs, room temperature
2 large egg whites, room temperature
1 teaspoon vanilla extract
1 teaspoon lemon extract
zest of one large or two small lemons

Preheat oven to 350 degrees F. Lightly butter and flour two 8 or 9-inch round cake pans.

In the bowl of your stand mixer, sift or whisk together the cake flour, sugar, baking powder, salt, and lemon zest. Add the butter and half the buttermilk. Beat with the paddle attachment on a medium-low speed until combined and smooth, about 3-4 minutes.

In a medium sized bowl, with a fork, whisk together the eggs, egg whites, the rest of the buttermilk, and the vanilla and lemon extracts to combine, just until eggs are broken up. Add the egg mixture to the batter in 3 additions, mixing on medium speed for 2 minutes after each addition, being sure to scrap down the sides of the bowl frequently.

Divide the batter evenly between the two pans, and bake on the middle rack of the oven for 35-40 minutes or until a toothpick or skewer inserted into the center comes out clean. Let cool in pans until they are cool to the touch, then turn out of pans and cool completely on wire racks.

Cream Cheese Frosting:
16 ounces (454 grams) cream cheese, softened
1/2 cup unsalted butter (230 grams) room temperature
1 teaspoon vanilla extract
2 1/2 cups (325 grams) confectioners’ sugar
pinch of salt

In a stand mixer, combine the cream cheese and butter, and beat on medium high speed until smooth. Add the vanilla and salt and mix until incorporated. Gradually add the sugar, and beat until light and fluffy, about 3-4 minutes.

Friday, September 10, 2010

Creme Brulee Tartlets


How do you make creme brulee better than it already is? Add some cinnamon and vanilla bean, and put it inside a buttery, flaky pastry tart shell. That's how. Plus there is always the added bonus when making creme brulee of using a kitchen torch. There is nothing like a little pyrotechnics at 7:00 am on a saturday morning, am I right?

It may be a little more involved than your typical creme brulee, but it is so so worth it. Someone commented on the post I did about the mini fruit galettes, praising/giving me the crazy eye for taking the time to roll out each little disc of dough, and meticulously crimping each tart. Well folks, its true, I am kinda crazy. I will be the first to admit that. I take pleasure in the little things in life, and by 'little things' I mean teeny weeny food items. Making them is all part of the fun. Do most people like to sit at their center island for 12 hours rolling and re-rolling, filling and chilling, baking and cooling, freezing and thawing? No. But I do. I realize I am getting into Dr. Seuss territory here, so lets get on with the recipe.


I used the same pate brisee (short crust) recipe as I did for the mini stone fruit galettes. This made the baking marathon much easier by utilizing one component in two desserts, but they were so different from each other, that I don't think it was obvious. These rich little morsels are a fantastic addition to any dessert table, and next time you make creme brulee, think about putting it in a pastry shell, your taste buds will thank you.


Cinnamon & Vanilla Bean Creme Brulee Tartlets
adapted from Bourke Street Bakery Cookbook via AlmostBourdain.com
Makes about 20-24  3.25" Tartlets

720 ml heavy whipping cream
1/2 cinnamon stick
1/2 vanilla bean, split lengthwise to expose seeds
10 egg yolks
80 grams granulated sugar, plus extra for torching
1 batch pate brisee, recipe below

In a large saucepan over medium-low heat, combine the cream, cinnamon stick, and vanilla bean and bring just to a simmer. Remove from heat, pour into a glass or metal bowl, cover with plastic wrap, and refrigerate for about 4 hours or overnight.

Reheat the cream mixture just to a boil, then remove from heat and set aside.

In a large metal or glass bowl, whisk the egg yolks and sugar for about a minute until the sugar is mostly dissolved.

Pour about 1/4 of the hot cream mixture through a sieve into the egg yolk mixture and whisk well to combine. Pour the rest of the cream through the sieve into the egg yolk mixture, and discard the leftover cinnamon stick and vanilla bean pod. Whisk well to combine.

Set bowl containing egg/cream mixture over a pot of barely simmering water to create a double boiler, making sure that the bottom of the bowl is not touching the water itself. Cook, whisking constantly (this will give you arm a fantastic workout) over the simmering water for 10-15 minutes. Note that if you double this recipe, you will be whisking for much longer, about 25-30 minutes.

Once the custard has thickened, remove from heat and whisk for another two minutes to start the cooling process. Let cool at room temperature for about an hour, whisking every 5-10 minutes or so to aid the cooling. Once it has cooled, set a layer of plastic wrap directly on the custard, this will prevent it from getting a skin, and chill overnight to set up a bit.

The next morning fill the tart shells (see directions below for pastry crusts) with the custard. You can overfill them a bit and then use a off set spatula to scrape any excess off the top, leaving a nice flat surface for the torched sugar. Once all the tarts are filled, chill them for at least 30 minutes before torching.

Sprinkle about a teaspoon or so of sugar in a thin layer over each tart, and use a kitchen torch to caramelize sugar. Concentrate mostly on the center, and torch gently around the edges being careful not to burn the edges of the pastry. Chill the tarts for another 30 minutes to reset the melted custard and sugar. You can sprinkle on some chopped nuts, or garnish with some fresh raspberries.


Pate Brisee Tart Shells
from Bourke Street Bakery Cookbook via AlmostBourdain.com
makes about 20-24 shells

400 grams (14 oz) unsalted butter, chilled, cut into 1/2 inch cubes
1 tablespoon white distilled vinegar
100 grams (3 1/2 oz) granulated sugar
2/3 cup water, chilled
665 grams (1 lb 7 1/2 oz) all purpose flour
1 teaspoon salt

Remove butter from fridge 20 minutes before mixing.

In a small bowl, combine sugar, water, and vinegar, stir to aid the dissolving of the sugar. Set aside in refrigerator for 10 minutes. Then, stir again to completely dissolve sugar.

In a food processor, pulse the flour and salt together a few times to combine. Add the butter, and pulse in one second bursts about 3-4 times until butter is cut in and evenly dispersed. You should have visible chunks of butter in your flour mixture, this is where the flakiness comes from.

Pour mixture into a large bowl and make a little well in the middle of the flour. Pour the vinegar water mixture into the well and gently mix liquids into the flour with a fork. When liquid is evenly dispersed, dump dough out onto a clean surface and knead gently a few times, just until dough comes together in one cohesive ball. It may be a bit shaggy or falling apart, but that's okay, while it is resting the moisture will bind everything together.

Using a 4-inch round cookie cutter, cut 10-12 circles out of each disc of dough. Press each disc into a 3 1/4 inch fluted tart mould, being careful not to stretch the dough, as this will cause shrinkage when baking. Push the excess off the edge with your thumb, and make sure the dough gets into each nook and cranny of the tart mould. 

Freeze shells for at least 20 minutes before baking. Preheat oven to 400 degrees F. Line each tart shell with a small piece of tin foil and fill with beans, rice, or pie weights. This is called blind baking. It helps the dough to stay fairly compact and not puff up too much to give you ample room for your filling. Place tart shells on a baking sheet and bake for 20-25 minutes, until shells are a golden brown. You should flip the pans top to bottom and front to back halfway through for even baking. 

Let shells cool in moulds for at least 15 minutes, then gently un-mold and cool completely on a cooling rack. You can make these ahead of time, then freeze until ready to fill. 


Between these, the mini galettes, and the macarons, the bridal shower dessert table was a hit. The extra effort was absolutely appreciated by bride, groom, and guests alike. 


Wednesday, September 8, 2010

I Win


I win!! I feel the need to do a victory lap around the apartment. Maybe even around the block. I made a near perfect batch of macarons to serve at the most recent bridal shower I attended. I ate enough of them myself that I should probably extend that victory lap a few miles...


I had the feet, I had the cake-like interior with almost no air pocket, I had the shiny smooth shells, and for the VERY first time, they popped right off the baking sheet. I felt great, I was elated, I was feeling pretty good about myself, then the next pan exploded. Oh well, I will always have the memory of that first pan to cling to.

What did I do differently this time? Well a few things. First and foremost, I went back to the basics. I made plain ol' almond macarons. No other nut mixtures, no fruit powder, just egg whites, almond meal, sugar, and powdered sugar. That's it. No fancy stuff (well except for a bit of hot pink food coloring). This helped to rule out any inconsistencies that may have been caused by said additions. 


Secondly, I baked one pan at a time. I put an empty pan on in the lower third of the oven, put the macs in the top third oven the oven for the first 10 minutes. Then I took the empty pan out, and put the macs in the bottom third. This, I think, allowed the heat to the bottom of the pan be a little gentler for the first half of baking (thus not cracking/exploding shells) but still allowing the strong heat from the bottom for the second half of cooking to fully bake the guts of the cookie, achieving the cake-like interior. This is purely hypothesis, further testing and tasting may be needed. I think my neighbors and co-workers will be just fine with that. 


As soon as I figured this out, I went straight for the chocolate macarons. These are still pretty basic on the spectrum of never-ending macaron flavors. Just substituting a few tablespoons of powdered sugar for a few tablespoons of cocoa powder created lovely deep chocolate cookies. 


For the fillings this time, I used a dark chocolate ganache, a vanilla butter-cream, and blackberry preserves. The jam filled ones were actually my favorite. I only made them since the groom is lactose intolerant, but I sure am glad I did. 


Plain ol' Hot Pink Macarons
adapted from Tartelette

90 grams egg whites (aged, loosely covered at room temperature for 24 hours)
200 grams powdered sugar
25 grams granulated sugar
110 grams almond meal (I used Bob's Red Mill, but you can grind your own almonds as well)
a dab of gel food coloring (or a teaspoon of powdered food coloring)

In your food processor, combine the powdered sugar and almond meal, and pulse a few times to combine. Pour into a small bowl and set aside.

In the bowl of your stand mixer fitted with the whisk attachment, beat the egg whites on medium-high speed until foamy, then gradually add the sugar and beat until a nice glossy meringue forms. This should take a minute or two on a medium high speed. Tartelette says it should look like shaving cream, I'd take her word for it, she is the master.

Transfer egg whites into a large bowl, add half of the powdered sugar/almond mixture, and your food coloring. With a large spatula, quickly fold the egg whites over themselves to let some of the air out, combining with the almond mixture. Add the rest of the almond mixture and fold gently until your batter has come together, no more than 50 strokes or so. You want a batter that if you let a clump fall off your spatula, it will spread and meld back into itself within ten seconds. If it stands up and does not spread at all, give the batter a few more folds until it does. My best advice here is to test it frequently when you think you are starting to get close to the end product, this will help you to not over mix your batter.

Line two rimmed baking sheets with parchment paper or silpats, and spoon batter into a piping bag fitted with a plain round tip (one with a fairly large opening). Pipe 1 1/5 inch rounds, evenly spaced, onto your baking sheet. Once all the macarons have been piped, pick up your baking sheet and drop it from about 6 inches above the counter. This impact will bring any air bubbles to the top of the macarons, and help them spread evenly. Do this a few times, then let the macarons sit at room temperature for about an before baking. This will create those nice shiny shells.

After the shells have rested, preheat oven to 300 degrees, place on rack in the top third and one in the bottom third of your oven. Bake one pan at a time, starting on the top shelf with an empty pan on the bottom shelf, and after about 10 minutes remove the empty pan and move the shells to the bottom shelf. bake for another 8-10 minutes (depending on the size of your shells), or until fully cooked.

Honestly the best way to tell if they are done, is to sacrifice one of you shells, pop it off the parchment and break it open. If it is gooey inside, bake for another few minutes, if it is done, take them out. If they are overdone, not to worry, after filling them and letting them age in the refrigerator for a day or two, they will most likely still be delicious.

Dark Chocolate Macarons

Same as above, omitting the food coloring and substituting 2 tablespoons of dark cocoa powder for 2 tablespoons of the powdered sugar. You can mix the cocoa powder in with the nut mixture before processing. 


Dark Chocolate Ganache

1 cup dark chocolate, chopped
1/2 heavy whipping cream

Place chocolate into a small glass or metal bowl. In a small saucepan over medium low heat, bring the cream just to a simmer and then pour over the chocolate. Leave the cream/chocolate mixture alone for two minutes. Gently whisk cream and chocolate together until smooth. Let cool until spreading consistency, about 5-10 minutes.

Vanilla Swiss Meringue Butter-cream
from Tartelette

1 cup of sugar
4 egg whites
3 sticks of unsalted butter, room temperature
1 teaspoon vanilla extract

In a small metal or glass bowl set over a pan of barely simmering water, whisk together the egg whites and the sugar, whisking constantly until the sugar has dissolved and the mixture resembles marshmallow cream, about 3-4 minutes. Pour the mixture into the bowl of a stand mixer fitted with the whisk attachment. Beat on medium speed until the mixture has cooled a bit and has formed a thick, shiny meringue, about 5 minutes. Change over to the paddle attachment and beating on a medium speed, add the butter one tablespoon at a time, mixing until completely incorporated after each addition. After all the butter has been added, mix in the vanilla, then beat on medium-high speed for 8 minutes, until frosting is light and fluffy and smooth.


Fill macarons with about a tablespoon of butter-cream, ganache, or preserves, and refrigerate for at least 24 hours. This will fully develop the cookie, making them moist and cake-y, and most importantly, delicious. 


Sunday, August 29, 2010

Mini Stone Fruit Galettes


The heat is on. 120 mini desserts down, 1 two-tiered wedding cake to go.


I am officially halfway through another baking marathon, and I can see the light at the end of the tunnel. But as you may imagine, I don't find myself with a lot of free time right now. So I will let these next few desserts mainly speak for themselves through their pictures.


I will say though that I tried a new pate brisee (sweet shortcrust) recipe, and I won't be going back to the old one. Ever. The last one I used from Dorie Greenspan was good, almost sugar cookie like in taste and texture (maybe I did it wrong, who knows) but this one, oh my god, this one turned out flaky, buttery, and almost like a dense puff pastry. My boyfriend actually uttered the words "this is my favorite thing you have ever made". It's that good.

Take that crust and fill it with fresh stone fruit and ground nuts, and you have a winner. This is my kind of dessert, lots of butter, not too sweet, and comes in a compact size.

I made these galettes miniature of course, but you could also use this to make one big galette, for a fairly quick and quite easy dessert. Personally though, I can barely handle how cute the little guys are. I mean come on, look at them.

You know how some people gush and coo at any little baby they see on the street? Well that's how I am with miniature baked goods. I think I have a problem.


Mini Stone Fruit Galettes

makes 20-24 galettes

1 batch Pate Brisee (sweet shortcrust pastry), rolled out to two 1/8 inch thick discs and chilled (see recipe below)
2 large nectarines (or 4 large black plums), pitted, cut in quarters, and sliced crosswise very thinly
3 tablespoons sugar
2 teaspoons lemon juice
zest of one lemon
1 egg, beaten with 1 tablespoon water
1/4 cup pistachios (I used pistachios with the nectarines, and almonds with the plums) ground finely
1/2 cup turbinado sugar

In a medium bowl, mix together your fruit, 3 tablespoons of sugar, lemon juice and lemon zest. Let the flavors mingle for at least an hour in the fridge. Meanwhile, remove one disc of dough from the fridge and use a 4.5-inch round cutter to cut 10 circles. (you may fit more, I got 12 out of some of my dough). Place circles back in fridge, and repeat with the other disc.

Pour fruit mixture into a sieve and set over a large bowl. Let as much liquid drain off as possible so your galettes don't get soggy.

I didn't get my dough as thin as I wanted it, so as I was assembling these, I placed each disc between two sheets of parchment paper and rolled them a bit thinner, and wider (about 5-6 inched across).

Working with 6-7 discs at a time (if you can fit all 20 of these onto two baking sheets, go for it, I chose to work in smaller batches) re-roll each disc if needed, and space evenly on a parchment paper lined baking sheet. Place about a teaspoon of you ground nuts in the center of each round, and top nuts with about 1-2 tablespoons of your fruit mixture.

Gently fold dough up around the fruit, crimping and pinching it together every so often. A trick here is to dip your crimping finger into your egg wash before each pinch, this way, they won't unfold and fall apart in the oven, as the egg acts as a glue. Brush some more egg wash over all the exposed dough (I just used my finger) and sprinkle about a teaspoon of turbiando sugar over dough and fruit. Repeat with remaining dough.

Chill assembled galettes for at least 20 minutes before baking. This will also help them stay together in the oven, and encourage the flaky dough to develop properly.

Preheat your oven to 400 degrees F. Bake on middle racks for 25-30 minutes, depending on how big your galettes are, and how thick the dough is, until the fruit is a little bubbly and the crust is a deep golden brown, switching pans top to bottom, and front to back halfway through baking time. Let cool completely on a baking rack, and store in an airtight container in the refrigerator if you are able not to eat them all straight from the oven.

These are delicious served warm, but were really really good served the next day at room temperature. Three days later, they are still wonderful straight out of the fridge.


Pate Brisee
recipe from Bourke Street Bakery Cookbook

400 grams (14 oz) unsalted butter, chilled, cut into 1/2 inch cubes
1 tablespoon white distilled vinegar
100 grams (3 1/2 oz) granulated sugar
2/3 cup water, chilled
665 grams (1 lb 7 1/2 oz) all purpose flour
1 teaspoon salt

Remove butter from fridge 20 minutes before mixing.

In a small bowl, combine sugar, water, and vinegar, stir to aid the dissolving of the sugar. Set aside in refrigerator for 10 minutes. Then, stir again to completely dissolve sugar.

In a food processor, pulse the flour and salt together a few times to combine. Add the butter, and pulse in one second bursts about 3-4 times until butter is cut in and evenly dispersed. You should have visible chunks of butter in your flour mixture, this is where the flakiness comes from.

Pour mixture into a large bowl and make a little well in the middle of the flour. Pour the vinegar water mixture into the well and gently mix liquids into the flour with a fork. When liquid is evenly dispersed, dump dough out onto a clean surface and knead gently a few times, just until dough comes together in one cohesive ball. It may be a bit shaggy or falling apart, but that's okay, while it is resting the moisture will bind everything together.

Cut ball of dough in half and shape each half into a disc about 1/2 - 3/4 inch thick. Wrap in plastic wrap and chill for at least two hours, or overnight. Take dough out of fridge about 30 minutes before you roll it out. Place dough between two sheets of parchment paper and roll out to a 1/8 inch flat disc. Always start in the center of the disc and roll outward, turning the disc 30 degrees after each roll to get an even thickness throughout. Place thin discs on a flat platter or pan, and chill for two hours to let the gluten relax. You are now ready to cut dough into circles for the galettes.

I used this crust for another yummy dessert for this bridal shower, so stay tuned, more minis to come!


Wednesday, June 30, 2010

More pops...


I realize this is a bit early in my blogging career to be repeating recipes, but screw it. Here's some more cake pops.

I couldn't resist. They are just too freaking cute. Seriously look at how cute they are! I am so humble.

I attended my boyfriend's cousin's bridal shower this past weekend and was asked to do the desserts. After some of the ladies saw my last cake pop post, they requested that I make them for the shower, of course I obliged. The wedding colors this time let me experiment with some new flavors and food colorings, plus I decided this time, I would go completely from scratch. I was regretting this decision a little when 4:30 am rolled around the night before the shower, and I was still sitting at my center island tying little tiny bows on the sticks, but was quickly reassured that they tasted WAY better than the boxed cake versions. Whew, all worth it. Thank god.

The colors if you haven't guessed by now were orange and blue, and I did my best to match the bride's invitations with the candy melt coating and the bows.

I made some with standard yellow cake, with an added buttermilk tang, which were then mixed with vanilla buttercream and dipped in orange candy melts. The second batch consisted of blue velvet cake, mixed with cream cheese frosting, and dipped in white candy melts. If i didn't have an severe dislike of any and all blue-colored foods, I would have eaten a whole lot of these guys. My waistline thanks me for this unfounded and completely irrational food aversion.

These turned out VERY blue, even though I used way less food coloring than called for. I need to work on my food coloring skills, well that among may other baking-related skills.

If I have learned anything though, it is that people love these bad boys, and I can imagine I will be making these over and over again, with endless possibilities of fillings and toppings, flavors and colors. I can barely stop thinking about the cake pops in my future, though that may be the fault of the sugar bomb I just consumed. Yep, I have leftovers. Thank god for leftovers.

Cake Pops

The majority of this round of pops (with the exception of the yellow cake, recipe below) is mish-mashed from previous posts on cake pops and cupcakes. I used my red velvet cake recipe and just substituted blue food coloring for the blue velvet pops. You can find the recipes and pop directions here:

Blue (Red) Velvet Cake and Cream Cheese Frosting Recipes
Buttercream Frosting Recipe and General Assembly Directions

Yellow Buttermilk Cake
adapted from Culinary Institute of America

3 1/2 cups cake flour
2 cups granulated sugar
1 tablespoon baking powder
1/2 teaspoon salt
1 cup unsalted butter (2 sticks) room temperature
1 cup buttermilk, room temperature
4 large eggs, room temperature
2 large egg whites, room temperature
2 teaspoons vanilla extract

Preheat oven to 350 degrees F. Lightly butter and flour two 8 or 9-inch round cake pans.

In the bowl of your stand mixer, sift or whisk together the cake flour, sugar, baking powder, and salt. Add the butter and half the buttermilk. Beat with the paddle attachment on a medium-low speed until combined and smooth, about 3-4 minutes.

In a medium sized bowl, with a fork, whisk together the eggs, egg whites, the rest of the buttermilk, and the vanilla to combine, just until eggs are broken up. Add the egg mixture to the batter in 3 additions, mixing on medium speed for 2 minutes after each addition, being sure to scrap down the sides of the bowl frequently.

Divide the batter evenly between the two pans, and bake on the middle rack of the oven for 35-40 minutes or until a toothpick or skewer inserted into the center comes out clean. Let cool in pans until they are cool to the touch, then turn out of pans and cool completely on wire racks.

As always, make sure the cakes are completely cool before you attempt the cake pops, otherwise your frosting will melt and you may some some trouble rolling intact balls.


Like I said the possibilities are endless when it comes to cake pops, if anyone has any interesting combinations or new fun flavors, I would love for you to share them in the comments! After all, cake pops are for sharing. Happy cake pop making, and hope you all have a wonderful 4th of July weekend!

Pin It

LinkWithin

Related Posts with Thumbnails