Friday, December 9, 2011

Blue Christmas


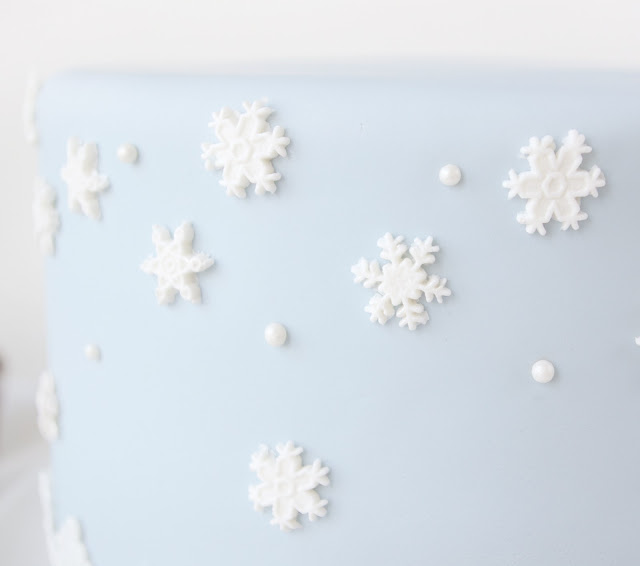
Its almost as if I willed it to snow last night by making tons of teeny tiny snowflakes out of gumpaste. Is that possible? I wonder what else I could use this power for....


It FINALLY snowed last night. I have been having a little trouble getting into the Christmas spirit with the warm and/or dreary weather this month. The minnesota girl in me craves snow as soon as mid-november hits, and this year has been a huge disappointment so far. Maybe thats why I made a blue cake last night, I think I need to start making big white fluffy cakes with mounds of snow piled on top. It will be like my own personal voo-doo cake, used for good, not evil. Unless you hate snow I guess. Sorry in advance.


I made this cake in my second to last (yay!!) cake decorating class last night, and this morning, instead of bearing down and finishing my final costing project (booooring) I decided to make some matching cupcakes! Lucky for you, I actually took some step by step pictures so you can see how I made the toppers. No, I did not freehand pipe those snowflakes, you think I am THAT crazy? Here is an easy way to get your template transferred onto your fondant to pipe over so you can get a clean, consistent design.

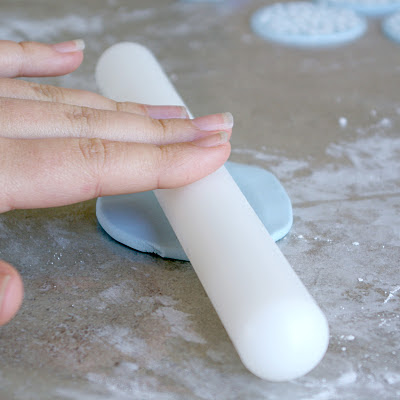
First, roll out your fondant to your desired thickness, I usually go to about 1/16 inch, pretty thin for these.


Cut out your circle, and make sure to dust a good amount of powdered sugar underneath it so it doesn't stick to your work surface. Peel the excess fondant away.


Take your paper template (that you already had cutout, because you are more prepared than I am) and gently press it into the fondant circle.


Use the pads of your fingers to gently rub all of the edges so you get a nice clean imprint. Don't press too hard or you will distort your circle and you run the risk of the paper sticking to the fondant.


Carefully peel away the paper and you are ready to pipe your design.


I used a 00 tip to pipe, I wouldn't go much bigger than a 0 or 1 if you are doing something this small and intricate. Also, I used buttercream to pipe because it's what I had on hand, but you could also use royal icing, you would probably get better line quality that way.


Don't worry if you mess up a little, just let the frosting dry for a few seconds then gently scrape it off with a gumpaste tool or exacto knife. 


You can skip this next step if you want, but I think adding a few small sprinkles, strategically placed, makes for a nice finished clean look. Plus the sprinkles hide the ugly corners. Not that you'd have ugly corners, but if you did, this would help.


If your hands are naturally always sweaty like mine, you should just be able to press your finger into each sprinkle and gently press them into the buttercream. You can also use a tweezers if you are a rockstar like that.

Let these dry for a few hours, then gently press them onto your piped frosting.


Voila! Hope you enjoyed this little tutorial, I think this is my first go at one of these. I can say it is trickier than it looks to take pictures with one hand while piping with the other.


Let it snow, let it snow, and here's hoping yours isn't a blue christmas.

Monday, November 21, 2011

Is that a chartreuse rose?


There is nothing wrong with a chartreuse rose. Who says you have to make lifelike fondant flowers in lifelike colors? Is there a rule book somewhere that I am not aware of? I will make lime green roses if I want to make lime green roses.


Maybe I am just a little extra feisty after the week that I have had. You know those food network competitions where they build the huge beautiful chocolate sculptures and the clock is ticking down and the chefs are going to put the final touches on and the thing crashes to the ground into a million little pieces in what seems like slow motion? I can officially say I know how that feels. A whole quarter of chocolate work and nothing to show for it. I didn't even get a picture before it was destroyed by a too warm chocolate kitchen. It capped off a already crummy week and drained my resolve to keep a happy face on and work through the all the crap.

I don't think I have ever been more ready for the holidays than this year. Between the stress of classes wrapping up for good, a possibly totaled car, being sick every other week, all I want to do is be home with my family and friends, not worrying about real life for a while. Soon, I will be sitting at the dinner table surrounded by all my favorite people, eating delicious turkey, brussels sprouts, mashed potatoes and cheesy corn, drinking some beaujolais nouveau, and just taking it all in.


There is just something about sharing a meal with the ones you love to set everything right, if even just for a little while. When I get back from home, its back into cake making and work mode full force until after new years. I am actually very happy that I have quite a few side projects lined up, even though I am incredibly busy. The cakes and desserts that I make for freelance projects are always the most fun, and the ones that I can pour my creativity into. No matter how many hours I put in, or long, late nights I stay up working on a cake, it's pretty much always worth it in the end.


To give someone a original, delicious, and gorgeous cake that you designed and created with your two hands is one amazing feeling. And that feeling can mean a lot when other things in your life aren't going so well.


I hope everyone reading has an absolutely wonderful thanksgiving and has some time to spend with the people in their lives who make them happy. Or at the very least I hope you get to eat a lot of mashed potatoes. 


Sunday, November 6, 2011

Autumn Cake


At one point this week, I had four fondant cakes of different shapes and sizes sitting in my kitchen. I can't bring myself to throw them away, but I don't know what to do with them. Maybe I will just let them petrify and make a cake shrine in our second bedroom. That probably won't happen, but it's an option. It's hard to dump something in the trash that you spent such a long time on, but nobody wants to eat two-week old cake (not that they will admit anyway). This cake luckily found a home this weekend for a friend's birthday and wasn't sacrificed to the garbage bin.


I am in my last quarter of pastry school, and one of my classes is a cake decorating class that focuses on fondant cakes. Unfortunately, I am not learning as much as I had hoped from this class, so I had to change my way of thinking about it. I now look forward to class as a chance to play and experiment for five hours a week with unlimited materials and lots of fun tools. This week our only restriction was an autumn themed cake, and since I love fall, I was really looking forward to it. I wanted to make a clean and classy fall cake, one that wasn't covered in pumpkins and marzipan fruit, perhaps something that could even be used as a wedding cake. We got to play with the airbrush machine to make more realistic leaves (Santa, if you are listening, Bria has been a very good girl this year and would like an airbrush machine for Christmas).


One great tip I did pick up this week was that I should start hoarding my egg cartons and always be on the lookout for other containers that can be reused to hold gum paste flowers and figures. Drying petals or leaves in a round cup gives them more dimension and movement than if you were to let them dry flat. You can purchase little round cups made specifically for this purpose, but why spend the money when there are things already in your house that work just as well? I happen to shop as Costco, and when honeycrisp apples came out this year, I bought a huge container of them. As I was reaching for the last one this week, I realized that the plastic clam shell they came in was perfect for flower shaping.


A drawback of using bowls that I had around the apartment to hold flower layers was that most of them had a flat bottom, but these apple cups are perfectly spherical. I cannot wait to test them out. Next time you are at the grocery store, check out the produce section, there are all kinds of egg carton-like packaging in different shapes and sizes that may be very useful in your cake creating endeavors.


Hope you enjoyed your extra hour of sleep/play/work this weekend. Happy fall!

Sunday, October 30, 2011

Roasted Rutabaga Beer Cheese Soup


Naaaa na na SOUP!! Na na, na naaa, na na. Naaaaaa na na SOUP!

So there is a bass-laden jock jam's song stuck in my head with a stadium of screaming fans in the background, and they are yelling SOUP instead of HEY! It must be fall.

This is how excited I get over soup season. I may or may not actually shimmy around the apartment humming this to myself while my 13-quart le crueset is full to the brim with bubbling soup. Those of you who know me probably aren't very shocked by this startling confession.

So let's talk about this soup. It's got beer, it's got cheese, and it's got buttery roasted rutabagas and parsnips. That's enough vegetables to allow you to feel like it's good for you.


Beer Cheese Soup with Roasted Root Vegetables
makes 12-16 servings

you can halve this recipe if you like, it makes a lot of soup, but I almost never make small batches so that I can eat it for lunch for a few days and freeze a bunch.

1 large rutabaga, peeled and diced into 1/4 inch pieces
4-5 small-medium parsnips, peeled and diced into 1/4 inch pieces
1-2 tablespoons olive oil
2 large vidalia onions, diced small
6 cloves garlic, minced
2 - 12 oz bottles of beer, preferable a full flavored lager or ale
6 cups vegetable stock (use the good stuff that comes in the cartons, not the 99 cent cans, you want the full flavor of the vegetable stock)
2 sticks ( 1 cup) unsalted butter
3/4 cup flour
8 cups whole milk
2 large bay leaves
3.5 lbs cheese, shredded (I used a mixture of Monterrey jack, white cheddar, and extra sharp cheddar)
3-4 tablespoons chipotle-adobo sauce, depending on how spicy you want it
2-3 teaspoons salt, to taste
1-2 teaspoon freshly ground black pepper, to taste
few handfuls of italian parsely, minced

Preheat oven to 425 degrees F. Toss the diced rutabagas and parsnips with olive oil to coat and season well with some of the salt and pepper. Spread evenly on a lined baking sheet and roast until browned and cooked through, about 45 minutes - 1 hour.

Meanwhile, in a large stockpot or dutch oven melt 4 tablespoons of the butter (1/2 stick) over medium heat. Add the onions, garlic, and bay leaves and sweat until the onions are very soft and translucent, about 20-30 minutes (if you are doing a half recipe, this probably wont take as long). At this point I opted to remove the onions with a slotted spoon into a bowl and add back into the soup a bit later. I felt that making a good roux would be easier if I didn't have to worry about mashing up the onions.

So, turn off the heat, and using a slotted spoon, remove the onions to a bowl and set aside, leaving whatever liquids are left in the pan. In a small saucepan, gently heat your milk over medium-low heat. You do not need to boil it, you just want it hot to add to your roux. Add the rest of the butter to your stockpot and melt over low heat. When the butter starts to bubble, add the flour and cook over medium-low heat, whisking constantly until light golden brown, about 5 minutes. Slowly whisk in the hot milk and continue cooking until it is completely combined and slightly thickened, just a minute or two.

In a few additions, add the cheese to the milk mixture and stir over low heat until cheese has completely melted. Add the beer, vegetable stock, and adobo sauce, and bring to a very gentle simmer. You want to be careful not to scorch your cheese. Add your onions and roasted vegetables to the soup, season with salt and pepper, and cook over low heat about 30-40 minutes until soup is nice and thick.

Make sure to taste the soup a few times while it is simmering, you may need to add more salt and pepper, or perhaps some more adobo sauce. You want to have a little heat at the end, but not have it overwhelmingly taste like chipotle peppers. Also, if the beer you used is bitter (I used an IPA the first time I tried this soup) you can add a few big spoonfuls of sugar to balance it out.

Garnish with fresh parsley, and serve with some n ice crusty bread. To take the soup to another level, grill some bratwursts and serve them sliced on top of the soup. It almost makes you feel like you are in Wisconsin, which is a good thing entirely.


If you have a killer soup recipe, please please please leave it in the comments, I am always on the lookout for new ones! Happy Fall!

Tuesday, October 18, 2011

Topsy Turvy Mummy Cake


I don't know what it is about Halloween, but it is quickly becoming one of my favorite food holidays. It is not necessarily the meals associated with Halloween that I love, but as an aspiring pastry chef, the treats and sweets that come along with this holiday are just so much fun. Pumpkins, ghosts, witches, mummies, bats, and monsters, with these creatures the possibilities for fun desserts, spooky to silly, are endless.

Since I no longer let myself buy five bags of Halloween candy (I have no trick or treaters and therefore would just eat it all myself) I like to make something from scratch to fill the void left by the lack of bite-sized butterfingers.

After last Halloween's very popular, and delicious, ghost and pumpkin cake pops, I wanted to have a little fun again this October. My cake decoration class's topsy turvy cake assignment was the perfect vehicle for a whimsical Halloween treat.


Topsy turvy cakes aren't as hard as they look, and didn't take very much longer than a regular cake.   There is a great tutorial on how to carve and frost a topsy turvy cake over here at My Sweet and Saucy. I cut, frosted, and then covered the tiers in fondant, and then used a gauze patterned rolling pin on strips of fondant and arranged them randomly all over the cake.


The bats are cut from black gum paste with wires put in before they were dry. We used purchased cake, but I would go for a more appropriate cake flavor such as pumpkin, gingerbread, or even a spooky red or black velvet.

Here are some great cake recipes that would be perfect for this type of cake:

Gingerbread Cake
Black Velvet Cake
Red Velvet Cake
Pumpkin Cake

I hope your Halloween is a little spooky, a little silly, and a lot delicious.

Tuesday, October 4, 2011

Banana Streusel Muffins


I have a love-hate relationship with bananas. I love the taste of them, love how well they go with peanut butter, and I love that they are a healthy, easy to grab snack. The thing I don't love so much about them is that when I eat them raw, they give me a stomach ache. It's tragic really. Now, despite this, I keep buying them. I must be a glutton for punishment. I keep finding myself with a small bunch of them in my grocery cart, or sitting next to me in the car on my way to work, just willing me to eat them. So I will get about two bananas into my purchase and then tell myself not to eat any more so as to avoid the stomach ache, which results in those poor bananas going bad on my counter.

What to do you ask? I have discovered a solution. If I cook the bananas prior to eating them, no stomach ache. Unfortunately, this will probably negate the health benefits, because all I want to put them in is cake and banana bread and muffins, which all have mucho amounts of butter and sugar, but at least those poor things don't go to waste. I am really just trying to look out for the bananas, you know?


These muffins provided the perfect vessel for my abundance of bananas. They are no ordinary banana muffin though. I topped them with a banana chip walnut streusel to take them up an extra notch. With the hint of cinnamon and slightly crunchy topping, these have provided me with delightful breakfasts this week. They are both filling and easy to grab on the go, but the best part is that they are so incredibly quick to make.


Banana Walnut Muffins with Banana Chip Streusel
makes 12 muffins
adapted from Jenny Steffins

Streusel:

1/2 cup flour
1/3 cup brown sugar
2 tablespoons melted butter
2 tablespoons banana chips, chopped finely
2 tablespoons walnuts, chopped finely
1/4 teaspoon cinnamon
pinch salt

Muffins:

2 large very ripe bananas
1/2 cup sugar
6 tablespoons butter, melted
1 large egg
1 teaspoon vanilla
1 cup flour
3/4 teaspoon baking soda
1/4 teaspoon salt
1/3 cup chopped walnuts

Preheat oven to 350 degrees F. Line a 12-cup muffin pan with paper liners.

Make the topping. Mix the flour, sugar, walnuts, banana chips, cinnamon, and salt together in a small bowl. Add the melted butter and mix until well combined. Set aside.

Peel the bananas and place them in the bowl of  stand mixer fitter with the whisk attachment. Mix at low speed until bananas are mashed. Add the sugar and mix on medium-high speed for a few minutes until a bit frothy and sugar beings to dissolve.

Mix in the butter, egg, and vanilla, and mix until well incorporated, scraping down the sides a few times. Add the flour, baking soda, and salt and mix just until incorporated. Remove bowl from mixer and add the walnuts, folding them in with a spatula. Divide between 12 muffin cups and top with 1-2 tablespoons of streusel.

Bake for 18-20 minutes, until muffins spring back with pressed gently with your finger and are golden brown.

Let cool in pan for a few minutes, then remove and cool completely on a wire rack. Store in an airtight container at room temp for a few days, or freeze.

Wednesday, September 21, 2011

On the mend


Breathe in.....breathe out. Sometimes I forget these two simple tasks. Taking the time to take it all in has been a lost art as of late. I looked up from my powdered sugar - covered counter top one day, and the summer had ended without my knowledge. My favorite time of year was passing me by without a second to enjoy it. That transition period between the hot humid summer, and the crisp cool fall, that's the best part, and I was missing it.


Not this week. I am taking the time this week to sit on my deck with a big spicy glass of zinfandel, in a big cozy sweater, and read or write, or do nothing at all besides sit, stare, and sip my wine. I just wrapped up another quarter of school, and it all finally caught up to me. The five hours of precious sleep a night, the guilt of not having talked to my parents or friends in weeks, the constant streaming to do list in my head, it can wreak havoc on one's body.

So this week, I am on the mend. Catching up with the emails and the phone calls, catching up on my sleep, taking some time to relax, and putting some good food into my body, that is all that is on my to do list now.

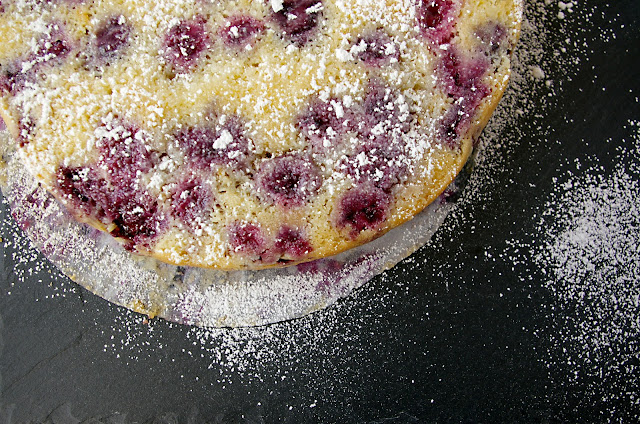
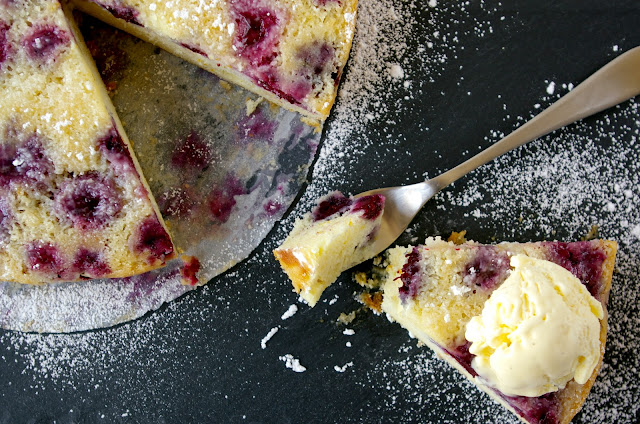
This cake, although I made it over a month ago and am just now getting around to posting it, would be near the top of my list of nourishing foods right now. It is just chocked full of blackberries, so you almost feel like you are eating something healthy (even though we all know it is still a cake). With a little bit of ice cream, and it is perfect for those lingering warm afternoons, and ever so slightly chilly evenings. Here's to the last days of summer, and a big warm welcome to the autumn months.


Blackberry Buttermilk Upside Down Cake
recipe from Bon Apetit Magazine

The original recipe calls for making this cake in a deep spring-form pan, I made it in two 9 inch cake pans for a thinner cake. I actually liked the thinness of my cakes, because there was a higher blackberry to cake ratio that way. If you would like to use both of them, you could sandwich some freshly whipped cream in between the two stacked layers, or just serve a single layer by itself, with some ice cream like I did.

3/4 cup (1 1/2 sticks) unsalted butter, room temperature
2 1/3 cups cake flour, sifted
2 1/2 cups fresh blackberries
1 1/3 cups sugar + 1/4 cup for dusting blackberries
1 1/2 tsp baking powder
3/4 tsp salt
1/2 tsp baking soda
3 eggs, room temperature
1 vanilla bean
zest of 1 large orange
1 cup buttermilk

Preheat oven to 350 degrees F. Line two 9 inch cake pans with parchment, and then butter and flour pan. Toss berries with the 1/4 cup sugar, and spread them in an even layer on the bottom of each pan.

Split the vanilla bean and with the back of a knife, scrape out the seeds and mix them with the buttermilk. Set aside.

Sift together the cake flour, baking powder, salt, and baking soda. In a stand mixer, cream together the butter and remaining sugar on medium high speed until light and fluffy. Add the eggs one at a time, scraping down the bowl and mixing well after each addition. Beat in the orange zest.

On low speed, add 1/3 of the flour mixture, then half of the buttermilk, then another 1/3 of the flour, and the other half of the buttermilk, scraping down the bowl and mixing well after each addition. Mix in the last 1/3 of the flour just until incorporated. Split the batter evenly between the two pans and smooth the top for even cooking.

Bake cakes on middle rack until golden brown, and the cake springs back when pushed gently with a fingertip, or a toothpick inserted into the middle comes out clean, about 30-45 minutes. Let cool in pan for about 15 minutes, then turn out onto wire rack with the berries facing up and let cool completely.

Thursday, August 18, 2011

Another Brick in the Wall - A 100th Post


I must be crazy. In a good way, yes, but crazy nonetheless. I thought that working two jobs and going to school three nights a week would be a fine and dandy idea, but let me tell you, it's a bit harder than I thought it was going to be. At one point this week when my alarm went off at 6:00 it took me a good hard minute to figure out if I was getting up in the AM to go to work or if I was waking up from a nap in the PM to go to class. I am also crazy for sketching up this Pink Floyd cake even though I have only worked with fondant oh...twice ever? You can put another tick in the crazypants box for staying up all night sticking little teeny tiny fondant bricks together for 50 pink-floyd themes cupcakes.


But you know what? I revel in the crazy. I am at my best when I am stressed out and way too busy. I feel better about myself when I have stuff to do, it makes me feel more grown up and responsible. Just  getting up in the morning with enough time to make breakfast and coffee before work makes me feel like I accomplished something. It's sad, yes, but its the little things in life, am I right? It also helps that I actually LOVE going to class, and now, going to work. I am two weeks into my new job at a specialty cakes bakery, and each day I think to myself, I can't believe someone is actually paying me to do this all day. This is awesome. Those thoughts are what is going to sustain me over the next few months with this insane schedule of mine. Hopefully my body clock will adjust to it's new pattern, and I can make time for relaxation and spending time with the ones I love. Until then, bring on the crazy.


This is my 100th post on this blog. It seems nuts to think that it has been two years since I started writing, and when I look back it makes me laugh when I realize how much has changed over that time. I wouldn't do a thing differently either. Thanks to all my lovely readers, your comments brighten my day, and without them, the motivation to sit down and write a post at 1:30 in the morning just wouldn't be there.


Onto the cake! One of my co-workers approached me a few weeks back and said he was throwing a Pink Floyd themed birthday party for one of his friends and if I could make a cake and some cupcakes. I of course said yes, even though I wasn't sure when I would possibly have time to make all of it, or even how I was going to make the damn thing. Sure I can totally cover a pointy cake with fondant, and have a giant rainbow sticking out if the side unsupported, why not?


This was by far the most difficult thing I have ever made, but it was so worth it to see the grins on peoples faces when I delivered it. 'Thats a cake??' is such a compliment. The cake is black velvet with a white chocolate buttercream frosting. A small departure from the typical cream cheese frosting, but it turns out its another great pairing.

Black Velvet Cupcakes & White Chocolate Swiss Buttercream
frosting adapted from Krissy's Creations
makes 24 cupcakes

Cake: 

2 1/2 cups cake flour
1 teaspoon baking powder
1 teaspoon salt
2 tablespoons unsweetened cocoa powder
1 - 1 ounce bottle of black liquid food coloring
1 cup unsalted butter, room temperature
1 1/2 cups sugar
2 eggs, room temperature
1 teaspoon vanilla extract
1 cup buttermilk, room temperature
1 teaspoon baking soda
1 teaspoon white vinegar

Butter and flour your cake pans and set aside. Preheat your oven to 350 degrees F.

In a large bowl sift the flour, baking powder, and salt. In a small bowl, mix the food coloring and cocoa powder until completely incorporated. Set aside.

In a stand mixer (or using a hand mixer) cream the butter and sugar on medium high speed until light and fluffy. Add the eggs one at a time, and beat until thoroughly combined, being sure to scrape down the sides. Add the vanilla and the red food coloring-cocoa mixture and beat well to combine. Add 1/3 of the flour mixture, beat on medium speed until combined, then add 1/2 of the buttermilk, and beat until incorporated. Add another 1/3 of the flour, beat well, then the other half of the buttermilk, scraping down the sides after each addition. Finish with the last 1/3 of the flour mixture and beat until just combined.

In a small bowl, mix the vinegar and baking soda, and immediately add to batter. Mix on high speed for just a few seconds until evenly dispersed, and pour right away into lined cupcake pans. Bake for about 20-30 minutes, until a toothpick entered into the center comes out clean. 

Frosting:

5 egg whites
1 cup sugar
2 cup butter (4 sticks) room temperature
1 tsp vanilla
8 oz. white chocolate, melted and cooled to room temp

In a medium sized heat proof bowl set over a pot of simmering water, combine the egg white, sugar, and salt. Whisk constantly until hot to touch and foamy, it should reach about 160 degrees F. 

Transfer mixture to stand mixer fitted with the whisk attachment and whisk on medium-high speed until completely cooled. It should form a shiny meringue with stiff peaks, and it should take about 5-10 minutes. Once mix is completely cool, turn mixer to medium add the butter a few tablespoons at a time, mixing well after each incorporation. Once all of the butter is incorporated, turn speed to high and whip until buttercream comes together into a smooth creamy frosting. 

Pipe onto cupcakes, and decorate as you please. 


Here's hoping for another 100 fun, satisfying, and delicious posts. 

Sunday, August 7, 2011

Bacon Marmalade BLT's


Two words: bacon marmalade. I could just stop this post right there, because if you are anything like me, you will hear those two words and immediately stop what you are doing to make a big batch of it.


In case you are still reading, let me tell you a little bit about these amazing sandwiches. A few weeks ago I was eating at one of my favorite lunch spots and the salad I ordered came with crostini with bacon marmalade. I wasn't sure what was in it exactly, but it was a revelation. I figured out the basic ingredients from the taste, but as soon as I got home I got on google and did some research. None of the recipes I found quite summed up what I was hoping to get out of my bacon marmalade making experience, so I pulled some ingredients from a few recipes and from my memory of lunch that day, and just went for it. It was good. Too good. So good I couldn't stop eating it with a spoon. It was even better the second time I made it, tweaking the recipe ever so slightly.

It's great eaten directly from the jar with a spoon, but it's better served on crusty bread with goat cheese, and even better smeared on toast with heirloom tomatoes, homemade mayonnaise, and butter lettuce. This really takes your average BLT to a new level. It is sticky and sweet and lightly spiced, and is nicely balanced out with the fresh tomatoes and lettuce and slightly tangy mayonnaise. Now I am wishing I hadn't given away my last jar of it to my classmates...guess I will just have to make some more.


Bacon Marmalade

1 1/2 lbs thick cut applewood smoked bacon, chopped into 1/4 inch pieces
1 large vidalia onion, diced
4 cloves garlic, minced
1/3 cup white wine
1/2 cup sugar
2 tablespoons molasses
1/4 cup coffee
1/4 cup maple syrup
1/4 teaspoon allspice
1/2 teaspoon smoked paprika
1/4 teaspoon cayenne pepper
large pinch ground cloves
small pinch ground nutmeg
salt and lots of fresh ground pepper to taste

In a heavy saucepan or dutch oven over medium heat, saute the bacon slowly until just crisp. Don't cook the bacon too fast or it can burn or over cook and become crumbly. Remove the bacon to a paper towel -lined plate and drain all but 2 tablespoons of bacon fat from the pan. Add the onion and cook over medium-high heat until soft and starting to caramelize, about 20 minutes. Add the garlic and cook for another 3-5 minutes until garlic is soft but not yet browning.

Add the white wine and scrape up any brown bits from the bottom of the pan. When the wine has reduced a bit, about 3-5 minutes, add the sugar, coffee, molasses, syrup, allspice, paprika, cayenne, nutmeg, cloves, salt and pepper, and stir to combine. Add the bacon back to the pot, bring it up to a boil, then reduce heat to low so that the mixture is on a gentle simmer and cook for about an hour to an hour and a half, until the marmalade is thick and sticky. It will thicken more as it cools.

Store in jars or sealed container in fridge for a week or two. It also freezes very well. Before using, you can pop it in the microwave just for about 15 seconds to loosen it up a bit and be spreadable.

Saturday, July 16, 2011

Triple Chocolate Ganache Torte


Actually, if you include the little chocolate jimmies around the bottom, it would be a quadruple chocolate torte, but who's counting anyway?

I am desperately trying to get caught up here on the blog and the other site I write for, Honest Cooking, before things get crazy and I start my pastry job. I have so many pictures of goodies that I want to share with all of you, but I am already having trouble finding time to sit down and get my writing on. I began my third quarter of school this week, and I can't believe how fast it is flying by. I have to say so long to all the tortes and cakes we have been focusing on for the first half of my schooling, and switch gears over to savories (meaning spending 4 hours mincing and julienning vegetables) and plated desserts.

We will get a sneak peek this quarter into the world of restaurant pastry production, and I can't wait. I have been pretty set that I want to be in a bakery and would never want to work on the line, but I am keeping an open mind and trying to soak up as much knowledge as humanly possible.


This chocolate torte was one of my favorites from last quarter, it was chocolate-ly, but not overly rich, and had nice strawberry surprise providing just a hint of fruitiness in the middle layer. The chocolate shavings on the top came from a really really thick hazelnut chocolate bar, but you can substitute smaller ones from any chocolate bar you have on hand. In class we used a 2-stage cake recipe with emulsified shortening, but since the vaseline-like fluid flex kind of squicks me out a little, I am going to give you my favorite devils food chocolate cake recipe instead.


Chocolate Ganache Torte
adapted from Zoe Bakes and Professional Baking

Cake:
3 cups granulated sugar
2 3/4 cups all purpose flour
1 1/8 cups dark cocoa powder
1 1/4 teaspoons baking powder
2 1/4 teaspoons baking soda
1 1/2 teaspoons salt
3 large eggs
1 1/2 cups buttermilk
3/4 cup vegetable oil
2 teaspoons vanilla
1 1/4 cup hot coffee
1/4 cup amaretto liqueur

Butter and flour the sides of two 9" cake pans, and line bottom with a circle of parchment paper. Preheat oven to 350 degrees F.

In a large bowl, whisk together the sugar and vegetable oil until combined. Add the eggs one at a time, whisking until thoroughly incorporated after each addition. Add the buttermilk and vanilla and wisk to combine.

Sift the flour, baking soda, baking powder, cocoa powder, and salt into a large bowl. Add the wet ingredients into the dry ingredients and whisk just until combined. Add the hot coffee and amaretto and whisk until incorporated.

Fill each cake pan 2/3 the way full and bake until a toothpick inserted into the center comes out clean, and center springs back when pressed gently with your finger, about 35-40 minutes.

Let cakes cool completely before assembling.

Ganache:
1 1/2 lb. heavy cream
1 1/2 lb. dark or bitter sweet chocolate, chopped

Place chocolate in a heatproof bowl. Heat heavy cream over medium heat until it comes to a simmer, then pour over chocolate. Let sit for a minute or two, then gently whisk until smooth. Let ganache cool until it is a spreadable consistency. You can make this ahead of time and chill until ready to use. Just put the chilled ganache in a stand mixer and mix with the paddle attachment until it becomes soft and spreadable.

Strawberries:
6-8 strawberries, hulled and sliced thinly
1-2 tablespoons grand marnier
1 tablespoon sugar

Mix strawberries, grand marnier, and sugar in a small bowl and let sit at room temp for 10-15 minutes.

Assembly:
Slice each cake in half so you have four layers of cake. Place the first layer of cake on a flat plate or cake stand and spread a thin layer of chocolate ganache all the way to the edges. Place the second layer of cake on top, and again spread a thin layer of ganache to the edges. Arrange a single layer of strawberries over the ganache, and top with another layer of cake. Fill with ganache, and top the cake with the last layer. With the remaining ganache, cover the outside of the cake, if you find the ganache hard to spread at any point place bowl of ganache over gently simmering water for just a few seconds to help loosen it up.

Decorate as you wish with chocolate sprinkles and/or chocolate shavings. You could also garnish with a little cocoa powder and some strawberries. This would be made even better with a big ol scoop of vanilla ice cream.

Pin It

LinkWithin

Related Posts with Thumbnails