Showing posts with label Christmas. Show all posts

Sunday, December 16, 2012

Cake Pop Winter Wonderland


I am a little lacking in the christmas spirit this year. I have no clue why, but it just doesn't feel christmas-y around here. I have the tree up, the candles burning bright, the oven is churning out goodies, Vince Guaraldi is playing on loop, and yet it is still not sinking in.  Perhaps thats how I ended up with pink and silver holly and christmas trees...


Maybe all I need is some snow, but the forecast here in Chicago is not cooperating with me on that front. From the looks of these pictures I took matters into my own hands and made myself a little snowy wonderland filled with cotton candy pink and shiny silver christmas trees. It seems as though I am only a few years away from a little christmas village taking over half of my living room. 
Thats not good. 


I figured since I was using gingerbread cake, that I should probably make some gingerbread people. I must say I had trouble deciding which would be less vulgar, to put the sticks in their heads or up their butts...heads it is. Now they look like a cross between the Michelin man and a tele-tubbie. Either way, they were tasty little buggars. 


Oh I also decided to go the more traditional route and make some green and red ones. 


But we can all agree the glittery pink disco trees are way more fun right?


Right. 

Gingerbread Cake Pops with Caramel Buttercream
adapted from La Cuisine d'Helene
makes 2 - 9 inch cake layers

2 1/4 cups all purpose flour
1/2 teaspoon baking soda
1/2 teaspoon salt
1/2 teaspoon allspice
1/2 teaspoon ground cloves
1/2 teaspoon ground nutmeg
1 teaspoon cocoa powder
1 teaspoon ground cinnamon
2 teaspoons ground ginger
1 stick (8 tablespoons) unsalted butter, melted then brought to room temperature
3/4 cup dark molasses
3/4 cup sugar
1 large egg
1/2 cup buttermilk
1/2 cup whole milk

Butter and flour two 9-inch cake pans and preheat your oven to 350 degrees Fahrenheit.

In a medium bowl whisk together the flour, baking soda, salt, allspice, cloves, nutmeg, cocoa powder, cinnamon, and ginger.

In the bowl of a stand mixer fitted with the paddle attachment, beat together the molasses, sugar, and butter until well combined. Add the egg, and beat until combined.

Slowly beat in the milk and buttermilk. It will look like it has curdled, but don't worry, this is supposed to happen. It will fix itself when you add the dry ingredients.

In a few additions, beat in the flour mixture, scraping down the sides of the bowl between each addition. Mix until just combined.

Divide the batter evenly between the two cake pans. Bake on the middle rack of the oven for 30-40 minutes, or until a toothpick inserted into the center of the cakes comes out clean.

Let cool in pan for about 20 minutes, then turn out onto a baking rack and cool completely.

Italian Meringue Buttercream

4 oz egg whites
8 oz granulated sugar
2 oz water
12 oz unsalted butter, room temperature, cubed
1 tsp vanilla
1/2 cup caramel sauce, room temperature

Place your egg whites in the bowl of your stand mixer fitted with the whisk attachment. 

Heat the sugar and water in a small sauce pan over high heat. Using a candy thermometer, bring the sugar to a boil and continue cooking until it reaches 230 degrees F. When it hits that temperature, turn your stand mixer to medium to begin mixing the egg whites until they are foamy. When the temperature hits 240 F, remove from heat and slowly pour into the egg whites on a medium speed. As soon as all of the sugar is in, turn the mixer to medium high and mix until the meringue is cool to touch. Add the butter a few tablespoons at a time and whip until thick, which may take a few minutes. Pour in the caramel sauce and mix until combined. 

Cake Pop Assembly

To make the cake pops, see my original post HERE on their assembly. For the Christmas tree and holly shapes, I pushed the cake dough into a mini cookie cutter and then gently pushed it out. There is enough butter in the frosting to make this quite easy and not sticky at all.  Once the shapes are formed, chill them and proceed as you normally would for round cake pops. 


Happy holidays, whatever color your trees happen to be this year. 

Friday, December 9, 2011

Blue Christmas


Its almost as if I willed it to snow last night by making tons of teeny tiny snowflakes out of gumpaste. Is that possible? I wonder what else I could use this power for....


It FINALLY snowed last night. I have been having a little trouble getting into the Christmas spirit with the warm and/or dreary weather this month. The minnesota girl in me craves snow as soon as mid-november hits, and this year has been a huge disappointment so far. Maybe thats why I made a blue cake last night, I think I need to start making big white fluffy cakes with mounds of snow piled on top. It will be like my own personal voo-doo cake, used for good, not evil. Unless you hate snow I guess. Sorry in advance.


I made this cake in my second to last (yay!!) cake decorating class last night, and this morning, instead of bearing down and finishing my final costing project (booooring) I decided to make some matching cupcakes! Lucky for you, I actually took some step by step pictures so you can see how I made the toppers. No, I did not freehand pipe those snowflakes, you think I am THAT crazy? Here is an easy way to get your template transferred onto your fondant to pipe over so you can get a clean, consistent design.

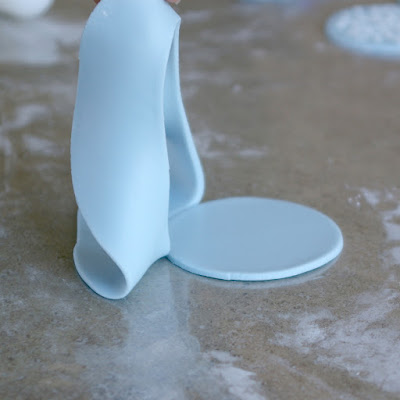
First, roll out your fondant to your desired thickness, I usually go to about 1/16 inch, pretty thin for these.


Cut out your circle, and make sure to dust a good amount of powdered sugar underneath it so it doesn't stick to your work surface. Peel the excess fondant away.


Take your paper template (that you already had cutout, because you are more prepared than I am) and gently press it into the fondant circle.


Use the pads of your fingers to gently rub all of the edges so you get a nice clean imprint. Don't press too hard or you will distort your circle and you run the risk of the paper sticking to the fondant.


Carefully peel away the paper and you are ready to pipe your design.


I used a 00 tip to pipe, I wouldn't go much bigger than a 0 or 1 if you are doing something this small and intricate. Also, I used buttercream to pipe because it's what I had on hand, but you could also use royal icing, you would probably get better line quality that way.


Don't worry if you mess up a little, just let the frosting dry for a few seconds then gently scrape it off with a gumpaste tool or exacto knife. 


You can skip this next step if you want, but I think adding a few small sprinkles, strategically placed, makes for a nice finished clean look. Plus the sprinkles hide the ugly corners. Not that you'd have ugly corners, but if you did, this would help.


If your hands are naturally always sweaty like mine, you should just be able to press your finger into each sprinkle and gently press them into the buttercream. You can also use a tweezers if you are a rockstar like that.

Let these dry for a few hours, then gently press them onto your piped frosting.


Voila! Hope you enjoyed this little tutorial, I think this is my first go at one of these. I can say it is trickier than it looks to take pictures with one hand while piping with the other.


Let it snow, let it snow, and here's hoping yours isn't a blue christmas.

Monday, January 3, 2011

A Nearly Perfect Christmas Eve Eve Dinner

For years, my immediate family has had a tradition of making an extravagant meal the night before Christmas Eve, also known as 'Christmas Eve Eve'. It's like a kickoff to the main event, though in recent years it has become my favorite part of the entire holiday. We have made blinis and beef cheeks, lamb shanks and crab cakes, gougeres, tarts, truffles, and about anything else you can think of. We have opened numerous bottles of Brunello and Porto and Champagne, and spent many many hours and days prepping and cooking and baking.


While every year has been memorable, this year topped them all. And it wasn't just the food that made this year outshine them all. Yes the revamped-retro inspired menu was incredibly aggressive, and we pulled it off swimmingly, savoring each and every bite, but it was the company, and the laughter, that will stay with me the most when I reflect back on this Christmas. We cooked and baked for two days, all four of us squeezed into the kitchen for one of them. There was laughing and heckling (in the most loving sense possible), lessons being taught, and skills being eagerly learned. Stories of our lives spent apart over the past month were told, encouragement and understanding were shared. Wine flowed freely into skillets and stomachs, and the food that we worked so hard on, was eaten around a beautifuly decorated table. Most importantly though, the meal that night was eaten together, the four of us, celebrating our health and happiness.

Okay that was pretty mushy, I may or may not be suffering post-Christmas home-sickness and cookie withdrawal. Onto the good stuff (the menu of course!). It all started with the idea to recreate a dish that my family had at a new restaurant in Minneapolis, who had the audacity to serve tater tot hot dish.  Now, this was not the tater tot hot dish of my youth. You know, the one with ground beef, a can of cream of mushroom soup, canned green beans, all covering a crispy layer of frozen tater tots. Nope this was tater tot hotdish, brought into the 21st century and put on steroids. We knew we had to make this at home, but what to serve with it? The menu quickly formed by thinking of slightly kitschy, old-school, retro food, that we could revamp and put a gourmet spin onto.

First up, pigs in blankets. Actually by the end of the appetizer course these became known as 'chicks in snuggies'. I blame the Champagne. Homemade sous-vide-d chicken sausages, were sauteed and wrapped up in buttery puff pastry. We baked them up and dipped them in a horseradish-sour cream sauce, and an oatmeal stout-mustard-shallot sauce. These exceeded all expectations. We knew they were going to be good. How good though? We were blown away.


Next up, soup and salad. We took the classic wedge salad and threw it on the grill along with some cherry tomatoes. We had homemade blue cheese dressing prepared by my smarter, prettier, older sister. Here's where the fun with the deep fryer came. Pops sous-vide-d some pork belly, breaded it, and deep fried it. It was crispy, fatty, pork heaven I tell you. Pork Heaven. Amen.


We added some roasted pureed cauliflower soup for good measure, you know, cause we didn't have enough to eat already.


Now, this may not be the prettiest dish you've ever seen on camera (plus, it was dark, and I really just wanted to dig in), but trust me, you can not go wrong with oatmeal stout braised short ribs, porcini mushroom béchamel sauce, deep fried potato croquettes, and steamed buttered french green beans. This may be the peak of the proverbial comfort food mountain. I dream about this dish.


The crowning moment, the cake.


Actually this was a disappointing moment, and the reason for the title of this post being a nearly perfect dinner. This recipe came from the cover of last month's Bon Appétit Magazine. The problem was that the cake just wasn't very good. I am not sure if I did something wrong, which is entirely possible, but the actual cake was dry and crumbly. If I ever made this again, which I may, it was stunning, and the frosting was insanely good, I would stick with the chocolate devils food cake I have made many times now. Poor thing sat on the table for three days after Christmas since no one could bring themselves to toss it.

Thankfully, there was cheese.  It just wouldn't be Christmas eve eve dinner without a cheese plate and a vintage Porto. And Trivial Pursuit.


Someday, my sister and I will beat my parents....someday. Until then, we will just have to keep practicing making amazing meals, and spending much needed quality time together as a family.

Wednesday, December 23, 2009

Don't tell the Girl Scouts


Now that I have finally emerged out of my cookie coma, I can finally finish posting about all the Christmas goodies I made this year. This holiday season was a whirlwind of foodie extravaganzas. There were so many amazing meals, and delicious desserts, but most importantly I was able to get home to Minnesota and spend time (mostly cooking and eating) with my friends and family. I think they were just happy because I brought lots of cookies home with me.

Ask any of my roommates from college how much I love Samoas Girl Scout Cookies (or caramel de-lites) and they will probably roll their eyes. I have been known to hide the purple boxes in my room so that no one will steal them. It's just that there aren't that many in the box, they trick you and use one of those vacuum formed plastic thingies (yes that is the technical term, and yes as an industrial designer I should know the actual term) to space them out, and plus, they only come around once a year.

Not anymore. A great blog, Once Upon a Plate, posted a homemade version of these coveted cookies. I have had it bookmarked for a while now, and didn't think I was going to get to it this year, but after I screwed up a batch of caramels, (completely stuck to the pan after I neglected to line it with parchment paper) I figured it was a good excuse to make the 'samoas'. With a pan of homemade caramel and my hand mixer, I embarked on probably the most tedious kitchen endeavor I have ever taken on, and this is coming from the girl who has made homemade bagels and teeny tiny stuffed pastas in recent history.

But oh man...are they good. They don't taste exactly like the real thing, and I will definitely be purchasing copious amounts of the originals when spring comes around and 'Girl Scout Cookie Season' kicks off. I think these are actually a different animal altogether with the dark chocolate and the homemade salted caramel. They are rich, VERY rich. This is a good thing for a person like me (a person with portion control issues) as it limits me to one cookie per sitting. Although, I have recently discovered that they are best straight out of the freezer, and that whole 'one per sitting' rule no longer applies.

Homemade Samoas
(or Carmel De-Lites, depending on where in the country you live)
adapted from Once Upon a Plate
Makes about 4 dozen cookies

There are three main steps to this cookie, and you will see very quickly why this is a tedious process. First you make the buttery cookies that are buried beneath the caramel coconut goodness. I made mine with holes in the center this time, but if I make these again, I will skip that step. I ended up filling the holes with the coconut mixture, and was too lazy to re-poke the centers out. As I see it, if there is no hole, that just means there is more cookie. :-) Second step is to spread the coconuts caramel mixture on each one of these teeny cookies. Then comes the chocolate dipping/drizzling. The last part is probably the most difficult: waiting until they set before you pop them into your mouth.

Cookie Base

1 cup butter, softened
1/2 cup sugar
2 cups all purpose flour
1/4 teaspoon baking powder
1/2 teaspoon salt
1/2 teaspoon vanilla extract
up to 2 tablespoons milk

Preheat oven to 350 F.

In a large bowl using a hand mixer (or a stand mixer), cream the butter and sugar together until light and fluffy. In a medium bowl, whisk together the flour, baking powder, and salt. Add the flour mixture to the butter mixture in a few additions, beating on a low speed. Add the vanilla, and just enough milk to get the dough to come together, without being sticky (I only needed 1 tablespoon). Gather the dough together in a ball and divide into three equal parts.

In between two sheets of parchment paper, roll one of the pieces of dough out with a rolling pin until it is 1/4 inch thick. Using a 1.5" round cookie cutter, cut out circles and place them on a parchment or silicone lined baking sheet.

If you want you can punch a hole out of the center of each round using the end of a large straw, or you can just skip this all together. Like I said above, if I make these again, I will not go through the trouble since it just got filled in with topping anyway.

Repeat this process until you have used all the dough, and feel free to re-roll scraps once or twice. Bake cookies for 10-12 minutes until the cookies are just lightly brown around the edges. Let cool for a few minutes on the baking sheet, then transfer to a wire rack to allow to cool completely.

Topping

3 cups shredded coconut (I would recommend unsweetened, but like me, if all you can find is sweetened that works just fine!)
12 ounces good quality caramels (I used a homemade batch of salted caramels)
1/4 teaspoon salt (if you are using salted caramels, you can reduce this to 1/8 teaspoon, or skip it altogether)
3 tablespoons milk
8 ounces dark chocolate, roughly chopped or broken into small pieces (if you do not like dark chocolate, feel free to use milk or bittersweet, I think the dark helped balance out the intense sweetness of this cookie, if even just a little)

Preheat oven to 300 F.

Spread coconut evenly on a rimmed baking sheet. Toast for about 20 minutes, stirring every 5 minutes or so. Keep an eye on this in the last few minutes of toasting as the sugar in the coconut can scorch very quickly once it starts turning brown. Let cool on baking sheet.

Unwrap the caramels and place in a microwave safe bowl. Add the milk and the salt, and microwave for 3-4 minutes, stopping a few times to stir the caramel.

When it is completely melted and smooth stir in the coconut in a few additions. Use your judgement here, I did not end up adding 100% of the coconut because it started to feel like it was getting a little stiff. The right ratio of coconut to caramel is key to actually being able to spread the mixture onto the cookies, if there is too much coconut, it will be nearly impossible, if there is too little coconut, the mixture won't hold up as well and will ooze off the cookie before it sets. Test the mixture out as you go, add about 3/4 of the coconut at first, test a cookie, if it is spreadable and stays on the cookie for the most part continue on with the rest of the cookies, if it starts to ooze, add a little more coconut and test again. (This is clearly a very scientific process here)

Once you get the caramel mixture to your desired consistency, spread about 2-3 teaspoons of the mixture on each cookie with a small spatula or offset spatula (I actually found my butter knife to work quite well) and place on a clean piece of parchment paper or silicone baking sheet. While you are doing this, if the mixture starts to firm up, pop the bowl in the microwave for a few seconds to re-melt the caramel. If you are getting fancy (or not being lazy) take a wide straw and re-poke the holes in the center of the cookies, again I skipped this step. More caramel = GOOD. Let cool and set up for about 10-15 minutes.

Once the caramel topping has set a bit, place the chocolate in a small bowl and heat in the microwave at 30 second intervals, stirring thoroughly in between each interval until smooth. Be careful not to scorch the chocolate. You can also use the double-boiler method (which I did) by placing a small metal or glass bowl containing the chocolate over a small sauce pan with about an inch of simmering water, and stirring continuously until melted.

This is where it becomes important that you let the caramel topping set and cool, it will help you keep a grip on the cookie while dipping. Take each cookie and dip the bottom 1/4 inch into the chocolate, and place back on the parchment paper or silicone sheet.

After all the cookies have been dipped, pour the remaining chocolate into a small Ziploc bag (or pastry bag with a small tip) and cut off a very tiny portion of the corner of the bag. Pipe the chocolate over the top of each cookie, melting more chocolate if you run out.

Now here is the tricky part: don't touch them until the chocolate has set...which takes forever when you are staring at about 48 Samoa cookies laying on your kitchen counter. Mine didn't turn out quite as pretty as the originals, but they were tasty.

Hope your holidays were spectacular!

Tuesday, December 15, 2009

Chai-Spiced Cookies


Let the baking extravaganza continue!

The second batch of cookies that I attempted this Christmas season worked a little better than the first, (I chilled them for a little while before popping them in the oven, which prevented spreading like the thumbprints) but when it came time to dredge them in powdered sugar, my lack of patience got the better of me. I threw them in when they were a little too hot and ended up with sort of damp, almost glazed cookies instead of the light and fluffy confectioner sugar coating that I was hoping for.

Hell, they still tasted good. Judging by the fact that I had to put them in the freezer so that I would quit eating them, I'd say they turned out just fine.

These cookies are a great alternative to your standard spice cookie, they are complex and buttery, with a dash (well more than a dash) of sweetness from the sugar coating. I highly recommend adding these to your cookie repertoire.

Chai Spiced Cookies
From Whole Foods via thekitchn.com
makes about 40 cookies

1/2 cup (1 stick) unsalted butter, softened
1/4 cup sugar
1 cup all-purpose flour
1/2 teaspoon ground cinnamon
1/2 teaspoon ground ginger
1/2 teaspoon ground cloves
3/4 teaspoon ground cardamom
1/4 teaspoon salt
1 teaspoon vanilla extract
3/4 cup powered sugar (confectioner's sugar)

Preheat oven to 350 degrees F.

Cream butter and sugar together in large bowl with hand mixer (or in your stand mixer, whatever floats your boat). In a medium bowl, whisk together the flour, cinnamon, ginger, cloves, cardamom, and salt. Beat the flour mixture and the vanilla into the butter mixture just until combined.

Pinch off teaspoon-sized balls of dough and roll them into spheres, placing them 1 inch apart on a parchment or silicone lined baking sheet. If your dough is really soft and warm like mine was, pop the pans in the refrigerator for a few minutes to firm them up. This will prevent the cookies from spreading at least a little bit. Bake until light golden brown, about 15-18 minutes.

Let the cookies cool for about 5-10 minutes on the cookie sheet (this is about the point at which I ended up with sticky gooey balls so BE PATIENT). When they have cooled, but are still slightly warm, toss each cookie in the powdered sugar to coat and place on wire rack to cool completely.

Cookies will keep in an airtight container for 1-2 weeks, or in my case as long as it takes to gobble them all up.

Try to save at least a few to share for the holidays.

Cookie (Semi) Fail...


It's that time of year again. Christmas cookie time. The baking has commenced and I wish I could say that it is going swimmingly. It's not. I have had to call the mommy christmas cookie helpline twice already...and it's only the 18th. Sigh.

The past two years I have made a jam thumbprint cookie form a Emeril recipe. The cookie itself is flavored with lemon zest and juice, and the filling is homemade raspberry jam. They are amazing, and probably in my top three favorite christmas cookies ever. They were super easy to make, and turned out quite pretty looking. You would think by now I could make these with my eyes closed, but this year they just didn't go well. Instead of cute little perfectly round cookies, with a dot of jam in the center, they spread into large flat discs with jam oozing out over the sides.

Luckily they still tasted fantastic.

There is a reason I usually stick to savory foods, I kind of suck at baking. Although I suppose there could be worse things to have to practice eh?

Besides the slight mishap (maybe I need to turn down the heat in my kitchen, who knows) these cookies are absolutely delicious. They aren't super sweet, which is probably why I enjoy them so much. Now the trick is just not eating them all before Christmas gets here...

Lemon Raspberry Thumbprint Cookies
Recipe from Emeril Lagasse on foodnetwork.com

1/2 cup raspberry jam (preferably homemade, but if you aren't lucky enough to have a mom that sends you multiple jars each summer, store bought is fine)
1 tablespoon chambord or kirsch (I didn't use any this time, but I have used triple sec and creme de cassis before, any berry or citrus liqueur that you have on hand will work, I recommend NOT skipping this ingredient, it adds some nice oomph to the cookie)
2 1/4 cups all purpose flour
1 teaspoon baking powder
1/4 teaspoon salt
1 cup (2 sticks) unsalted butter, room temperature
2/3 cup sugar
2 large egg yolks
1 tablespoon lemon zest
1 tablespoon lemon juice
1 teaspoon vanilla extract

Preheat oven to 350 degrees.

In a small bowl, mix the jam and whatever liqueur you are using. Set aside.

In a medium bowl, whisk together the flour, baking powder, and salt.

In a large bowl cream the butter and sugar together with hand mixer (or if you have a stand mixer do it in there. Also, if you have a stand mixer, I am jealous of you) until light and creamy. Add the egg yolks, lemon zest, lemon juice, and vanilla and beat to combine.

In two additions, add the dry ingredient mixture and beat just until wet clumps form.

Then using your hands, gather the dough together in a ball.

Divide the dough into 4 equal parts and form 12 1-inch balls out of each of those parts. Place balls on parchment paper or silicone mat lined baking sheets, leaving 1 inch space in between each cookie.

Using a 1 teaspoon measuring spoon (a melon baller works if you have weird square shaped measuring spoons like me) make a small indent into the top of each cookie.

Fill each indent with about 1/2 teaspoon of the jam mixture.

Bake until golden brown, about 20 minutes. Let cool on baking sheets for just a few minutes, then transfer to cooling rack.

More cookie shenanigans to come, don't worry.

Pin It

LinkWithin

Related Posts with Thumbnails