Showing posts with label Fondant. Show all posts

Friday, February 27, 2015

Cake-a-palooza Day 5

Day 5!

Friday is here, which means my work week is almost over. Almost. At the bakery, we've been preparing all week for a big gala downtown, and tomorrow is the big day. My boyfriend is taking a state licensing exam tomorrow that he has been preparing for for months. Needless to say we are all going to be happy when Sunday comes.


For now though, let's just talk about this cake. I've done ruffles, in fondant and buttercream, I've done them vertically and horizontally, and I've done them in ombre tones, and pretty pastels. I wanted to try them in a way that I'd never done before. Something a little more refined and clean. Soft and romantic, but clean and modern all at the same time, these ruffles are just a bit different than the typical ruffled wedding cake. Paired with soft pinks and grays, and stylized Juliet roses, this cake can make a statement without being over the top.


Tomorrow we do the opposite. Stay tuned.

**This cake designed and made by Bria Helgerson for Sugar Fixe Patisserie**

Thursday, February 26, 2015

Cake-a-palooza Day 4


Well, I made it three days before I gave up on daily cake posts. I give props to all those bloggers out there who have time to post daily, or even once a week! I can barely throw a post up once every few months, but like I said, I am trying to make up for lost time!


Up next, another petite wedding cake, this time in mint green with frilly white ruffles. I kind of thought the cupcake trend was on the down-spiral, but it seems that I was wrong. As I am getting more involved at the bakery with wedding consultations, I am finding that cupcake-mania is still alive and kicking. The reason is this: cost effectiveness. Brides are seeing that a three dollar cupcake per guest is cheaper than a wedding cake at five dollars (minimum) per guest, and opting to save some money. However, they are still wanting that photo-op of cutting their cake, the beautifully displayed creation, perfectly matching their decor and theme. Enter: the petite wedding cake.

A miniature version of the show-stopper, perfectly sized to cut and share with the wedding party, or save for the first anniversary. This particular one is a little more on the modern-but-romantic side, with a mint green background, and a delicate white gardenia.


Two more cakes to come, so stay tuned!

**This cake designed and made by Bria Helgerson for Sugar Fixe Patisserie**

Tuesday, February 24, 2015

Cake-a-palooza Day 3


I'm gonna make this short since it has been a VERY long day and there is a glass of wine calling my name. So let's talk about this cake, which I have so lovingly named 'big blue'. This isn't a cake for the traditionalist, or the romantic. This cake is for someone who likes a little quirk, a little mod, maybe even a little hint of southwest flair. All of those things go together right? 


Right. This cake allowed me to practice one of my new favorite mediums. I have long been a user of petal dusts and luster dusts, but up until recently have only been using them by themselves, or mixed with alcohol. I may have been a little late to the game, but mixing dusts with a small amount of cooking oil, produces a much different, silky smooth finish. It also allows for a much more fluid brush stroke, which is how I created the pattern on the bottom two tiers. 


The feathers were also a first for me, and they almost became the death of me. Gum paste flowers have nothing on feathers when it comes to fragility, but the statement they make on this cake makes all the breakage and heartbreak worth it. 


**This cake was designed and made by Bria Helgerson for Sugar Fixe Patisserie. 

Sunday, February 22, 2015

Cake-a-palooza Day 1


I am about to make up for some lost time here. Get ready for a cake-a-palooza. 6 days, 6 cakes. Things are about to get real crazy at the bakery, so I figured I better post these pictures now, or they will sit on my hard drive for all eternity. Seven months after starting a new job at a bakery, I find myself once again in a management position. I realized I really missed bossing people around, but more importantly I missed being able to share and implement new ideas to help improve and grow the business. So here we go, let the madness begin once again.


It is almost March and we are quickly approaching wedding season. A few recurring trends you will see throughout the next few days are: metallics applied in new ways, intricate gum paste flower sprays, unexpected pops of color, and the merging of romantic and modern aesthetics.

First up a small but striking cake. The bottom tier is brushed with a metallic copper petal dust and is adorned with gum paste poppies, leaves, and berries in peach and copper hues. The top tier is left blank to showcase the detailed arrangement.


Stay tuned, more to come tomorrow.

*This cake was designed and created by Bria Helgerson, for Sugar Fixe Patisserie.

Tuesday, December 2, 2014

Paint it Black - Pink and Black Peony Cake


Black Friday? Screw that. Last week while trying to enjoy some holiday cooking/baking and simultaneously watching an entire days worth of Friends re-runs on TV, I found my self yelling at the obnoxious commercials. "It doesn't count as a black Friday sale if it isn't on black Friday!!!" There may have been a few more expletives in there, but I will censor it for family viewing. Why, oh why are stores now opening on Thanksgiving? They can't just wait another few hours to open at 4 am on black Friday? Really stores? I realize this is a completely irrational feeling for a few reasons, one being neither I, nor any of my family members work in the retail industry and are therefore not affected by having to work on Thanksgiving, and two, I am not being forced to go shopping on said holiday. But dammit, is nothing sacred anymore? I would much rather pour myself another glass of wine and let the crazies get their 2-for-1 60-inch plasma TVs thank you very much. I am going to be the best old curmudgeon some day. Okay rant over.

Maybe I was just a little extra crabby this year. I always get a little sad around Thanksgiving since I haven't been able to get home for it the past few years. Even though I am welcomed with open arms to my partner's family's table, and I love them as my second home, I still miss carving the turkey with my dad, running the turkey day 5k with my sister, and popping wine before noon with my mom.


Luckily, this year I was able to go home in October for a big celebration. My mom turned 60. Yes folks, she is officially old. I guess that makes me really old too. More importantly, we threw here a big shindig to celebrate, with tons of house smoked pork, all the trimmings, home-brews, bubbly, and of course, cake. I wouldn't be a good pastry chef daughter if I didn't bring a cake now would I? A few years back my very talented mother started painting, specifically painting greeting cards. She would send me them periodically, or gifted them to family and friends. I have saved every one of these cards, because they are beautiful, which she thinks is silly. I think she's crazy. And old.

For her birthday, I decided to turn my favorite of her cards into her cake. It had an even more special meaning when I re-read the card. It had been sent to me from my grandpa, right after I had been laid off from my design job. He told me I would find something new and not to worry because everything will work out in the end. Now, here I am, 5 years later, turning this card into a cake, and loving what I do.


On a serious note, my mom is one amazing, strong, intelligent, driven, passionate, nurturing lady. She has always supported her daughters in everything we do, pushing us where we needed to be pushed, and letting us carve our own path when a little nudge wasn't needed. Even though I am in my thirties, I can still say I want to be like my mom when I grow up. I love you Mom. Here have some more cake!


Chocolate Devils Food Cake with Dark Chocolate Ganache and Salted Caramel Buttercream
*this will make a 2 layer 9 inch cake (the cake pictured is a 4-layer 9-inch bottom tier, and a 2-layer 7-inch top tier)

Cake:
3 cups granulated sugar
2 3/4 cups all purpose flour
1 1/8 cups dark cocoa powder
1 1/4 teaspoons baking powder
2 1/4 teaspoons baking soda
1 1/2 teaspoons salt
3 large eggs
1 1/2 cups buttermilk
3/4 cup vegetable oil
2 teaspoons vanilla
1 1/2 cup hot coffee

Butter and flour the sides of two 9" cake pans, and line bottom with a circle of parchment paper. Preheat oven to 350 degrees F.

In a large bowl, whisk together the sugar and vegetable oil until combined. Add the eggs one at a time, whisking until thoroughly incorporated after each addition. Add the buttermilk and vanilla and whisk to combine.

Sift the flour, baking soda, baking powder, cocoa powder, and salt into a large bowl. Add the wet ingredients into the dry ingredients and whisk just until combined. Add the hot coffee and amaretto and whisk until incorporated.

Fill each cake pan 2/3 the way full and bake until a toothpick inserted into the center comes out clean, and center springs back when pressed gently with your finger, about 35-40 minutes.

Let cakes cool completely before assembling.

Ganache:
1 1/2 lb. heavy cream
1 1/2 lb. dark or bitter sweet chocolate, chopped

Place chocolate in a heatproof bowl. Heat heavy cream over medium heat until it comes to a simmer, then pour over chocolate. Let sit for a minute or two, then gently whisk until smooth. Let ganache cool until it is a spreadable consistency. You can make this ahead of time and chill until ready to use. Just put the chilled ganache in a stand mixer and mix with the paddle attachment until it becomes soft and spreadable.

Salted Caramel Sauce
this makes about 3-4 cups of caramel sauce, which is much more than you will need for a small cake, but I find that if i am going through the trouble to make caramel I might as well make a big batch and freeze the leftovers.

3 cups sugar
1/2 cup water
3 oz butter
2 cups heavy cream
1 tsp vanilla
1/2 tsp salt

 Combine the butter, cream, vanilla, and salt in another saucepan. Heat until butter is melted and cream is hot, keep warm until caramel is ready. Combine the sugar and water in a medium saucepan over high heat. Cook until sugar turns a deep amber color. Remove from heat and carefully whisk in the cream mixture one ladle-ful at a time. Mixture will bubble up and sputter, using a bigger pan for the sugar will help protect your hands from splatter. Let cool to room temperature before adding to buttercream.

Salted Caramel Buttercream

4 oz egg whites
8 oz granulated sugar
2 oz water
12 oz unsalted butter, room temperature, cubed
1 tsp vanilla
1/2 cup room temperature caramel sauce

Place your egg whites in the bowl of your stand mixer fitted with the whisk attachment. 

Heat the sugar and water in a small sauce pan over high heat. Using a candy thermometer, bring the sugar to a boil and continue cooking until it reaches 230 degrees F. When it hits that temperature, turn your stand mixer to medium to begin mixing the egg whites until they are foamy. When the temperature hits 240 F, remove from heat and slowly pour into the egg whites on a medium low speed. As soon as all of the sugar is in, turn the mixer to medium high and mix until the meringue is cool to touch. Add the butter a few tablespoons at a time and whip until thick, which may take a few minutes. Add the caramel sauce and whip until combined.

Assembly

Pipe a barrier of buttercream around the edge of the bottom layer of leveled cake. Drizzle the cake inside the barrier with extra caramel sauce. Then spread a thin layer of ganache, again staying inside the border. On top of that, spread a layer of buttercream, sealing in the ganache and caramel with the border. Place the second layer of cake on top. Smooth any buttercream that has bugled out the sides and chill completely before frosting as you like. I finished this cake with a regular layer of buttercream, chilled then covered in fondant. 

Wednesday, June 25, 2014

Ranunculus and Succulents...say that ten times fast.


I keep calling it spring. Even though I know it is officially summer, I just cannot seem to get it through my head. Spring has once again flown by without notice, and all of the sudden it is 85 degrees and sunny everyday. Well, almost every day. Usually on my days off from work it rains, so there's that.


Cake season is in full swing, and I have been cranking out wedding cakes at the restaurant like it's my job. Because it is my job, or was my job I suppose. I finished up the last wedding cake I will be doing at the restaurant this past weekend, after some hard decisions were made. I have been pushing and pushing for the last year to keep wedding cakes on the table as an option for our events, because it truly is the favorite part of my job. I learned, however, in this past year that plating desserts and charcuterie boards for service while trying to do watercolor work on a 4 tiered cake or attaching 50 tiny little gum paste petals to a sugar flower, is near impossible. I wasn't achieving the quality of work on my cakes that I know I am capable of, and that is a big disappointment.


So, for now, it's back to regular service at the restaurant, and the wedding cakes will move back into my own personal kitchen for the time being. I have taken for granted how much easier it is to bang out a four tiered cake when you have a large mixer and lots of full size sheet pans. For the next week and a half, it is back to baking at the apartment for a 4th of July wedding in Wisconsin.


These two cakes were by far my favorite from this spring's wedding season. The clients on both of these expressed that they loved my cakes and pretty much let me do whatever I wanted, with a bit of inspiration direction. I was able to push out of my comfort zone a bit, doing gum paste flowers that I hadn't attempted before including the ranunculus, and succulents. I also took my first swing at watercoloring an entire cake. There is something truly terrifying and incredibly awesome about taking a blue soaked paintbrush to a perfectly white, fondant-covered cake 3 hours before the start of a wedding. It wasn't perfect, but I learned a lot in the process and hope that I get a chance to do it again soon.

So, happy summer to all, I for one can't wait to see what this season has in store. Changes, growth, and more new challenges, or perhaps just more rain on my off days. Only time will tell.

Tuesday, March 25, 2014

Cakes for Dudes


Tomorrow, the man in my life turns the big 3-0. This has its pros and cons. Pro: cake. Con: my big 3-0 is not far behind. But lets focus on the the positives shall we?

Turning thirty is supposed to be such a big scary thing. I make jokes a lot about it, and tease him endlessly since he is hitting the milestone before I am, but deep down I don't think either of us really care all that much. Plus, we all become mature, responsible adults when we turn thirty right? Right?? All jokes aside, we aren't big birthday celebrators in the first place, so we tend to keep things pretty low key.

I have learned that it is pretty much impossible to make a surprise cake for someone you live with. I have also learned that when you make a cake for someones birthday without having a party or a bunch of people over, the majority of the cake goes untouched in the refrigerator until it ends up in the garbage. So, I am going to forgo the cake this year (sorry Steve) and hope that the pistachio gelato and half eaten shamrock shake in the freezer will suffice.


I have made quite a few cakes in my day, and lets face it, they were pretty much all for the ladies. Even the wedding cakes I have done, though they were for a couple's celebration, it was mostly the bride that cared about the look of the cake (I find the grooms tend to only care about what is inside the cake).


Obviously there are exceptions to this, but it is always a bit tricky when asked to make a cake for an adult male. It is easy to make a pretty pattern, throw some frilly gumpaste flowers on a cake for any occasion, but that is typically seen as being 'girly', and that usually doesn't fly for the guys.


So what's a girl to do? Beer, baseball, and totally neutral colors and shapes, that's what! Yay gender roles! Actually in full disclosure, the baseball cake turned out to be for a woman, which I didn't find out until the party started and totally made me happy. I also felt guilty for just assuming it was for a man. In general, I am finding it easier to break my habits of always making 'feminine' cakes. Using darker, bolder colors, utilizing more geometric patterns and shapes, bold writing and designs, and generally staying away from flowers seem to be some basic stepping stones for creating a more masculine cake.


Making it look and taste like beer always helps.


Saturday, October 5, 2013

Good as Gold


It's Saturday morning, and I am at home, drinking coffee, and...well, that's it actually. I am sitting in my pj-s, doing nothing. Nothing except writing this post. It feels wonderfully weird. No baking to do, no projects to work on, nothing. I get to spend some time with friends today whom I haven't seen in far too long, participate in some fall-themed activities, and share with you some goodies that I just haven't had the time to post.

A few years ago, I hinted not-so subtly on this very blog that I wanted Santa to bring me an airbrush machine for christmas. Santa pulled through, but unfortunately the machine was swiftly delegated to our second bedroom, otherwise known as the room where kitchen appliances go to die. When a friend of mine asked me to make her a anniversary cake, and showed me the picture of what she had actually wanted her wedding cake to look like (not what they ended up receiving unfortunately). I knew this was a perfect opportunity to resurrect and make use of my not-so new toy.


A smooth layer of buttercream, a quick coat of airbrush gold, and a light pressing of a textured paper towel, gave this cake it's antiqued look. For the flower, I rolled what felt like a million little balls out of fondant in multiple sizes and used royal icing to secure them to the center of the flower. Then I airbrushed the entire center and let it dry before affixing the petals.


Inside is my favorite devils food chocolate cake, frosted with vanilla italian meringue buttercream and filled with this raspberry curd mousse.

Raspberry Curd Mousse
recipe adapted from epicurious.com

12 oz raspberries
1 1/4 cup sugar
2 eggs
2 TBL lemon juice
2 TBL unsalted butter (room temperature)
pinch salt
1 tsp gelatin
1 TBL water
1 cup heavy whipping cream

Combine raspberries, sugar, lemon juice, and butter in a food processor, and pulse until raspberries have broken down. Transfer to a saucepan, and whisk in the eggs and salt. Place pan over medium heat, and bring mixture to 175 degrees F, whisking constantly. Remove from heat, strain through a fine mesh sieve, and let cool to room temperature, whisking every few minutes to aid cooling. Combine water and gelatin and let bloom for 5 minutes. Melt gelatin and whisk into raspberry curd. When mixture has cooled to room temperature, whip the heavy cream to medium peaks. Add the raspberry curd and mix until combined. Chill until you are ready to fill your cake.

You can skip the gelatin if you want, but I found the raspberry curd to be a little runny to be filling layer cakes with. If you are using the curd or mousse for a different purpose you can omit it.

Tuesday, September 17, 2013

Checking In


If I have been reminded of anything this summer, it is that life is short. Too short. The life you've grown accustomed to, your sense of comfort and control, and even the ones you love can be snapped away in a mere second. The months fly by without you noticing, or having the time to stop and realize what you are missing.


I found that I sort of checked out of life this summer. I checked out of social activities, checked out of taking care of myself, checked out of a lot of things. I threw myself into work and grief, and neglected most of everything else.


Now I find the weather beginning to cool off, there are pumpkins for sale at the garden store down the street, and I am wondering where the season went. I am also wondering what the hell was wrong with me?


My wake up call came in the form of a much needed celebration to close the summer. I have been home so many times these past few months, a few times to say goodbye to lives cut too short, but most recently a visit home for a wedding was the giant breath of fresh air that many in my family needed to come together and celebrate love and new beginnings.


Weddings have a way of doing that I think. It reminds you of how much love there is in this world. You can look around, and see all eyes and hearts focused on the two people in the front of the room, supporting them and wishing them a life full of happiness. In this case, the wedding was my sister's (which will have it's own post altogether) and there were just so many faces that I had a chance to catch up with and reconnect with. I also was scolded by more than a handful of family friends and relatives that I had not updated this space in a long time, so friends, this is for you.


I feel honored every time I am trusted to make a wedding cake. It is a big job, and often it is the first thing guests see when they walk into the reception space. It is a constant reminder of why I do what I do. I am in the business of making people happy, and to see the joy on someone's face when they catch the first glimpse of their wedding cake, or when dessert is placed in front of them at the end of their meal, is my motivation to keep creating.


When life hands us a little more than we can handle, it's easy to check out. The better path though, is to check back in, keep getting better at your job, strengthen your relationships, tighten up your family ties. Life may keep you busy and overwhelmed but at the end of the day, what is left is family, love, and passion, things that should never be taken for granted.

Thursday, November 8, 2012

The Art of Impermanance


For some reason or another, I have been putting off writing this post. Whether it's sheer laziness on my part, or the thought that I really don't want to write about food after working at the restaurant all week, I just couldn't get it started. Maybe it's the fact that I didn't want to just write another superfluous post about a wedding cake that I made for person a, and it contains a,b, and c, flavors, and it was this (insert difficult sounding adjective here) hard to make. Maybe it was the fact that I am feeling guilty that the person I made this cake for is one of my very best friends, and I haven't talk to her in far too long. Maybe it's because this was the last of the wedding cakes for the year, and I am sad to know there won't be any more for the next few months. So, here I am, holding onto the pictures in hopes that they will tide me over until the next one comes along.


But that's the thing about this industry, they are just pictures. There is no cake left (I sincerely hope not) to eat, or gumpaste flowers to swoon over, they are long gone. In my previous life as a product designer my art was permanent. It was sketched, modeled, and produced in various materials, such as plastic, metal, fabric. The sketches were filed, documents backed up, and finished products were sold to eager consumers. It's all still around in one way or another, but my new art is so much different. My new art is the epitome of impermanence and its been quite the adjustment.


I wonder if I will ever get used to watching my cakes be cut and completely disassembled in five minutes flat. Something that I put hours and hours into is destroyed in less time than it took to mix and bake just one of the many layers it contains. The consolation of course is when the client, be it your best friend or someone you've met only once, takes that first bite and an exstatic smile starts spreading across their face. This is when your nerves calm, and the heartbreak you experience from watching the knife stab through the intricate decorations starts to subside, and you remember this is what it's all about. In that one moment, you get to make someone really happy. They are celebrating something big, whether it be a birthday, wedding, baby or engagement, and they just ate something that will stick in their memory for years to come.

The satisfaction of that moment is enough, and it has to be to keep on going in this industry. Unless I start making styrofoam cakes and decorating my apartment with them...just kidding.


There were some new flavors in this cake that I just have to share with you. The groom is from florida and the bride requested that two of the tiers resemble key lime pie in some way. I went through a few variations and quickly found a winner. The cake is a richly flavored vanilla cake with buttermilk and lime zest, filled with key lime curd, and brought over the top with coconut buttercream. It was like florida on a plate, or so I was told, I haven't been to florida in years so I will reserve judgment.

Key Lime Cake
adapted from Bon Apetit
This recipe makes 2 fairly thin 9 inch rounds, I like to double it and make three thicker layers, I pretty much always go for a taller cake.

1 cup ap flour
3/4 cup cake flour, sifted
1/2 tsp baking powder
1/2 tsp baking soda
1/2 tsp salt
1/2 cup butter, room temperature
1 1/4 cup granulated sugar
2 eggs
2 1/2 tbl key lime juice
1 tbl key lime zest
1 tsp vanilla extract
3/4 cup buttermilk

Preheat oven to 350 degrees F. Line pans with parchment, and lightly butter and flour sides. In a medium bowl, whisk together the flours, baking powder, baking soda, and salt. In a stand mixer, cream together the butter and sugar. Add the eggs, one at a time, scraping the bowl between each addition. Add the lime juice, zest, and vanilla, and mix to combine. Add 1/3 of the flour mixture, mix just to combine, scrape bowl. Add half the buttermilk, mix to combine, scrape bowl. Add another third of the flour, followed by the remainder of the buttermilk, and the remainder of the flour, scraping well between each addition.

Divide batter between pans, and bake for 20-25 minutes, or until top of cake springs back completely when gently pushed with your index finger. Let cool in pans for about 5-10 minutes, then turn out and cool completely.

Key Lime Curd
adapted from Ina Garten
Makes about 3 cups, I add a little gelatin to this recipe when I use to to fill cakes. It makes it much more sturdy and you wont have to worry about it running out the sides of the cake (not that I have had that happen, I swear).

Zest of 4 limes
1 1/2 cups sugar
1/4 pound butter, room temperature
4 eggs
1/2 cup key lime juice
pinch of salt
1 tsp gelatin
1 tbl water

Place sugar and zest in a food processor and pulse until zest and sugar are finely ground together. Place the sugar into a large, heavy saucepan, but do not place over heat yet. Whisk together the sugar and butter, then add the eggs, one at a time, mixing until completely incorporated after each addition. Add the lime juice and salt, then place over medium heat and cook until the temperature reaches 175 degrees F, whisking vigorously constantly. Remove from heat. Bloom gelatin in the water and let stand for about 5 minutes. Heat gelatin in the microwave  for 5 second intervals, just until it melts completely. Whisk the hot gelatin into the still warm lime curd. Transfer curd to a bowl, cover, and refrigerate until set, at least 4 hours, before using.

Coconut Buttercream

4 oz egg whites
2 oz water
8 oz sugar
12 oz butter
1/2 tsp vanilla extract
1/2 coconut extract

Place egg whites in the bowl of your stand mixer fitted with the whisk attachment and begin whipping the whites on medium-high speed. Place the sugar and water in a small saucepan and using a candy thermometer, heat the sugar to soft ball stage, or 240 F. The eggs at this point should  be voluminous and frothy. Slowly pour the sugar into the egg whites in a steady stream, while the mixer is on high.
Let the mixer run on high (I usually set it to one number below the very highest setting) until the mixture has cooled completely. Switch to the paddle attachment, and add the butter one tablespoon at a time, mixing on a medium-low speed. Once all the butter has been added, turn your mixer to high and whip for 3-5 minutes until frosting is light and smooth. Add the vanilla and coconut extracts.


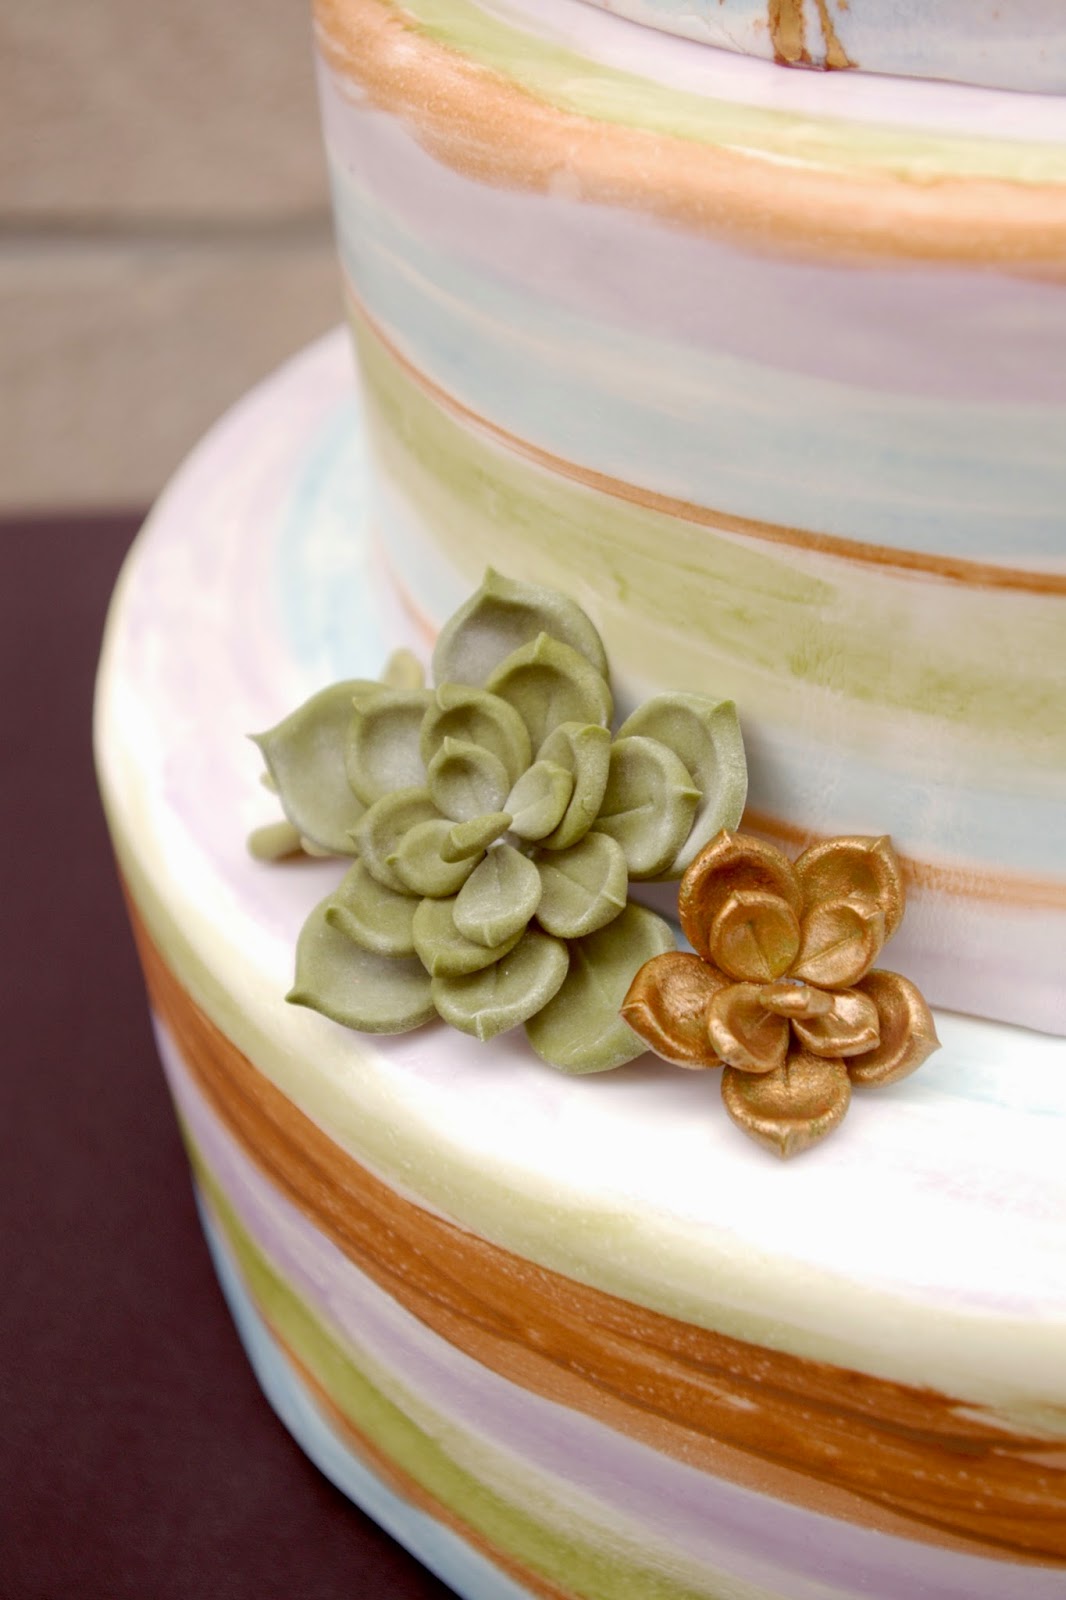
Special shout-out to my mom for helping me with these cakes, and the over 100 cake pops that were made for this wedding, especially for helping me cut out each and every of the hundreds of fondant flowers that cover the sides of this cake. Thank you to Erica for taking all the lovely pictures, so that I didn't have to! Last but not least, congratulations to my best friend Heather, and her best friend Matt, you two are so incredibly lucky to have each other, and I love you both.

Tuesday, August 21, 2012

Ruffles!


One more wedding cake under my belt, and just a few days to recover before I start working on the next one. This cake came with a few ups and downs, and many lessons learned. I realized as I was putting the fondant on the bottom tier of this cake, that this was in fact the largest fondant project I had taken on yet. I haven't covered anything larger than a ten inch cake before. A pyramid, yes, but something this huge? Nope, not even close. For some reason it hadn't occurred to me until just that moment.


There is no more hesitation these days when someone hires me to make a cake or dessert table, I say yes of course I can do that. Whether its for better or worse, I rarely consider if I have the necessary time and means to do said project, but deep down, I know that one way or another I will get it done, and I won't stop or finish it until it looks and tastes exactly how I wanted it. If that means ripping two pounds of fondant off of a 15-inch cake tier because it has one too many wrinkles and starting from scratch at 2 am, that's what I will do.


As much as it interferes with my sleep schedule, and the cleanliness of my kitchen at times, it's the attitude I need to have in this industry. Yep, I can do that! Sometimes, the google helps, and sometimes I just jump right in and figure it out for myself. So here's to diving into the deep end, and hoping you make it out alive, and with a beautiful, and even more importantly, delicious, cake in hand.


Pin It

LinkWithin

Related Posts with Thumbnails