Showing posts with label Comfort Food. Show all posts

Sunday, August 5, 2012

Sweet Corn Risotto


Before I say anything else, I have to say one thing. I am sorry, Mom. I know the second you read the title of this post, you cringed a little, but kept reading out of obligation as a mother to read each and every one of her daughter's blog entries in it's entirety.

You see, my mom loves sweet corn, as long as it's not in things. Corn in soups, salsas, salads, creeps her out. We all think she is crazy, and thankfully this is not a genetic trait she passed along to me. I love corn in anything and everything. Sometimes for dinner I will just eat a big bowl of corn with butter, salt and pepper with a fried egg on top. I love the crunch it adds to soup, the bright notes it adds to salads, and how amazing it is when smothered with cheese (trust me on that).

I have been seeing recipes pop up in the last month or so all over the blogosphere for corn risotto, and knew instantly that I needed to jump on the bandwagon. I read a few recipes, but none of them really grabbed me as much as the mere idea of sweet corn risotto, so I decided to wing it.


The extra effort of milking the corn cobs for the pulp and juices really adds a strong fresh corn flavor to the entire rice, rather than just stirring in some corn towards the end of cooking. The additions of garlic, pancetta, and chives didn't hurt either. I made a huge pot and can hardly wait to eat it all week long. There may even be some arancini (fried risotto balls) in my future.


Sweet Corn & Pancetta Risotto
serves 6-8

6-8 cups low sodium chicken stock
6 tablespoons unsalted butter, divided
4 tablespoons olive oil, divided
4 oz pancetta, chopped
2 cloves garlic, minced finely
4 shallots, minced
1 1/2 cups arborio rice
1 cup white wine
4 ears fresh sweet corn
2/3 cup grated parmesan cheese
1/4 cup chives, chopped
salt and freshly ground black pepper to taste

Prepare the corn first. Using a sharp knife, cut the kernels off the cobs and place in a bowl. Be sure not to cut too close to the cob, you want just the soft crisp nuggets of corn. Then you want to "milk" the corn cobs. This basically means you want to squeeze all the pulp and juice out of the cob. I used my microplane to gently grate the cobs of corn over a bowl. After I went over the entire cob with the microplane, I quickly ran the back of my knife down each cob to squish out the rest of the juice. This can get a bit messy, so use a large bowl and wear an apron.

Bring the chicken stock to a simmer in a large saucepan or small stockpot, then reduce heat to low and keep warm.

In a large heavy pot, melt two tablespoons of butter over medium heat. Add two tablespoons of olive oil. Add pancetta and cook until most of the fat has rendered and starts to crisp. Add the garlic and saute for another 1-2 minutes, just until fragrant. Remove from heat, and transfer pancetta to a bowl and set aside.

Over medium heat in the same pot, melt two tablespoons of butter with two tablespoons of olive oil. Add the shallots and saute until tender, about 6-8 minutes. 

Stir in the rice, and let cook until the rice toasts a bit and becomes slightly translucent, about 3-4 minutes. Add the wine and cook until it has absorbed, stirring frequently, about 3 minutes. When wine is just about all absorbed, add the corn kernels and pulp and stir to combine.

Reduce heat to medium low, and add 1 cup of hot broth, stirring rice very frequently until broth is absorbed. Continue adding broth 1 cup at a time and stirring, until rice is just al dente. This should take about 30-40 minutes, and you may not need all the broth.

When the rice is at the al dente stage, stir in the pancetta, the rest of the butter, cheese, and chives. Add plenty of black pepper and salt to taste. Serve immediately, and if you have leftovers, its nice to have a bit of chicken broth in the fridge to loosen up the risotto as its reheating. Just a few tablespoons of hot broth can turn a sticky clump of leftover risotto nice and creamy again. 

Thursday, January 13, 2011

Curried Squash & Wild Rice Soup


The weekend has once again come and gone, and yet again I am left with thoughts unfinished and tasks undone. My to do list has grown exponentially, and it seems that I am playing an endless game of catch up. Sunday marked the first day in weeks that my alarm clock was quiet until after the sun came up.

I suppose I could have caught up on the sleep lost over the past few weeks to racing thoughts and hard decisions, instead, I rolled myself out of bed and pulled out my Le Crueset. I flicked the burner on, and in went the turkey carcass that has been waiting in my freezer since thanksgiving, some carrots, onions, herbs, and garlic. Soon, the wonderful scent of homemade stock was filling the apartment. All I had to do was wait, so I pulled out another stock pot, and went to work peeling squash, sweet potatoes, and apples.

Soon enough, my stove was full of soups bubbling away, and my mind was perfectly clear. I was no longer worrying about the big changes about to come, or the new directions my life may be taking. I wasn't thinking about jobs and money and bills and credit cards. All I had to think about was not burning the chicken and apple sausage or over cooking the wild rice that were destined to join the roasted squash in the soup pot. I was filled with the anticipation of a new recipe working out with no kinks, and most of all filling my tummy with a wonderfully hearty and comforting soup.


This soup is chocked full of good stuff. Butternut squash, sweet potatoes, apples, and shallots, get roasted together and pureed. Then nutty wild rice is added, and topped with some chicken apple sausage. Lets not forget the warming kick from a little curry powder that really balances out the sweetness from the apple and squash. I have a few soups I tend to make over and over again, so this time I was looking for a little familiarity, but also something new.

I kept thinking about a butternut and wild rice soup from Emril Lagasse, recommended to me by my sister, but when I went to look up the recipe, it had a ton of heavy cream, and just didn't appeal to my mood at the time. So I took the notion of combining squash, sausage, and wild rice and made it my own. This was a great adaptation of a simple roasted vegetable soup, I hope you all get the chance to try it soon.


Curried Squash and Wild Rice Soup
this makes a HUGE pot of soup, feel free to halve

1 - 4 lb butternut squash, peeled, seeded, and cubed into 1 inch pieces
2 large sweet potatoes, peeled and cubed into 1/2 inch pieces
6 shallots, peeled and quartered
2 small granny smith apples, or 1 large, peeled, cored, and quartered
10-12 cups chicken stock
1 1/2 cups wild rice, cooked according to package directions
1-2 tablespoons curry powder
4 chicken-apple sausages (feel free to substitute any sort of sausage here) quartered lengthwise and diced
olive oil
salt and pepper

Preheat oven to 400 degrees F.

Toss squash, apples, shallots, and sweet potatoes with a few tablespoons olive oil, season generously with salt and pepper, and spread in an ever layer on two baking sheets. Roast for about an hour, tossing a few times, until soft and cooked through, and beginning to turn golden brown.

Transfer about 1/2 the vegetables to a food processor with 2-4 cups of chicken stock (enough to cover veggies), and puree until smooth. Transfer to stock pot, and repeat with remaining vegetables.  Stir in the cooked wild rice, and add the remaining chicken stock to desired thickness. Season with 1-2 tablespoons of curry powder, depending on how spicy you like it, and salt and pepper to taste. Bring the soup up to a very gentle simmer.

Meanwhile, heat a small amount of olive oil in a medium saute pan, and cook the sausage over medium high heat until cooked though and crispy brown on the outside. You can either stir the sausage in, I prefer to use it more as a garnish.


This soup freezes very well, so feel free to make a huge batch, it will be enough to get you through the remaining months of winter.

Tuesday, December 7, 2010

Pumpkin Mac


Thanksgiving is long gone, the Christmas decorations are up, the ground is covered in snow....and yet I am still finding random cans of pumpkin around my apartment. I am not kidding, they are everywhere. I think that as a result from the big pumpkin-shortage scare of 2009, I over compensated with my pumpkin purchasing this fall. Every time I went to the grocery store in late October and early November, I picked up a can, you know, just in case they ran out before Thanksgiving. I wonder if I am beginning to exhibit hoarding tendencies.


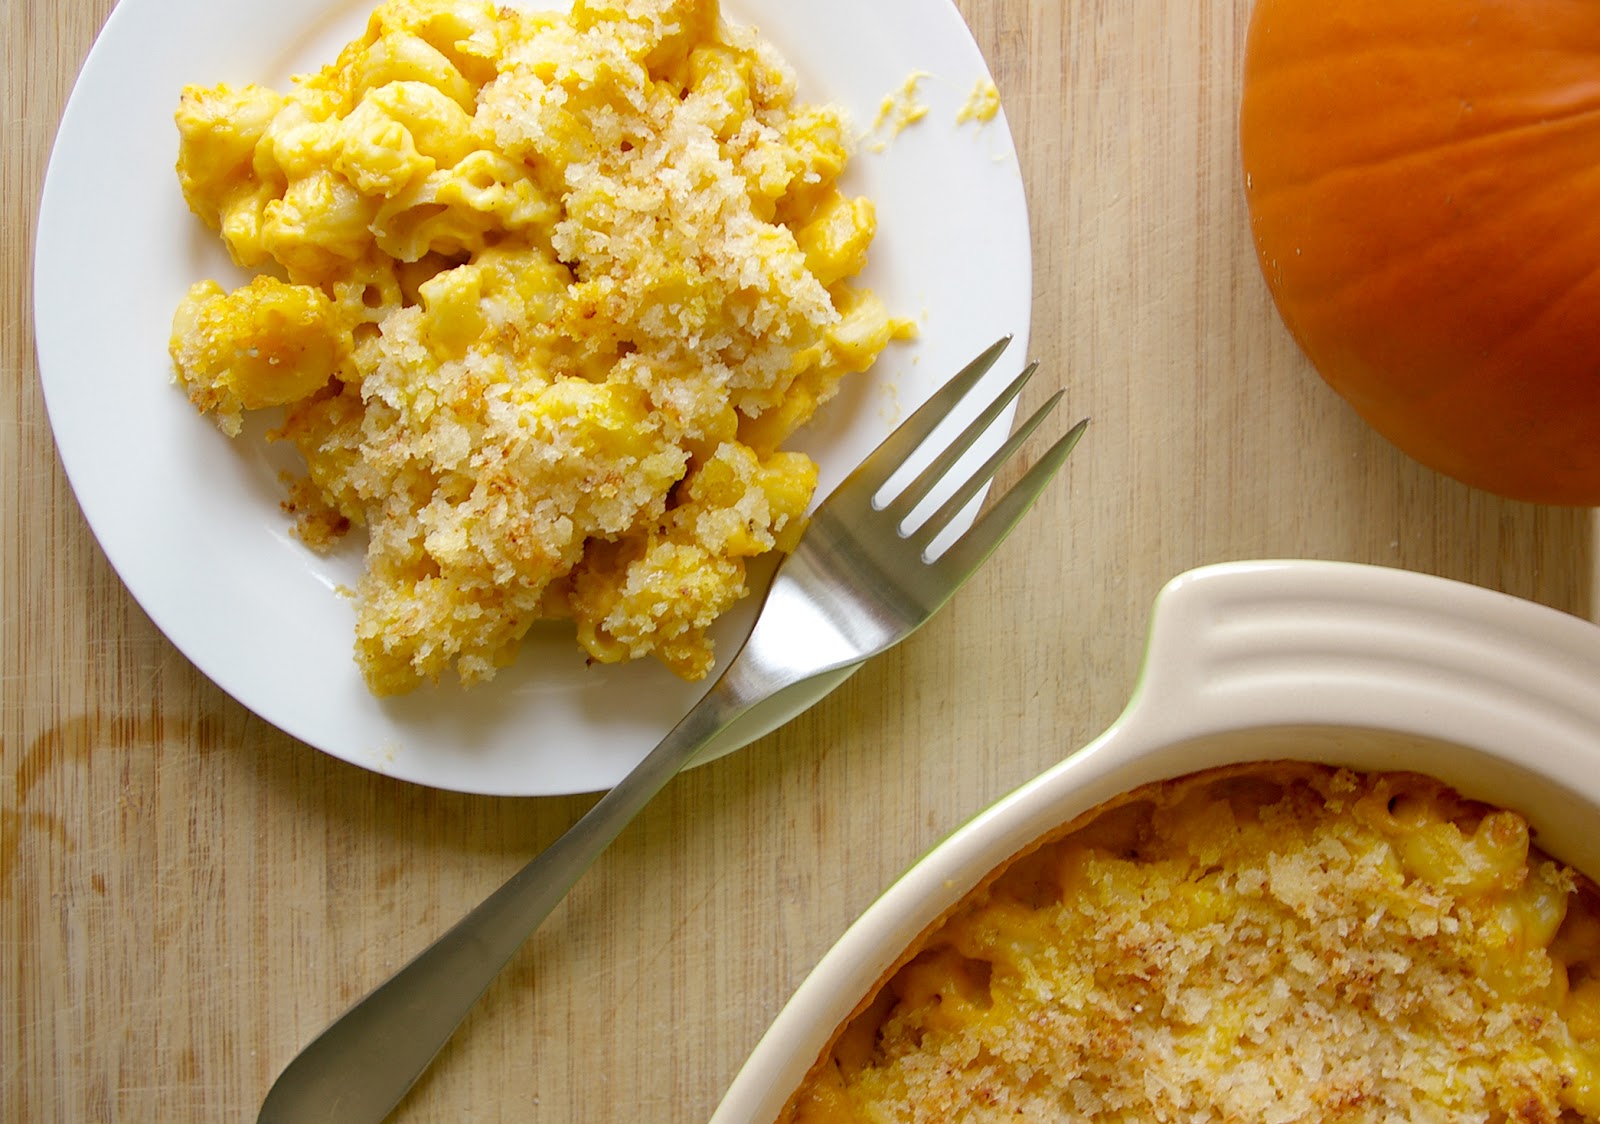
Luckily, after all the pumpkin pies and tarts were made, I found an even better way to use up my seemingly endless supply of extra pumpkin. Pumpkin macaroni and cheese. I have been seeing versions of this creation all over the blog-o-sphere lately, and I am so glad I tried it. It wasn't overwhelmingly pumpkin-y, but very rich and creamy with a hint of squash flavor at the end. I added some Gorgonzola and ground mustard to the mix, just to give a little extra bite to cut through the rich cheesy pumpkin sauce.


Pumpkin Macaroni and Cheese
serves 8-10

1 pound dried pasta (I prefer cavatappi or penne rigate, it holds the sauce really well)
1 quart whole milk
1 stick butter, divided
1/2 cup flour
1 15 ounce can pure pumpkin puree (DO NOT use pumpkin pie filling, not the same thing!)
8 ounces Gruyere cheese, grated
8 ounces cheddar cheese, grated
4 ounces crumbled Gorgonzola cheese
1 teaspoon ground mustard powder
1/2 teaspoon ground nutmeg
1/2 teaspoon freshly ground black pepper
1 tablespoon salt
1 1/2 cups panko bread crumbs
1/2 cup pecorino romano cheese, grated

Bring a large pot of salted water to a boil, and cooked the pasta until just al dente. It should still have some bite to it as it will continue to cook while baking. Drain, set aside.

Preheat oven to 375 degrees F. Meanwhile, heat the milk in a small saucepan over low heat, being careful not to let it boil or burn.

Melt 6 tablespoons of the butter in a large, heavy bottomed pot over medium-low heat. Add the flour and whisk constantly until combined and just starting to turn a light brown color, about 2-3 minutes. Slowly add in the milk, whisking until smooth and thick, about 3-5 minutes. Remove from heat and stir in the Gruyere, cheddar, and Gorgonzola cheeses, pumpkin puree, salt, pepper, nutmeg, and ground mustard.

Add the pasta and stir until pasta is evenly coated. Pour into a 10 x 14 baking dish, or alternatively you can use two slightly smaller ones. (I do this, and freeze one of the pans after baking, that way I am only tempted to eat half a pound of pasta in one sitting, rather than the entire pound.)

Melt the remaining two tablespoons of butter in the microwave, then mix with the panko and pecorino romano. Sprinkle the bread crumb mixture all over the top of the pasta and bake for 30-40 minutes, until top is golden brown and bubbly.

If anyone has any other more savory ways to use up excess pumpkin, please let me know in the comments, I think I still have a few cans lying around...

Thursday, November 11, 2010

Truffled Potato & Portobello Tart


**Reminder, Giveaway ends this Friday, November 12th (that's tomorrow!) Go here to enter!**

It has recently occurred to me that I am obsessed with tarts. Big tarts, little tarts, sweet tarts, savory tarts. Line some goodies with pastry or a crust of some sort, and I am in. Such an easy sell. Mashed potatoes? Sure I like them, but mashed potatoes baked inside a pastry dough? Give it to me right now.


This tart may contain everything I want out of comfort food. Creamy, cheesy mashed potatoes, crispy, buttery filo dough, earthy, hearty mushrooms, fresh chives, and a drizzle of truffle oil. Oh yes, that's right, I played the truffle oil card. My older, wiser sister is a firm believer that, like bacon, truffles make pretty much everything better. If that is her conviction, I think I would like to join the faith. Think there is a truffle worshiping church somewhere in Italy? There should be.

I don't know what took me so long, but I finally bit the bullet and bought a bottle of black truffle oil. I need to restrain myself so I don't put it on everything I eat for the next two months. I cannot wait to try making my own slow fried eggs with a little of the oil drizzled over the top for breakfast this weekend. Or maybe for dinner tonight, I don't know if I can wait that long.


I saw a version of this tart on Jamie Oliver's show on the cooking channel last week, and knew instantly that I had to make it. Unfortunately, it is no longer asparagus season and there is little I detest more than asparagus spears that are an inch in diameter. I am very discriminatory when it comes to asparagus, I only like the skinny ones. Maybe someday I will learn to love all asparagus spears as they are, but for now I am set in my ways. This is coming from the girl who only used to eat the 'tree tops' off the broccoli and leave the rest. I have come a long way since then.


I had to think of something that would go well with the cheesy mashed potato base, but wouldn't put me into carbohydrate or starch overload. Many of the vegetables that are in season right now would probably have that effect. I instead decided to use thinly sliced portobello mushroom caps in place of the asparagus, and add a little Gruyere, chives, and of course truffle oil to the mix. It was wonderful. The smell was heavenly and I have been thoroughly enjoying eating all the leftovers this week.

The best part is, it was really easy to assemble. Filo, or Phyllo dough can be intimidating because it is so fragile and thin, but this tart is pretty rustic, it looks better that way. You don't have to worry about tearing the sheets of dough, just slather on some more melted butter and patch it up with the next layer. You could substitute puff pastry dough for a thicker and less fussy crust, but I like how light the crust was with just five or so layers of filo.


Or you can forgo the crust all together and just bake the filling, for a gluten free version. Almost just as good. Almost.


Truffled Potato & Portobello Tart
adapted from Jamie Oliver
serves 4-6

1 1/4 lb. (a little more or a little less if just fine) of russet potatoes, peeled and cubed
3-4 medium portobello mushroom caps, thinly sliced
5-6 sheets of filo dough
1/2 stick of butter, melted
3/4 cup white cheddar cheese, grated
3/4 cup Gruyere cheese, grated
3 large eggs
1 cup heavy cream
salt & pepper to taste
2 tablespoons minced chives
truffle oil for garnish

Place cut potatoes in a pot filled with cold water and boil until fork tender, about 15 minutes. Drain.

Preheat your oven to 375 degrees F. Take whatever dish you are planning on using, I actually used a 8 X 8 in cake pan that I lined with parchment paper (but you can using a baking dish, or a tart pan as well) and brush with melted butter to coat.

Take one sheet of your filo dough (keep the rest covered with a slightly damp paper towel so it doesn't dry out) and gently line your pan. Brush melted butter all over the filo, and repeat with 5-6 sheets of dough. You can leave the edges of the filo draped over the sides of the dish for now. Cover with a damp towel or paper towel and set aside.

In a small bowl beat the eggs together with the cream with a fork. In a large bowl, break up the potatoes with a masher, then add the cheeses and mash until combined. Add the cream and egg mixture and mash and mix until smooth. Season generously with salt and pepper.

Pour potato mixture into filo-lined baking dish leaving at least 1/2 inch room from the top of the dish. Spread into an even layer and top with your sliced mushrooms. Sprinkle with a little extra ground black pepper and the chives. Gather the extra filo dough that was draped over the edge and crimp it together around the edge of the potato mixture. Brush more butter all over the filo crust, and bake for 20-30 minutes until middle has set and the filo is golden brown. The time will vary depending on the size and depth of your baking dish. Mine took a bit longer since it was so deep.

Let the tart set up for at least 15 minutes before cutting. Drizzle with a bit of truffle oil and sprinkle with fresh chives before serving.

Wednesday, November 3, 2010

Greek-Style Shepard's Pie & A Giveaway!


I wish I could give away a dutch oven to each and every one of you. Seriously, I do. I love these things. To me, dutch ovens absolutely symbolize cold weather cooking. Though they are very heavy pieces of artillery, my two LeCrueset's have become an incredibly vital part of my kitchen. As soon as the weather turns brisk, my mind starts scheming to come up with new things to make in Big Red (that's what I call my 13-quart red Dutch oven, and yes I realize I am a huge nerd). 

Alas, I cannot give you a dutch oven, but I can do something to help those of you who are in need of one (or anything else in your kitchen artillery that you find you are missing). I am giving away a $45.00 gift card for CSN stores online! They have a huge selection of cookware and kitchen gadgets, and you can use this gift towards any of it. 

All you have to do is:

Leave me a comment on this post, telling me what your favorite thing to make in your dutch oven is? Or, if you don't have a dutch oven, what would be the first thing you would make if you did?

You have until next Friday, November 12th at midnight to enter. I will pick a winner at random, and you will be contacted by CSN stores to redeem your gift! 

Now, lets get on to the goodies. This may not be the most beautiful or photogenic dish, and it may not be the most fancy dish, but it is so so delicious. Tender eggplant and big chunks of beef, tons of oregano and a pecorino-garlic spiked mashed potato topping...I can barely handle it. I spied this on the cover of bon appetit about two years ago, and finally got around to making it this week, I can't believe I waited this long. It is chocked full of vegetables, tender cubes of braised beef, and topped with a creamy, starchy topping, it has all the things you want out of a traditional shepard's pie, with a few twists. 

I found my favorite way to eat this particular dish is in a mug. Preferably with a snuggie on. (I almost tried to smuggle home the snuggie I got my parents as a gag-gift for Christmas) Yes, I am ashamed. You can curl up on the couch and let this pie warm your hands and your belly. 

Greek - Style Shepard's Pie
serves 8-10

1 1/2 - 2 pounds eggplant, cut into 1/2 inch cubes
coarse salt
6-7 tablespoons olive oil
2-3 pounds beef, cubed into 1 inch pieces (I usually just buy the 'stew beef', pre-cut into small square pieces)
All-purpose flour
5-6 carrots, diced
3 cups chopped onions (I used about 2 1/2 large vidalia onions)
1 cup dry white wine
1 - 28 oz can of diced tomatoes
3 cups beef broth
8 garlic cloves, minced
1 tablespoon dried oregano
2 1/2 pounds russet potatoes, peeled and chopped
2 tablespoons unsalted butter
2 tablespoons olive oil
2 garlic cloves, minced
3/4 cups whole milk
1 1/4 cups grated Pecorino Romano cheese (if you can find the Greek Kasseri cheese, use that, I couldn't find any)

Spread the eggplant on a baking sheet and sprinkle with a small handful of coarse salt. Let sit at room temperature for about 1 hour, to pull the excess moisture out of the eggplant. Rinse eggplant with water to remove salt, and pat dry with paper towels. 

Heat 3 tablespoons of olive oil in a large heavy pot over high heat. Add eggplant, and saute until tender and browned, about 12-15 minutes. Transfer to bowl, and set aside. 

Season beef with salt and pepper, then toss with enough flour to lightly coat all the pieces. Heat a few tablespoons of oil in the same large pot over medium-high heat. Working in batches, if necessary, brown meat on all sides, about 8-10 minutes for each batch. Transfer beef to a bowl, and set aside.

If pot is dry, add another tablespoon of olive oil then add the onions. Saute the onions until tender and translucent, about 10 minutes. Add the wine to the pot and scrape up all the brown bits on the bottom of the pot. Cook for about 5 minutes, until most of wine has evaporated. Add tomatoes with juice, beef broth, garlic, and oregano, and bring to a boil. Add beef with any accumulated juice and carrots to pot, and bring to a simmer. Cover and simmer over low heat for 1 hour, stirring occasionally. Uncover and simmer over low heat for another 45 minutes.

While the filling is simmering, place your potatoes in a large pot and cover with cold water. Bring to a boil and cook until potatoes are fork tender, about 15 minutes.

Preheat oven to 375 degrees F.

Meanwhile, heat the two tablespoons of butter in a small saucepan over medium heat. Add garlic and saute just a minute, until fragrant. Add milk and bring to a simmer and turn off heat.

When the potatoes are cooked through, drain and return to pot, cooking over medium heat for a few minutes until excess water has evaporated. Crush potatoes with a potato masher, and add the milk, mashing until smooth. Stir in the cheese, season with salt and pepper, and keep covered until filling is done. 

You can either bake the pie in the dutch oven the you prepared the filling in if it is oven proof, or you can transfer the filling into a 9 x 13 baking dish. Top the filling with spoonfuls of the mashed potatoes, and spread gently into a even layer to seal in the edges. 

Bake until filling is bubbling and topping is golden brown, about 45 minutes. 


Tuesday, September 21, 2010

Soup for a Sicky


Well, after all my praise about the fall season approaching, the weather that I so love has turned on me. Actually I think it's more of the fact that the weather can't make up its mind about what season it wants to be. A week ago it was a perfect 67 degrees and sunny, 88 and sticky a few days later, then a trip to Wisconsin over the weekend brought a 36 degree overnight low. My sinuses have given up trying to adjust and are now revolting. I have a mutiny going on in my face, and it's not even winter yet.

Feeling like this makes it hard to get motivated to cook anything for dinner, I had trouble bringing myself to make a sandwich last night. Thank god for my productive weekend two weeks ago in which I spent the morning making a huge pot of soup, and stored most of it in the freezer for just such an occasion.

This corn and potato chowder is a perfect soup for a sicky like me. It is comforting, hearty, and creamy, but not super thick, so it doesn't leave you feeling like a big lump if you accidentally eat two giant bowlfuls. If you use corn off the ears like I did, be forewarned that it is a bit of work, cutting the kernels off and milking the cobs takes some time and patience.


In my opinion, it would have been very much worth it had the corn been better quality, unfortunately, it wasn't the greatest. I would make this again before next year's sweet corn season comes around, but will probably take the easy route and go with frozen. If you do use frozen corn, I would recommend taking about 1 - 1 1/2 cups of the corn and puree it in a food processor before adding it to the soup, this will simulate the corn pulp that you would have extracted from the cobs.


Corn and Potato Chowder
recipe adapted from Foy Update

10 ears sweet corn
1 large vidalia onion, diced
1 1/2 lbs baby red potatoes, cut into 1/4 inch pieces
6 oz pancetta, chopped
4 cloves garlic, minced
4-5 tablespoons flour
2 tablespoons unsalted butter
1-2 tablespoons olive oil
6 cups chicken stock
2 cups whole milk
1 cup heavy cream
2 tablespoons minced parsley
2 teaspoons minced thyme
1 bay leaf
1 heaping tablespoon sugar
salt and pepper to taste

Prepare the corn first. Using a sharp knife, cut the kernels off the cobs and place in a bowl. Be sure not to cut too close to the cob, you want just the soft crisp nuggets of corn. Then you want to "milk" the corn cobs. This basically means you want to squeeze all the pulp and juice out of the cob, this will help make the soup nice and creamy. I used my microplane to gently grate the cobs of corn over a bowl. After I went over the entire cob with the microplane, I quickly ran the back of my knife down each cob to squish out the rest of the juice. This can get a bit messy, so use a large bowl and wear an apron.

In a large stock pot or dutch oven, heat a few tablespoons of olive oil over medium high heat. Add the pancetta and saute until most of the fat has rendered off and it is starting to get crispy, about 6-8 minutes. Remove the pancetta and set aside. Reduce heat to low and add the onions and butter. Cover and cook until onions have softened, stirring occasionally, about 12 minutes.

Add the garlic and saute for 1-2 minutes. Make a roux by sprinkling the flour over the onions and whisk for a minute or two until the flour has heated and is combined with the butter and onions. Slowly whisk in the stock and bring to a simmer.

Add the potatoes, bay leaf, thyme, corn pulp/juice, whole milk, and the cooked pancetta. Bring back to a simmer and cook over low heat for about 15-20 minutes, until potatoes are nice and tender. Add the corn, heavy cream and sugar, bring to a simmer again, and cook until corn kernels are tender but still crisp, about 10-15 minutes. Take out the bay leaf and serve topped with the chopped parsley and even some grated parmigiano reggiano.


The winter is coming, along with the colds, flu's, and sinus infections that come with it. I suggest you make this soup right now so you are armed and ready to battle it out.

Monday, March 8, 2010

I am Turning into an Italian Grandmother.

Yes it is true. I am slowly but surely turning into an little old Italian lady. Pay no mind that I am in fact mostly of Norwegian descent, and that I am the ripe old age of 25.

I know because of the look I got when I told people I spent almost 10 hours in the kitchen last weekend making lasagna. Why did it take you so long they asked. Well because I took the long way. I made a near-traditional meat Bolognese sauce. I made a béchamel sauce. I made my own egg noodles. I made the ricotta. Yeah you heard me correctly. I made the ricotta.

Have I gone insane you ask? My mom asked. Some of my friends asked. Maybe I have. But man was it fun. And rewarding. And by rewarding I mean this lasagna was so damn good. Insanely good. Standing for 10 hours stirring sauces, and kneading pasta dough, and straining curds and whey? Yup, it was worth it. SO worth it.

No Hold's Barred Lasagna
recipe adapted (barely) from Serious Eats

The bolognese sauce cooks for a good 3-4 hours so I would prep as much of the ingredients as you can, and then start with the sauce. While the sauce is simmering, make and drain the ricotta and make and roll out the pasta dough. Right before you are ready to assemble, put together the ricotta mixture and make the béchamel sauce. Lots of multi-tasking, but that's the fun part right?

Special Equipment:

Cheesecloths, pasta roller, food processor, deep 13 X 9 baking dish

For the ragù Bolognese:
2 tablespoons extra virgin olive oil
4 tablespoons butter
1 pound 85/15 ground beef
1 pound ground pork
3-4 ounces chicken livers, finely chopped
1 large onion, finely chopped (about 1 1/2 cups)
2 large carrots, peeled, and cut into 1/4-inch dice (about 1 cup)
3 large ribs celery, peeled, and cut into 1/4-inch dice (about 1 cup)
4 cloves garlic, finely minced
1/2 cup fresh sage leaves, finely chopped
large pinch red pepper flakes
1 (28-ounce) can crushed tomatoes
1 1/2 cups dry red wine
1 1/2 cups whole milk
2 cups homemade chicken or veal stock (or 2 cups low-sodium canned chicken broth)
2 bay leaves
1 tablespoon soy sauce
1 tablespoon worcestershire sauce
1/2 cup heavy cream
Salt and freshly ground black pepper
1/4 cup minced basil
1/4 cup minced parsley

For the ricotta:

One gallon whole milk
1/3 cup plus 1 teaspoon distilled white vinegar
1/2 teaspoon salt

For the ricotta mixture:
3 cups fresh ricotta
Salt and freshly ground black pepper
2 large eggs
2 tablespoons minced basil
2 tablespoons minced parsley

For the pasta:
6 eggs, divided
6 egg yolks, divided
5 cups all purpose flour, divided
1 1/2 teaspoon salt, divided
6 tablespoons of water, divided


For the béchamel:
2 tablespoons butter
2 tablespoons flour
2 cloves garlic, finely minced
2 cups whole milk
1/2 pound dry whole milk mozzarella cheese, grated or finely chopped (buy the ball of cheese, stay away from pre-shredded stuff here)
1/4 teaspoon freshly grated nutmeg
Salt and freshly ground black pepper

To assemble:
Fifteen 4" by 8" sheets fresh rolled pasta (or sized to fit your pan)
4 ounces parmigiano reggiano, finely grated (About 2 cups)
1 tablespoons minced basil
1 tablespoons minced parsley

To make the bolognese sauce:

Heat the butter and oil in a large pot or dutch oven over medium-high heat. Add the pork, beef, and chicken livers, stirring to break up meat, and cook until no longer pink, about 7-10 minutes. Transfer meat to strainer set over a large bowl. Transfer about half the liquid back to the pot and reduce heat to medium. Add the onions, carrots, celery, sage, garlic, and red pepper flakes and cook until vegetables are softened, but not browned, about 10 minutes.

Return the meat back to the pot, along with the tomatoes, red wine, milk, stock, and bay leaves. Bring to a boil, then reduce heat and simmer partially covered, about 3 hours stirring occasionally.

When sauce is reduced and slightly thickened, remove bay leaves, add soy sauce, worcestershire sauce, and heavy cream and simmer for about 5 minutes longer, stirring frequently. Season to taste with salt and pepper. Remove from heat and let come to room temperature, about 30 minutes. Stir in parsley and basil, set aside until use. If making ahead of time (do it, it only gets better) reheat until warm before assembling lasagna.

To make the ricotta:

In a large pot, using a candy thermometer, bring a gallon of whole milk to 180 degrees F, stirring frequently to prevent scorching. When it reaches temperature, remove from heat and gently stir in the vinegar. Curds should start forming immediately.

Cover and let sit for about 2 hours. Line a colander with a few sheets of cheesecloth or food safe paper towels, and set over a bowl. Transfer the larger curd to the colander with a slotted spoon, then slowly pour the remaining curds and whey into the colander.

Let drain for 1-2 hours, depending on desired texture and consistency.

If using that day mix ricotta with the eggs, parsley, basil, salt and pepper, and set aside. If making ahead of time, place in air tight container and refrigerate for up to 7 days, mix with eggs and herbs directly prior to assembling the lasagna.

To make the pasta:

This much pasta should be made in two batches. In a food processor, combine the 2.5 cups flour and 3/4 teaspoon salt, pulse a few times to combine. In a small bowl lightly beat together 3 eggs, 3 egg yolks, and 3 tablespoons of water. With the food processor running, slowly stream in the egg mixture and run until a sticky dough forms. Add water by the teaspoons if mixture is dry. Turn dough out onto a floured surface and knead until smooth and pliable, about 10 minutes. Cover with plastic wrap and let rest for 45 minutes. Repeat with the other half of ingredients.

Take each ball of dough and divide it into four pieces. Flatten 1 piece of dough with heel of hand into a rectangular shape. Put through pasta roller at widest setting 5 times, folding edges over to retain rectangle shape.


Reduce the setting by one, and roll the rough three times on each setting, until you reach the 3rd thinnest setting (this is on a 7-setting roller).

I prefer my lasagna noodles thick, but feel free to go to the second thinnest setting if you like. Repeat with each piece of dough. Flour sheets of dough and let dry on dry dish towels until ready to use, at least 20 minutes.

Cut round edges off of dough and then cut pasta into square or rectangular sheets to fit your pan. I used two slightly smaller pans, so your ratios may vary a bit. You will most likely have lost of leftover pasta, cut into shapes and freeze for later use. Don't you love it when there are bonuses?

To make the béchamel sauce:

Heat the butter in a heavy saucepan over medium-high heat until it stops foaming, about 1 minute. Whisk in the flour and continue stirring until mixture turns a light tan color, about 1 minute. Add garlic, whisk to combine. Slowly stream in the milk while whisking, and bring to a simmer. Reduce the heat to low and add the cheese and nutmeg and whisk until cheese is completely melted. Return to a simmer then remove from heat and set aside until ready to use.

Almost there, time to assemble! If you are using the 9X13 pan, you should end up with five layers of noodles. If you are using smaller pans, you may end up with less noodle layers in each. Exact measurements are not important for each layer, but I will give you an approximation. Just use your best judgement and hope you don't run out before you reach the top!

To assemble:

Preheat your oven to 375 F. Add about 1 - 1 1/2 cups bolognese sauce to bottom of baking dish and drizzle with about a 1/2 cup of béchamel. Top with three sheets of pasta. Add another 1 - 1 1/2 cups bolognese sauce and 1/2 cup béchamel sauce, and sprinkle with 1/3 cup parmigiano reggiano cheese. Add three more sheets of pasta. Spread 1/2 of your ricotta onto the noodles and spread it evenly with a rubber spatula. Top with another 1 cup of meat sauce and sprinkle with 1/3 cup of parmigiano reggiano cheese. Repeat the noodle-meat-béchamel-parm and noodle-ricotta-meat-parm layers. Top with the last layer of noodles, the remaining meat sauce, the remaining béchamel, the remaining parmigiano reggiano. Now, stand back and bask in the glory of this almost-overflowing dish of cheesy, delicious, wonderment.

Place baking dish onto a foil-lined baking sheet (to catch all the bubbly overflow) and place on middle rack in the oven. Bake for 45 minutes- 1 hour until hot and bubbly and cooked through. Tent with tin foil during baking if the top is getting too dark.

Remove from the oven and sprinkle with basil and parsley. Be sure to let the lasagna sit and rest for at least 10-15 minutes at room temp before cutting into it.

Seriously just try not to pull off the little almost-burnt corners of pasta and pop them in your mouth while you let the lasagna rest. Just try, its hard.

Serve if you must have some greens with a light salad, but I say the best side dish for this lasanga is just another piece of lasagna and a big 'ol glass of Chianti. If I am indeed turning into a grandma, there's gotta be wine.

Oh and one last thing...get off my lawn.

Sunday, February 21, 2010

Cabernet Braised Short Ribs and Mushroom Risotto


There are some people that tie their memories to the weather, different smells, specific dates, or the time of year. I have been finding that recently I have been tying many of my great memories with friends and family to food. For example, I can't remember a specific christmas by the year, or by how much snow we got, or what my christmas presents were, but jog my memory of what we cooked for 'christmas eve-eve' dinner? Now I remember.

It works the other way too. Lobster crosses my mind? I immediately think about the many July 4th's throughout my childhood when the cousins in my family would draw a track on the driveway with chalk and "race" the lobsters before our parents murdered them (but for good cause) in the giant bubbling stock pot in the kitchen. Granted they usually only moved an inch or so, but it was still fun picking them up and being terrified that they were going to pinch us (even though their claws all had rubber bands on them).

I also think about last winter when some of my favorite people in the world got together at a cabin in northern Wisconsin and had a BYOL party (Bring Your Own Lobster). It unexpectedly took hours to bring the huge stock pots full of water and crab seasoning to boil and didn't end up eating until almost 11 pm, but we kept ourselves busy drinking wine, playing with the very lethargic lobsters, and catching up on lives being lived three states away from each other.

Short ribs and risotto will be one of those meals that is tied to so many great memories for me. It was one of the first 'extravagant' meals I cooked for my boyfriend after we moved to chicago together. It was on the menu last winter when some of my best girlfriends from Purdue finally found a night we could all get together for the first time in months.

It was also the meal I made for eight hungry skiers this past weekend, at what is quickly becoming my favorite tradition: Valentines Day Cabin Weekend. In lieu of the Hallmark world of hearts and candy and forced romantic evenings, my Minnesota friends and I, along with our wonderful significant others, have turned v-day weekend into a weekend full of skiing, laughing, drinking, and eating. Rarely does the v -word even cross our lips, but when it does we aren't just celebrating love in our romantic relationships, we are toasting our friendships as well. The card I received from one of said Minnesota friends sums it up pretty well: "I hope we are still spending valentines day together when we are 80". Until I am 80, when I think of short ribs and risotto, I will be reminded of this very awesome valentines day, the giant red le creuset filled with braised meaty goodness, and the very best friends a girl could ask for.

Cabernet Braised Short Ribs
recipe adapted slightly from epicurious.com
Serves 8 with leftovers

These are great made a day early and chilled overnight. This allows you to to skim some of the hardened fat off the top to produce a less greasy pan sauce, but are just as good made the day of.

8-9 pounds meaty short ribs
2 tablespoons fresh rosemary, minced
2 tablespoons fresk thyme, minced
1 tablespoon coarse salt
1 tablespoon freshly ground black pepper

1/4 cup (about) vegetable or olive oil
2 - 750 ml bottles of Cabernet Sauvingnon
2-4 cups beef stock (this will depend on the size and shape of the pot you use, you will need enough to just about cover the ribs with liquid)
2 tablespoons of butter, room temperature
2 teaspoons all purpose flour

The day before cooking the ribs, season the ribs on all sides with the rosemary, thyme, salt, and pepper and place in a large glass baking dish. Cover and chill overnight.

Let ribs stand at room temp before continuing. Preheat oven to 375 degrees F. In a large dutch oven, heat two tablespoon of oil over medium-high heat. Working in batches, add short ribs to pot in a single layer, turning about every 2 minutes to brown all sides. Place browned ribs in large bowl, and add more oil to pot as needed to brown all the ribs. Once all ribs have been seared, pour off drippings from pot and return to medium heat. Add the wine, scraping up and browned bits on the bottom of the pan. Bring wine to a simmer, then return the ribs and any accumulated juices to the pot. Add enough beef stock to almost cover the ribs. Bring to a boil, then cover and transfer pot to oven.

If making these the day of consumption, cook for about 3-3.5 hours, until meat is incredibly tender and falling off the bone.

If making the day before, cook for about 2.5 hours, then let cool, cover, and chill overnight. The following day, skim some of the congealed fat off the top and return to 375 degree oven for another hour to and hour and a half, until the meat is tender and falling off the bone.

When ribs are done, remove meat and bones from pot, place in a tightly covered bowl and keep warm. Skim any fat from the top of the liquid, and bring to simmer over medium high heat on the stovetop. Boil until reduced to about 2 cups, about 20 minutes. Mix together butter and flour in a bowl until well combined, and whisk into simmering braising liquid. Continue whisking over medium-high heat until thickened slightly, about 2 minutes.

Plate ribs next to, or on top of the risotto, topped with sauce and the mixed herb gremolata.

Meyer Lemon Herb Gremolata
adapted slightly from epicurious.com

Please don't skip this topping. It lends an amazingly bright citrus note to the earthy meatiness of the short ribs.

1/4 cup chopped italian parsley
3 tablespoons finely grated lemon peel, meyer lemon if it is in season
3 garlic cloves, minced
2 tablespoons finely minced rosemary
2 tablespoons finely minced thyme

Mix all ingredients in a small bowl. Can be made one day in advance, but I would recommend making it the day of so the citrus is at its freshest.

Mushroom Risotto
serves 8 plus plenty of leftovers

12-16 cups canned low sodium chicken broth
1 ounce dried porcini mushrooms
1/2 cup unsalted butter, divided (one stick)
4 tablespoons olive oil, divided
5-6 shallots, minced
1 1/2 pounds fresh mushrooms, chopped (I used a mix of white and baby bellas)
3 cups arborio rice
1 1/3 cup white wine
1 1/3 cup grated parmesan cheese
1/3 cup italian parsley, chopped
salt and freshly ground black pepper to taste

Bring the broth to a simmer in a large saucepan or small stockpot. Add the dried porcini mushrooms, reduce heat, and keep the broth warm over very low heat while you cook the risotto. The mushrooms will flavor the broth as they steep.

In a large heavy pot, melt two tablespoons of butter over medium heat. Add two tablespoons of olive oil. Add the shallots and saute until tender, about 6-8 minutes. Add the garlic, and saute for another 2-3 minutes.

Stir in the rice, and let cook until the rice toasts a bit and becomes slightly translucent, about 3-4 minutes. Add the wine and cook until it has absorbed, stirring frequently, about 3 minutes. Reduce heat to medium low, and add 1 cup of hot broth, stirring rice very frequently until broth is absorbed. Continue adding broth 1 cup at a time and stirring, until rice is just al dente. This should take about 30-40 minutes, and you may not need all the broth.

While rice is cooking, remove the porcini mushrooms from broth with slotted spoon, chop, and set aside. Heat two tablespoons of butter and one tablespoon of live oil in a large skillet over medium-high heat. Add fresh mushrooms and porcini mushrooms and saute until mushrooms are slightly browned, 8-10 minutes, stirring occasionally. Cover to keep warm and set aside.

When rice reaches the al dente stage, remove from heat and stir in remaining 1/2 stick of butter, parmesan cheese, mushrooms, and parsley.

Season with salt and pepper to taste.

Add some roasted carrots for good measure and you have yourself a meal.

Make this, and make it often. I can only hope that this wonderful meal may be attached to some amazing memories for you as well.

Pin It

LinkWithin

Related Posts with Thumbnails